|
|
Adding an External Schrader Valve for the Air Shock
on a Victory Cross Country Motorcycle
This document describes how to relocate the point at which you add or remove air from the rear shock absorber on a Victory Cross Country Tour motorcycle. The end result is that a new Schrader valve is positioned on the outside of the right side cover — as opposed to the stock valve's position underneath that side cover — thus eliminating the need to remove that cover when adjusting the shock.
ABOUT THE REAR SHOCK, AND WHY YOU NEED TO ADJUST IT:
As I wrote in a review in webBikeWorld in 2012, the Victory Cross Country Tour is, in general, a fine bike. This includes its suspension. The front suspension, although non-adjustable, has 5.1" of travel and is well-damped and properly compliant for most riders. The rear suspension is handled by a single shock, unlike competitive models from that other American cruiser manufacturer that use dual shocks. Also in contrast to those bikes, it has a stellar 4.7" of travel.
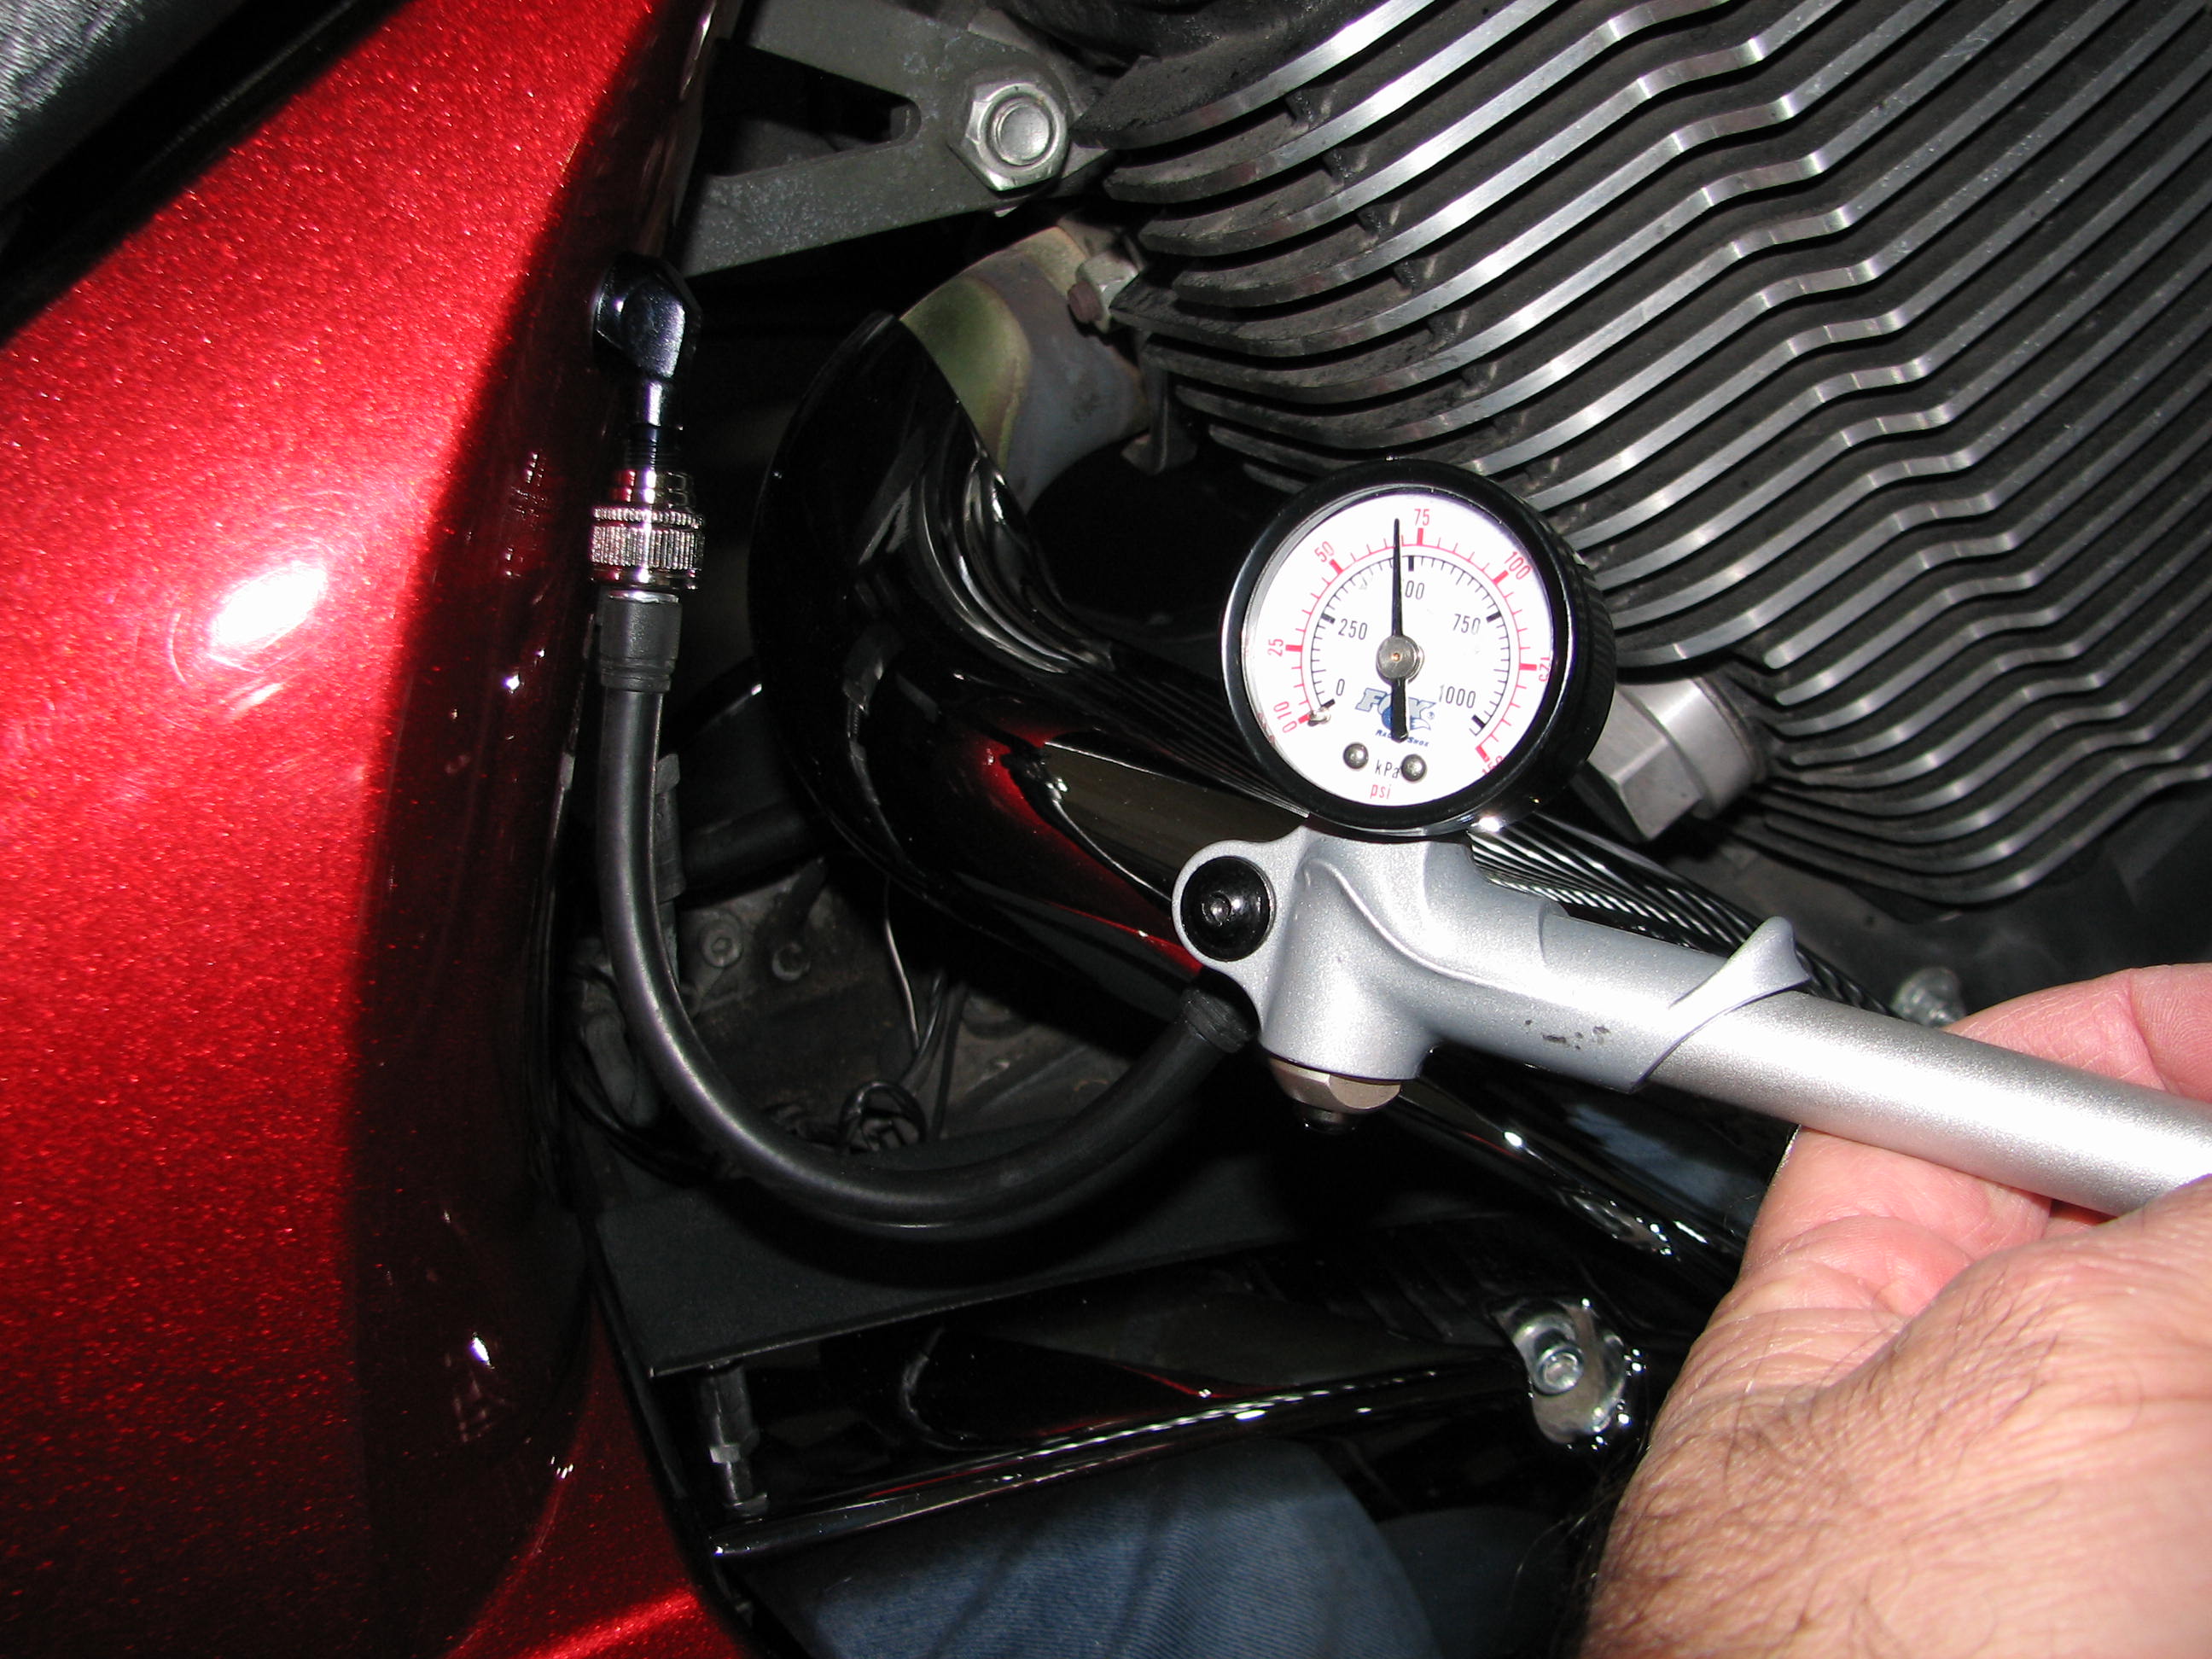
That rear shock is air-adjustable for preload. For the topcase-equipped Tour, the chart in the owner's manual stipulates 9 PSI for a 150-lb. rider, 72 PSI for 425 lbs. (and beyond) of riders and gear, and various values in between. Thus, Victory recommends fiddling with the shock when changing from solo to two-up riding. As I do a lot of both solo riding and two-up travel with my wife, I have often made such adjustments. In the course of doing so, I have confirmed that they do indeed make a difference. In our case, we use 40 PSI most of the time for lightly laden day trips; anything less results in bottoming out over very large bumps, but using 50 PSI definitely makes the ride too harsh.
In addition to weight changes, you may want to bump up the air, for instance, when planning on riding some serious twisties. Alternatively, you may want to let some air out for plushness, if you plan on a superslab day.
WHAT'S WRONG WITH THE STOCK CONFIGURATION?
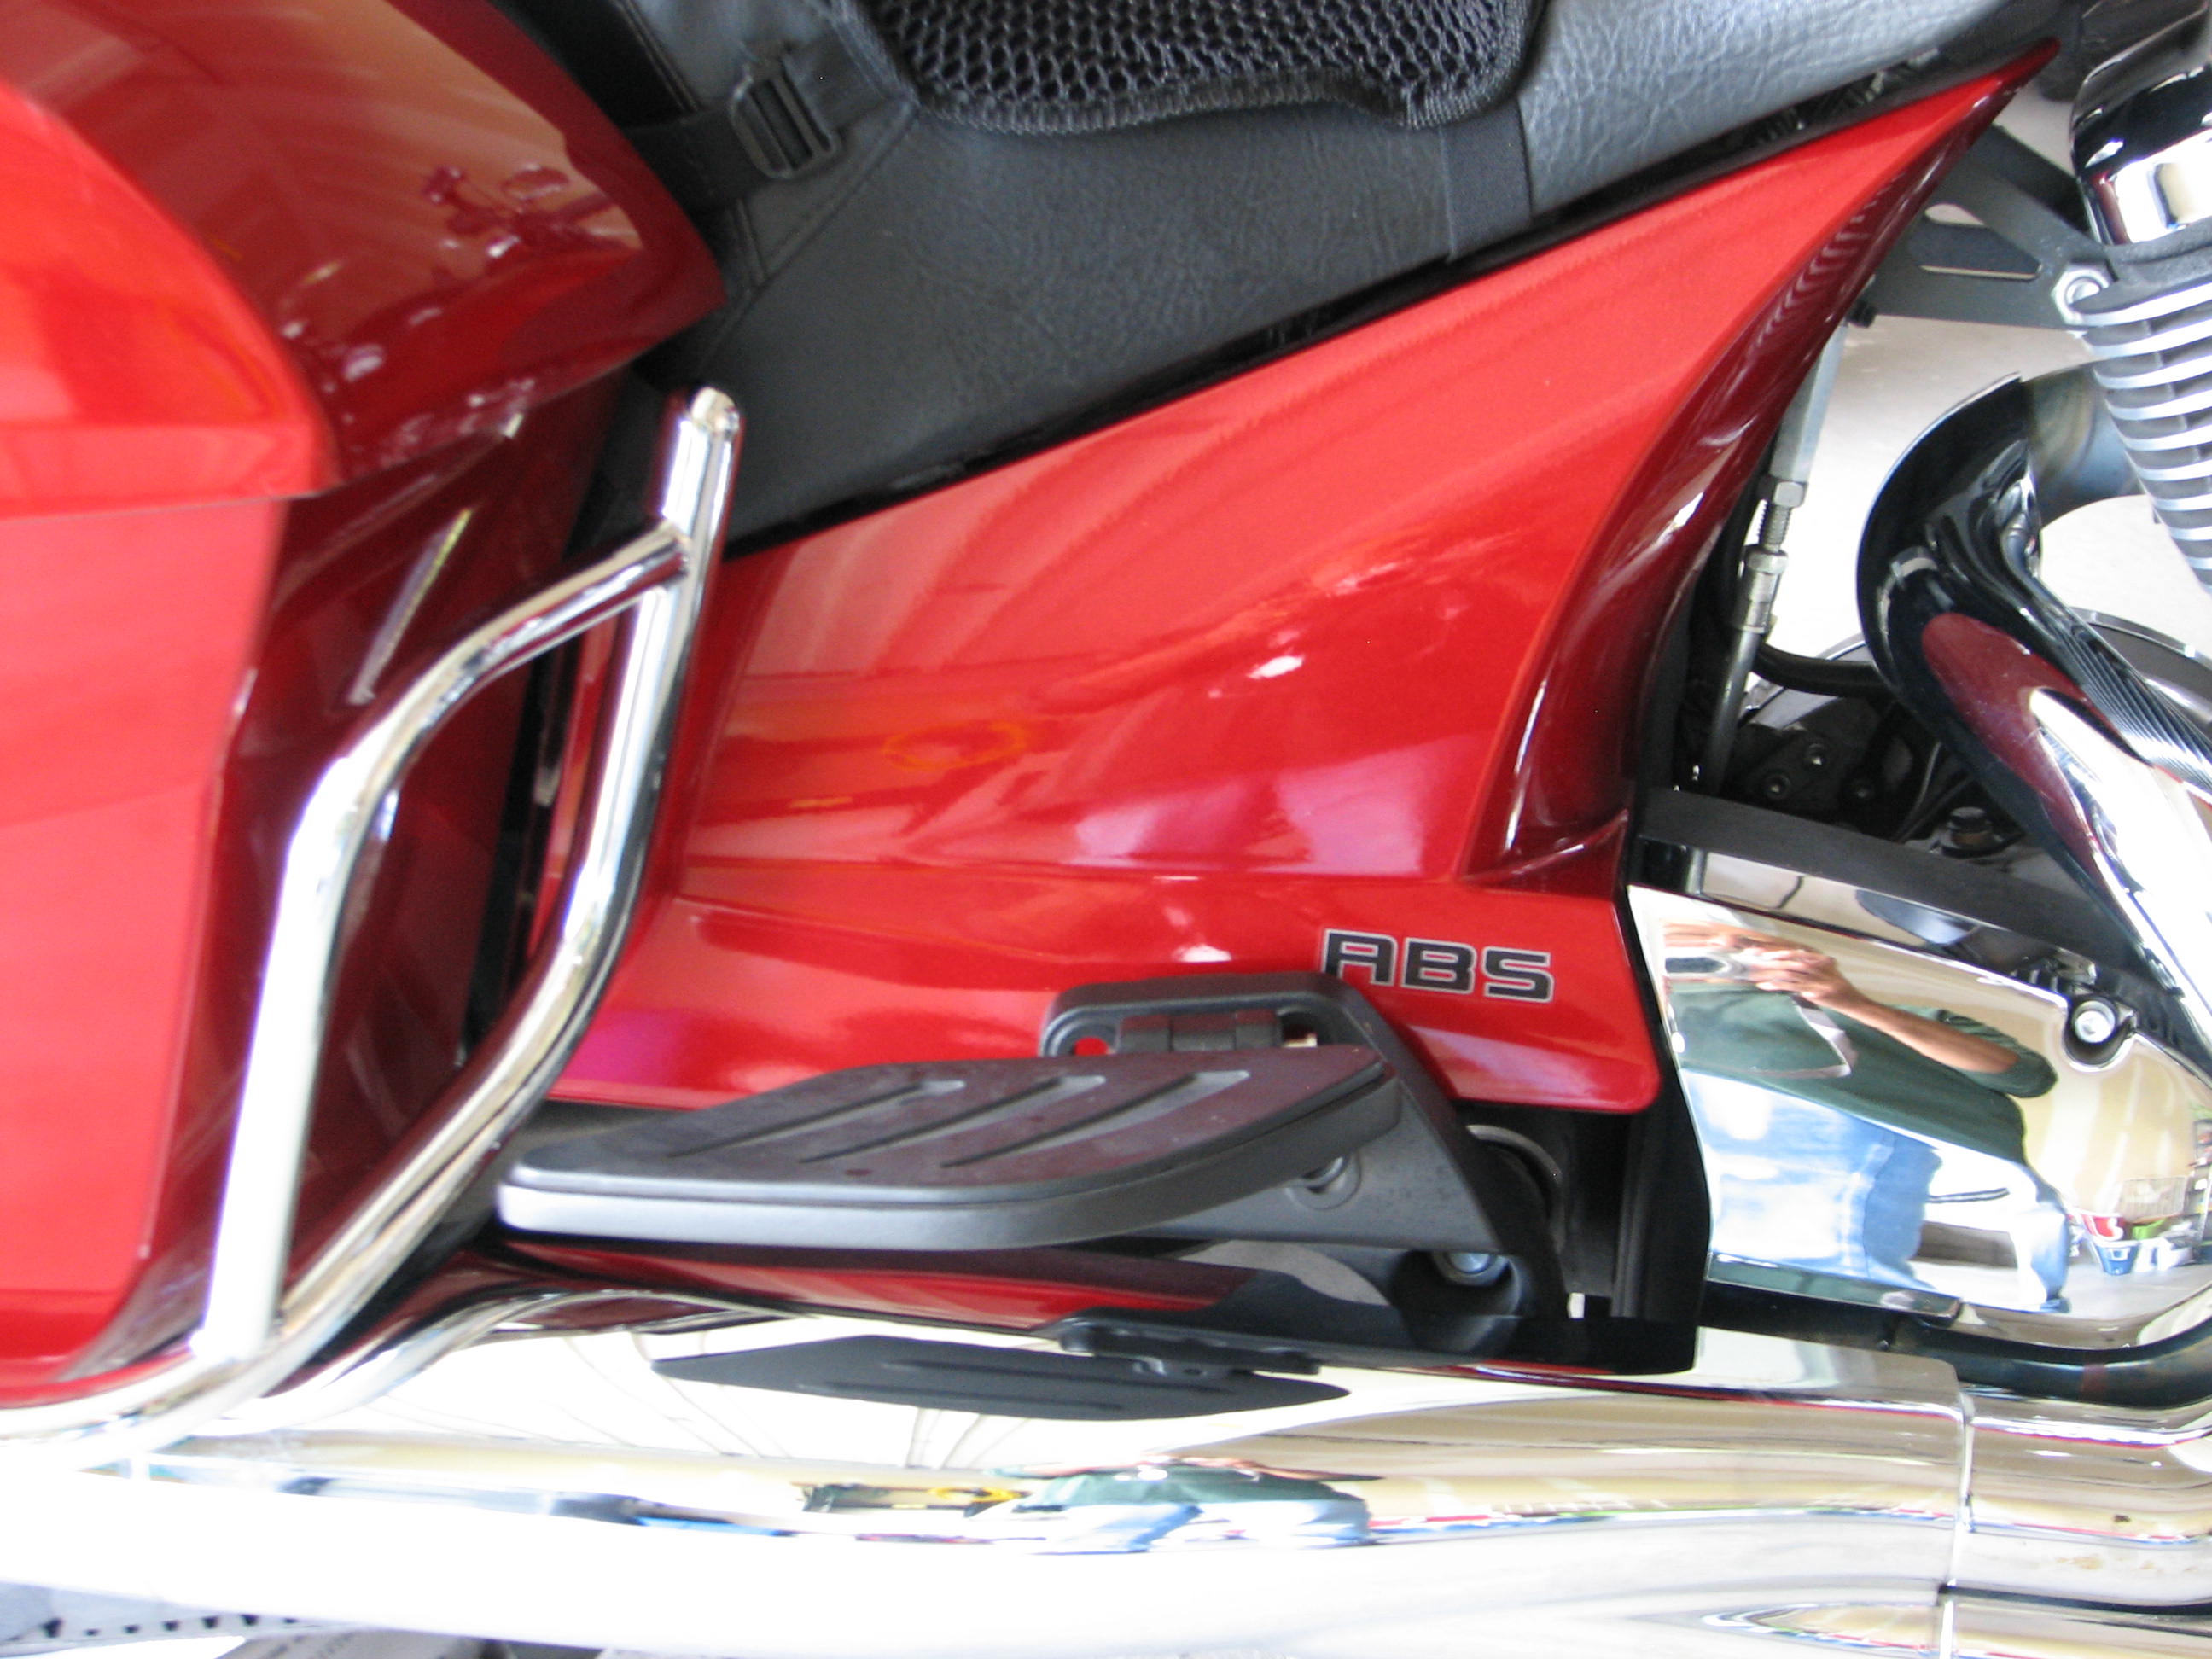
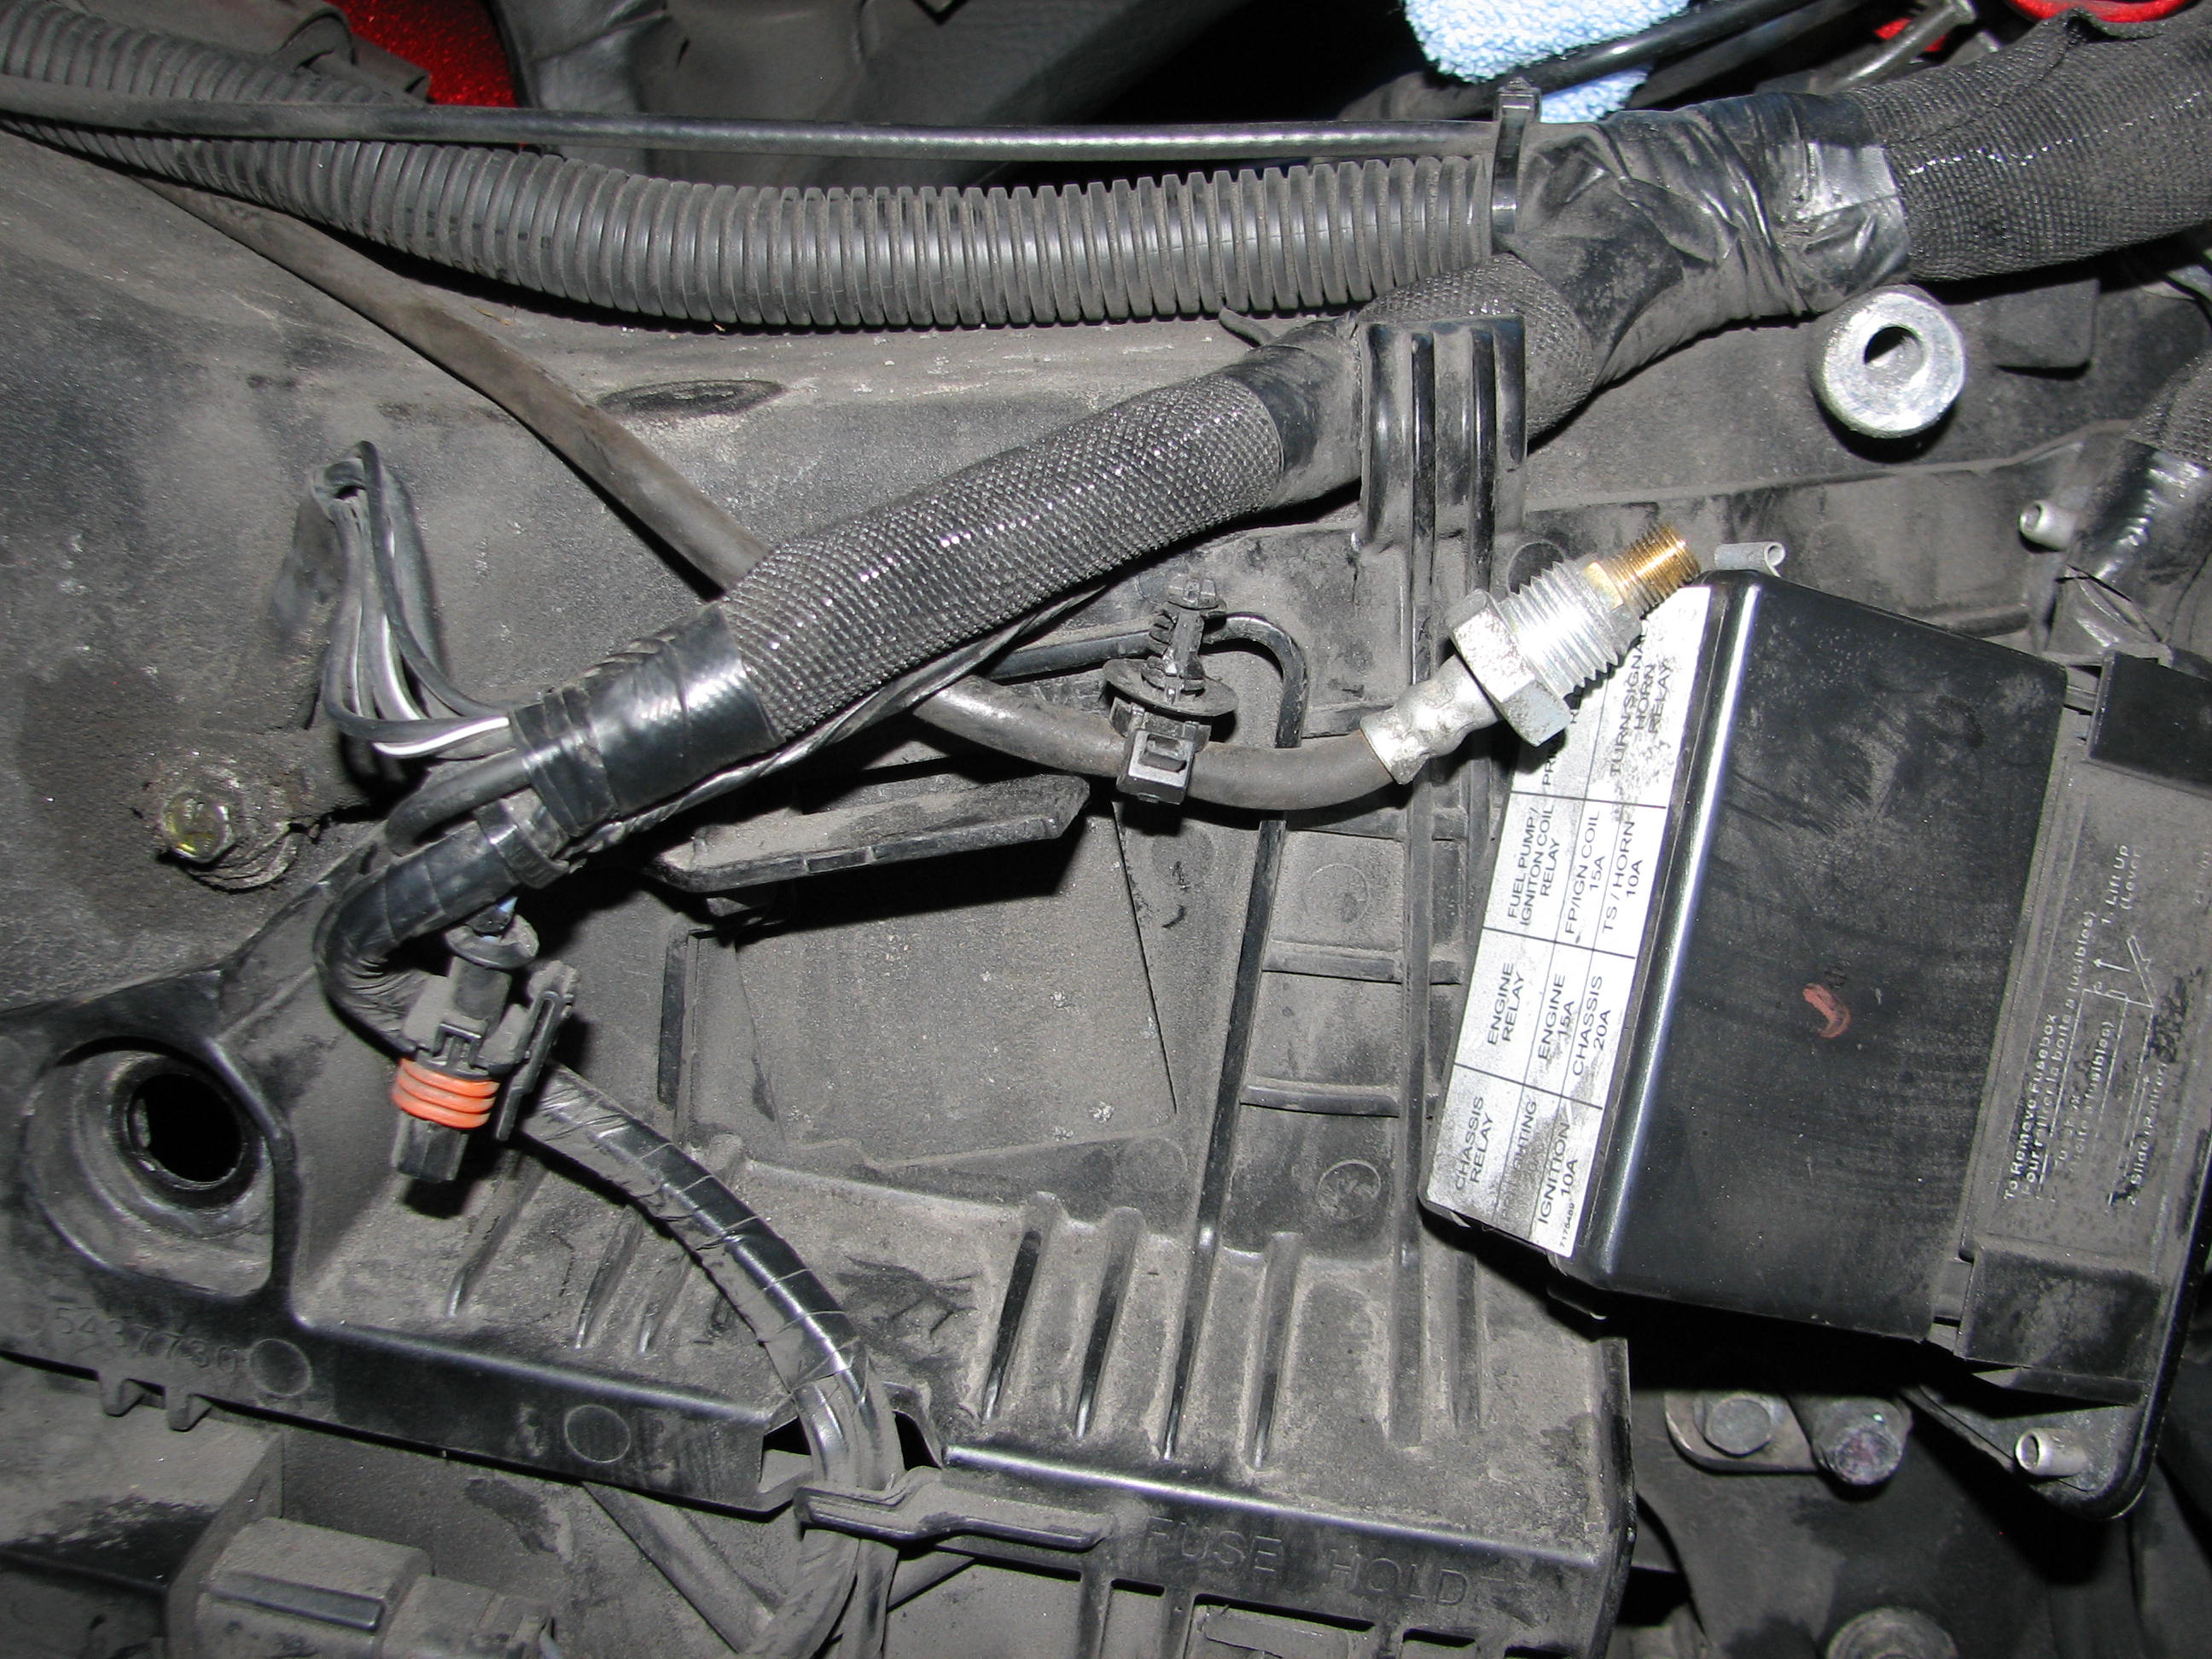
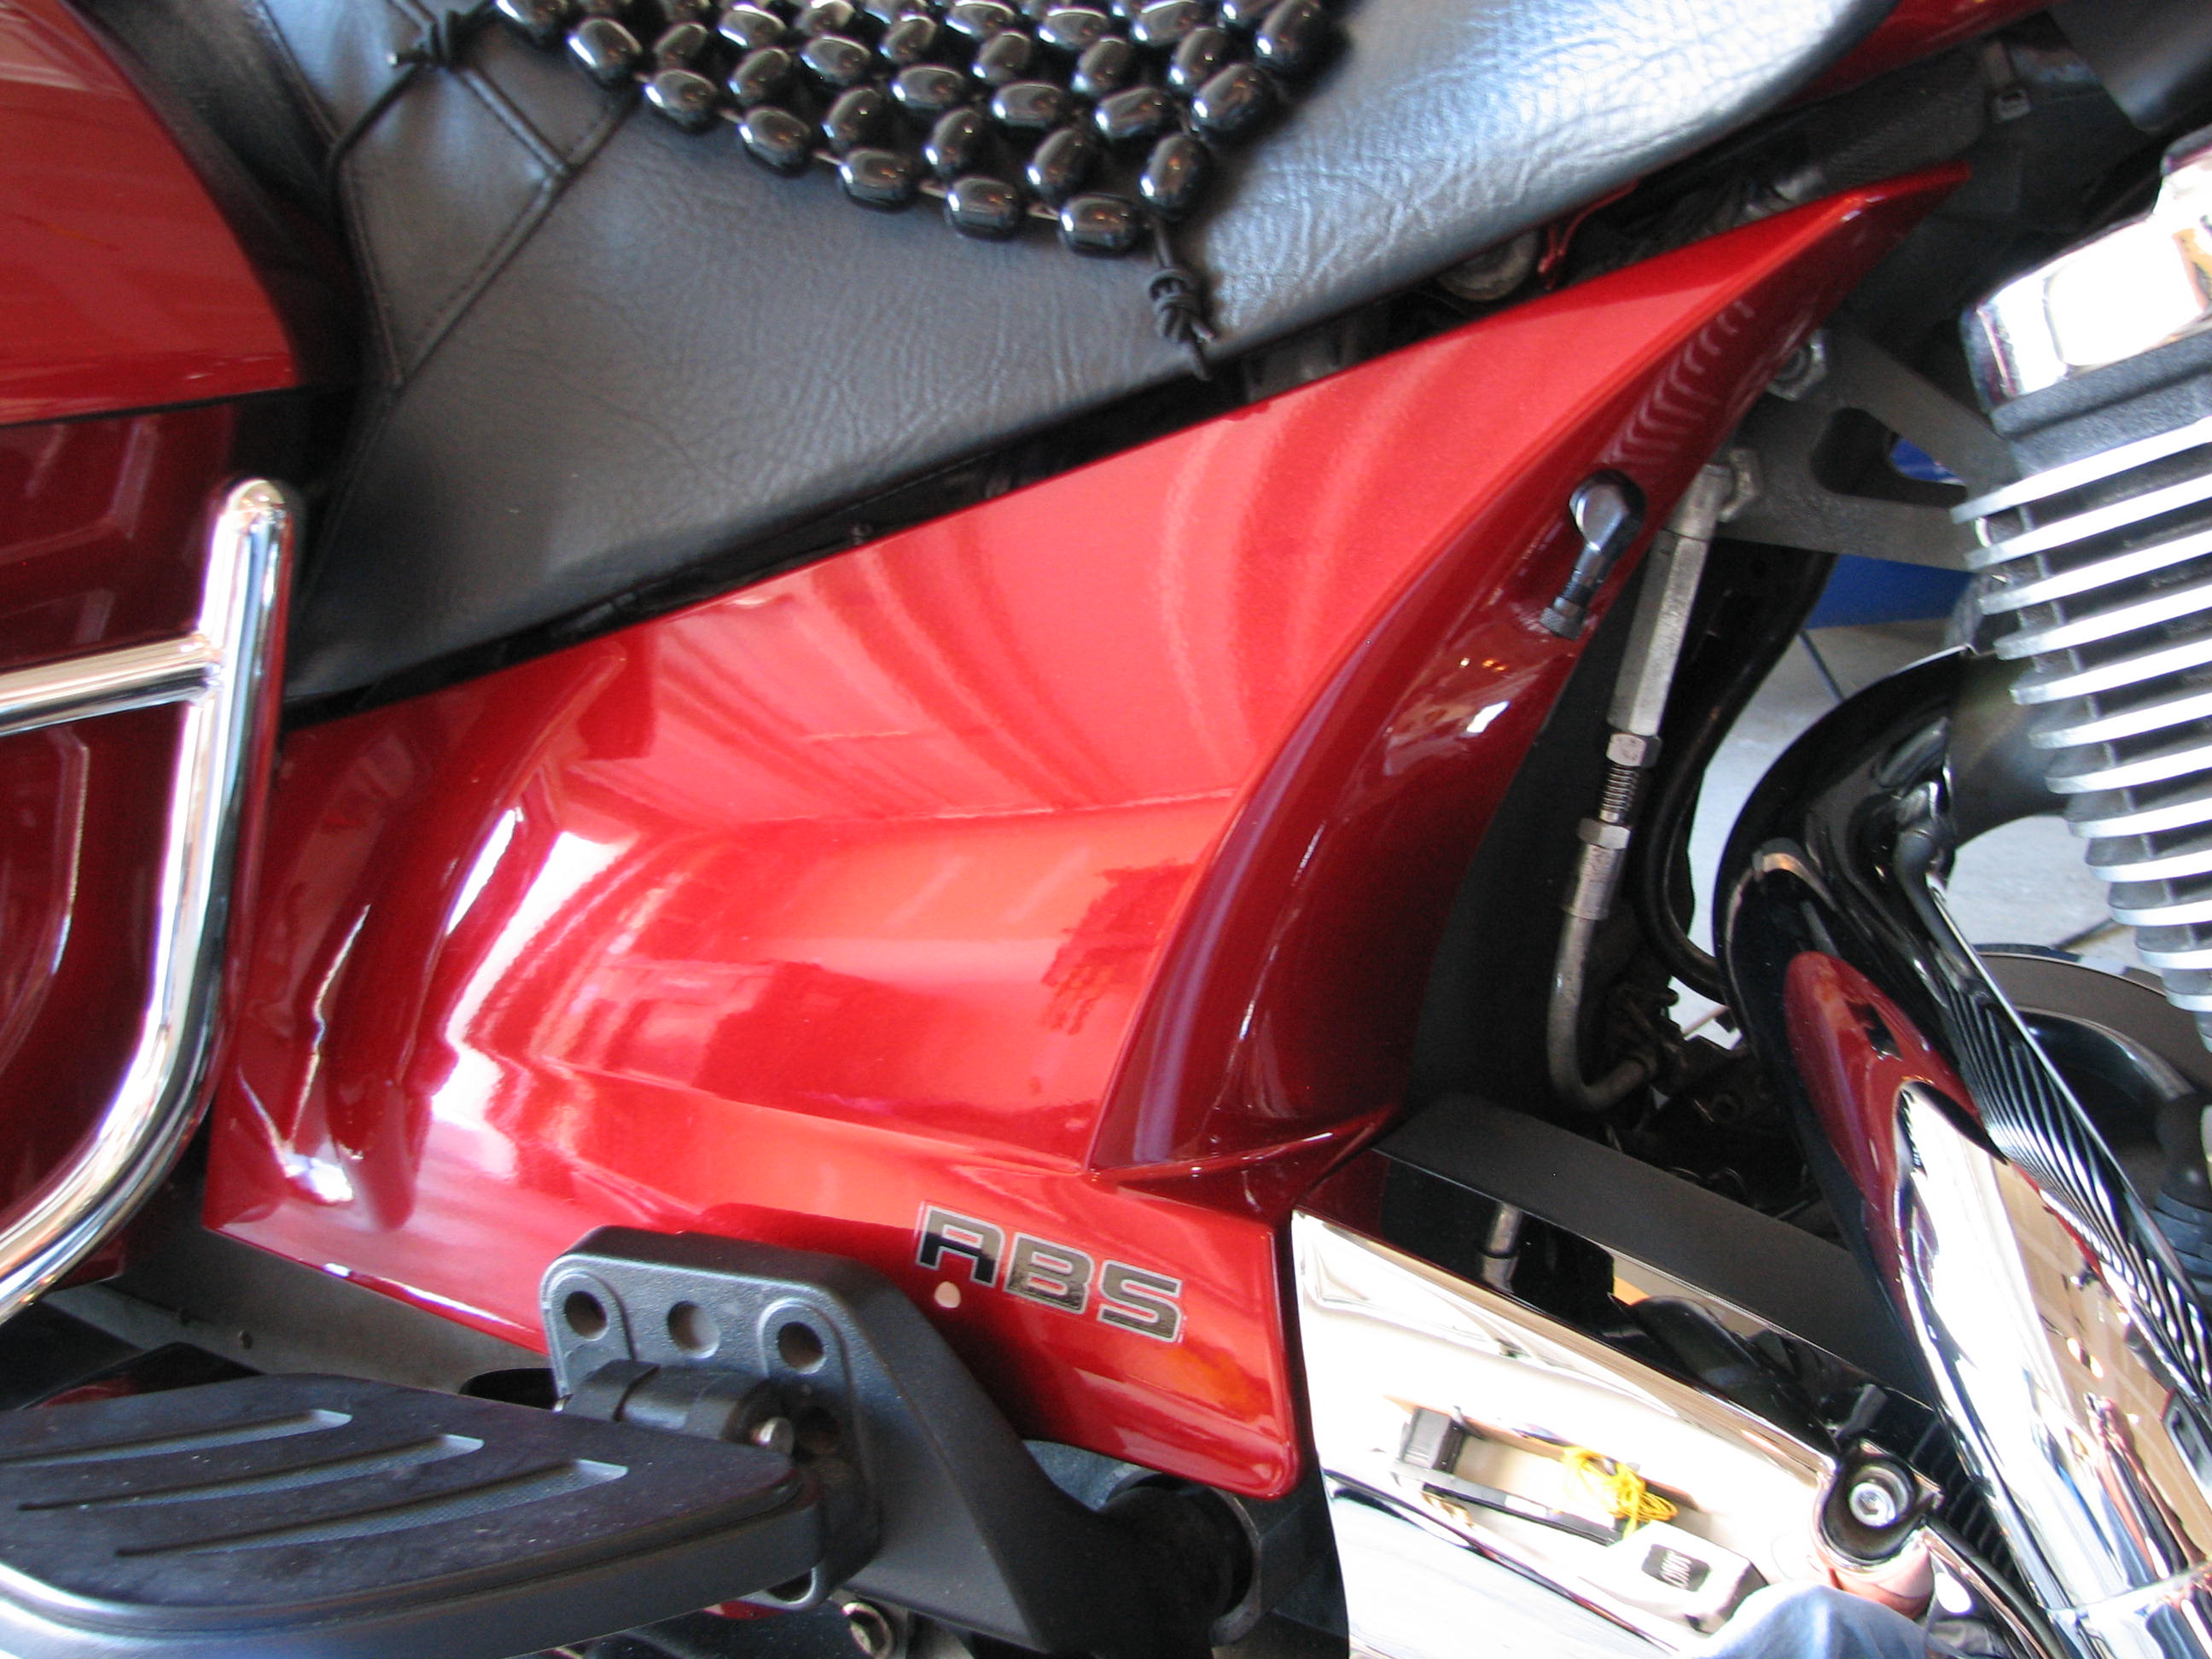
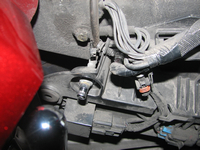
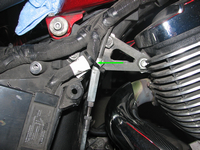
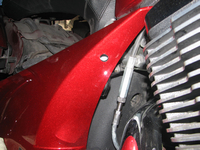
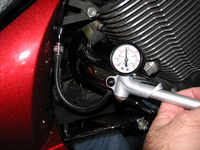
Shock adjustment is via a Schrader valve that lies underneath the right side cover. As with all the pictures on this page, click on the image to enlarge it, and then press Escape or Enter or the "X" (which appears if you hover your mouse over it) to close the enlargement:
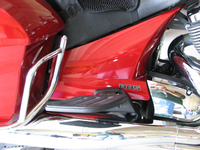
That's certainly not optimal, as the side cover is held in place via three plastic barbs that fit into rubber grommets. If you frequently remove the cover, you risk not putting it properly back in place, which in turn may result in the cover's sailing down the highway some day1.
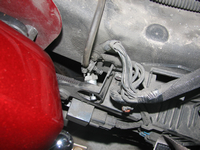
What's worse, however, is that as you're pulling against the friction of the grommets, you have just over an inch before you hit the saddlebag guard, and less than an inch before you hit the passenger foot-board support. On a Cross Country Tour, in particular — the "Cross" models that don't have passenger mini-board supports or saddlebag guards are not quite as bad — that's just looking for a scratch or a broken pin to occur. When I would take the cover off — I'm not making this up — I'd drape a cleaning cloth over the bag guard and another one over the foot support.
HOW DO SOME OTHER BIKES DO IT?
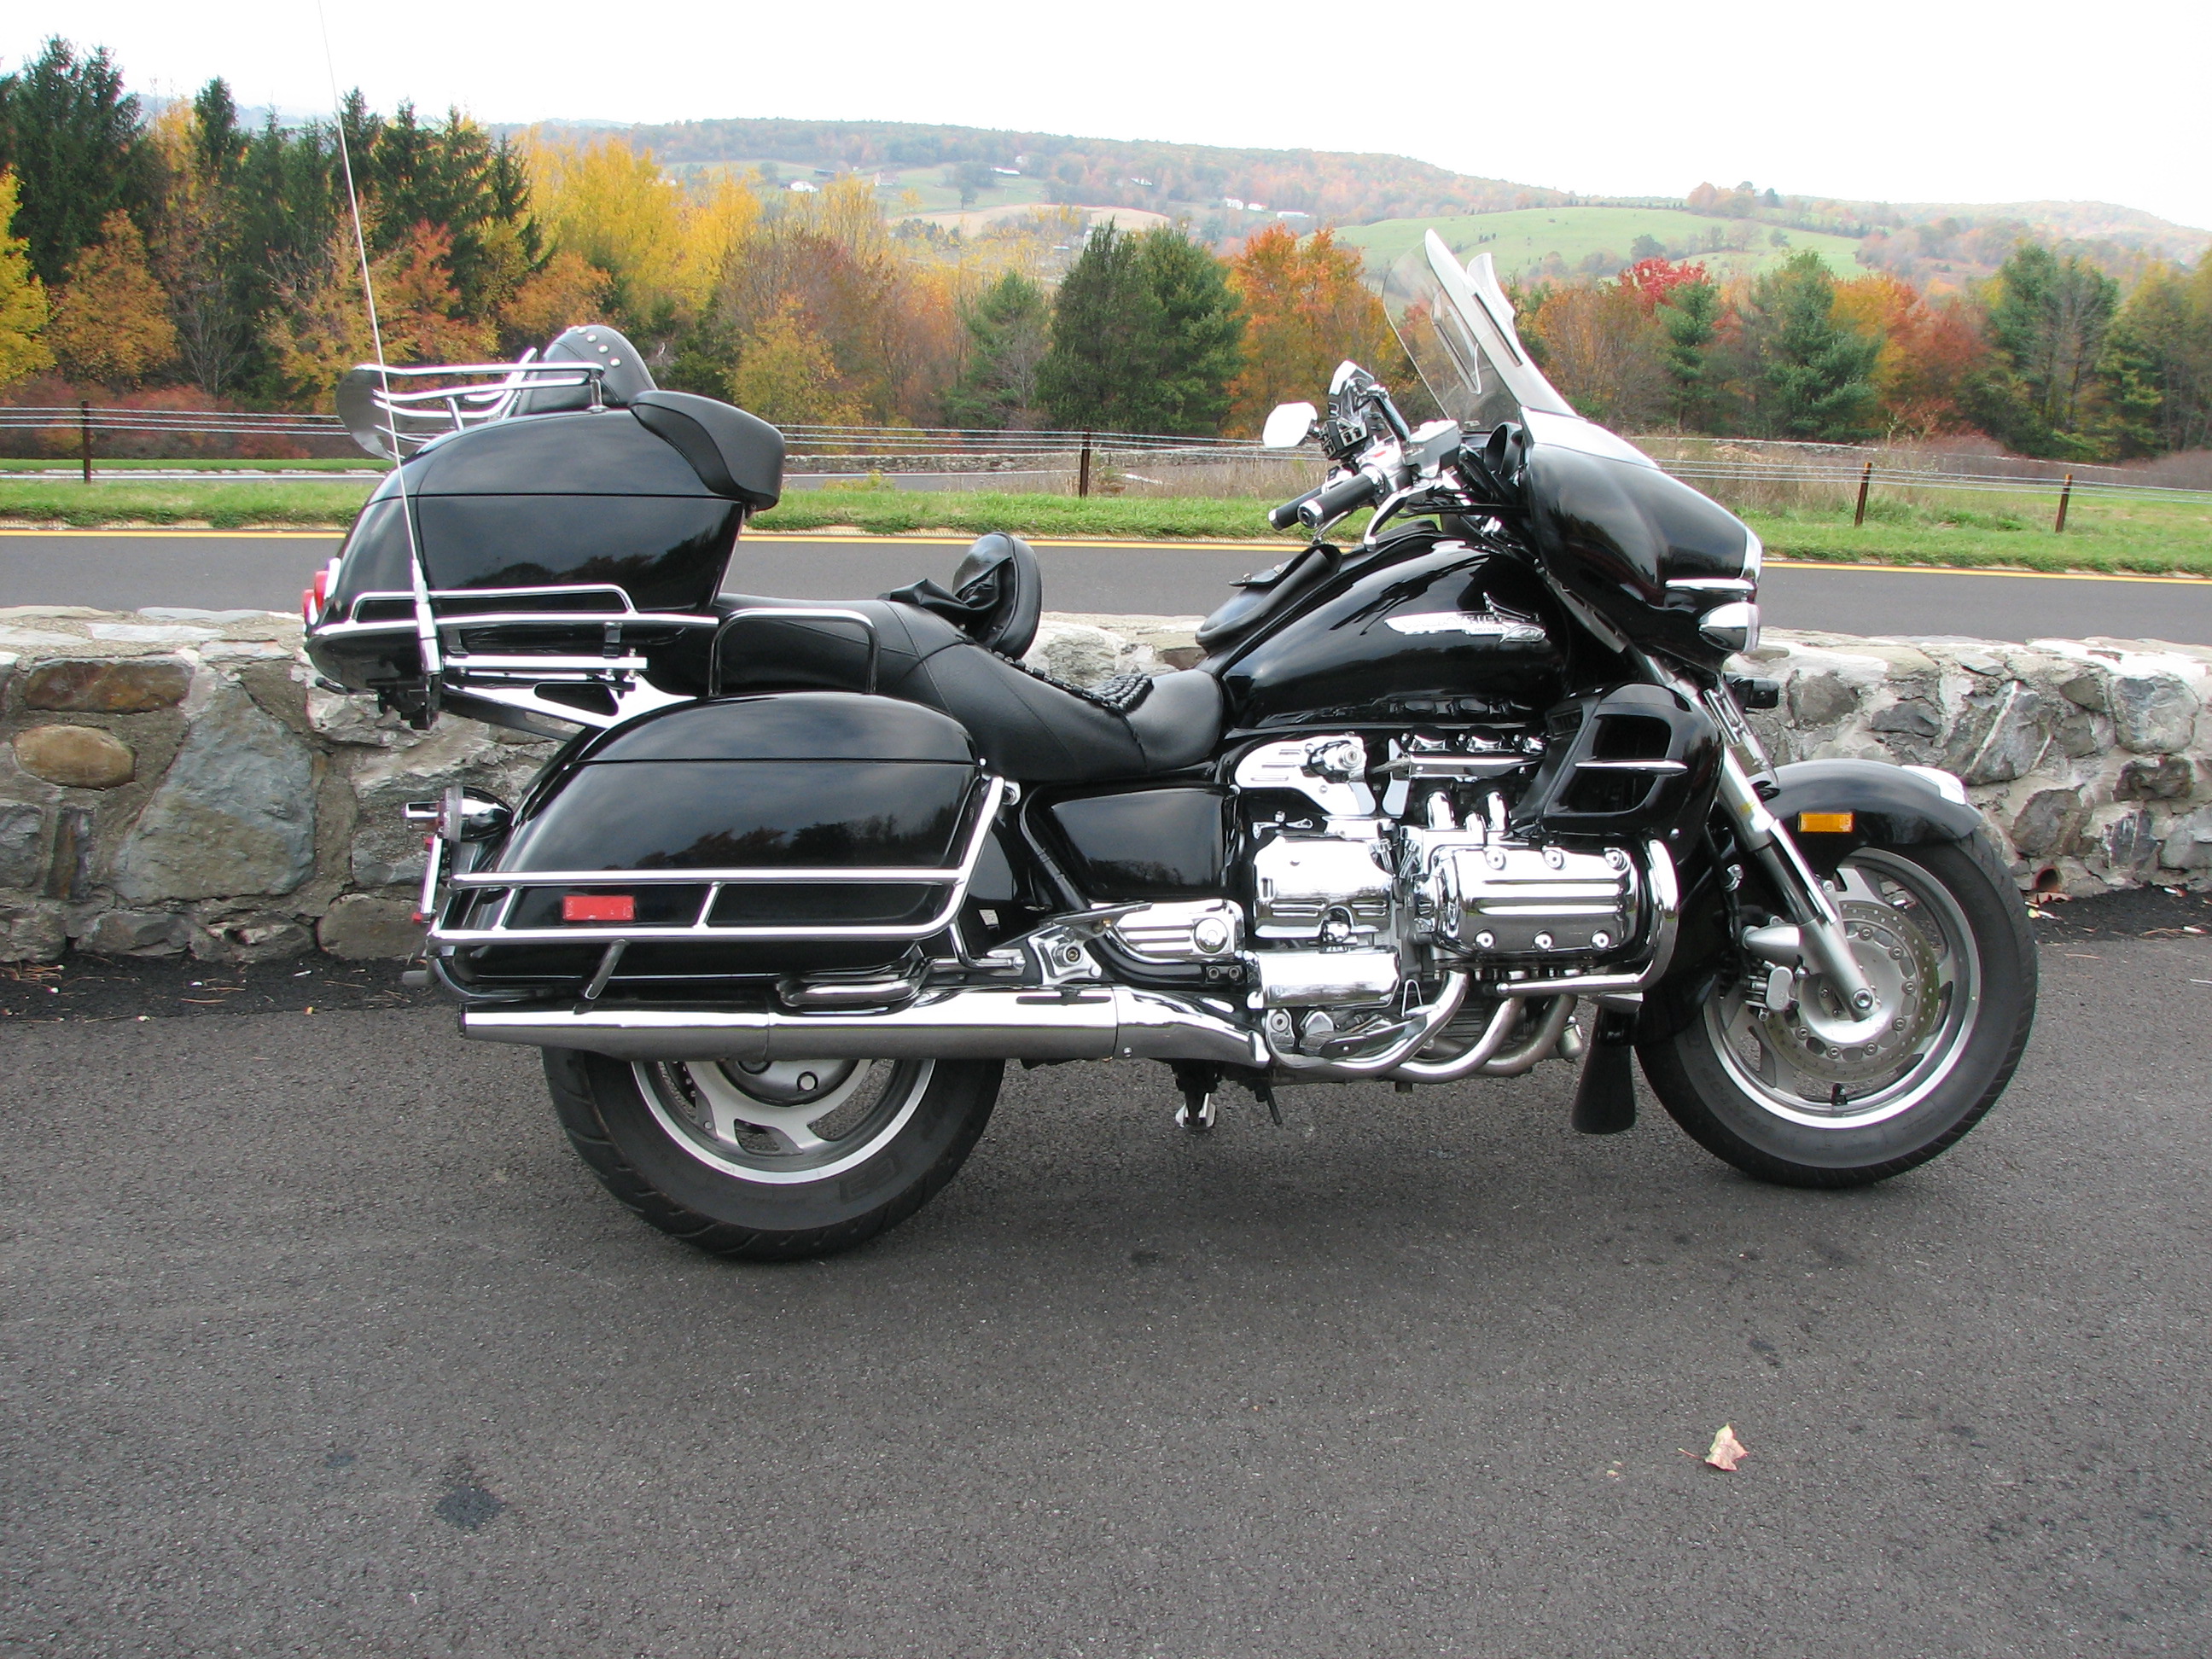
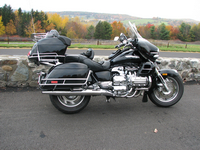
If you're going to employ the side panel to hide the Schrader valve, at least make the cover small enough that its removal is a clean shot. On the Honda Valkyrie Interstate that I owned from 2000 – 2007, the side panel covered the main fuse area, just as that panel on the Tour does. Unlike the Tour, however, its removal was not hindered by saddlebag guards or anything else:
The current (2014) model of Honda's Gold Wing has a rear suspension consisting of a "single shock with computer-controlled spring preload adjustment with two memory presets; 4.1 inches travel."
A half-dozen or so BMW models have employed, for several years now, Electronic Suspension Adjustment (ESA), either as standard or optional equipment.
More recently, the 2014 Yamaha FJR1300ES, via a stepper-motor and related electronics, "features an all-new electronically adjustable suspension to take the bother out of adjusting the suspensions to fit different riding conditions and bring greater convenience to touring." Considering just this one example, I realize that this is somewhat of an apples-to-oranges comparison, i.e., a sport/tourer vs. a cruiser/tourer. Even so, note that the FJR1300ES, like even the base Cross Country, has an engine of similar horsepower and torque, and includes as standard equipment cruise control, hard saddlebags, and heated grips (and throws in an electric windshield). With all of that, and electronically-adjustable suspension, it's still priced more than $2,000 less than the base Cross Country.
I tell you, Victory dropped the ball, missed the boat, screwed the pooch, etc., on the method and placement of suspension adjustment.
OK, LET'S AT LEAST RELOCATE THE ADJUSTMENT POINT:
With an eye toward a relocation fill point, I started asking questions about the end of the air-shock's hose in a December 2013 post on the VictoryForums. Mike "MTVic" followed that up with a thread describing his process of actually accomplishing this task. Thus, MTVic paved the way here, and I am indebted to his work and his description of it; my additions here are largely cosmetic extensions of that procedure. If you're not interested in drilling through stock plastic, and merely want to relocate the Schrader valve, MTVic's thread is what you want to read.
Adding a Schrader valve outside the side cover doesn't automate the adjustment process, but at least you won't have to risk scratching, breaking, or losing the side cover. Here's how I did it.
-
Remove the seat. You'll need to take off both side covers, the two (6mm Allen) bolts that hold the seat on, and then slide the seat out and back. You don't need to disconnect the heated-seat connection — just place the seat sideways a bit, out of the way.
-
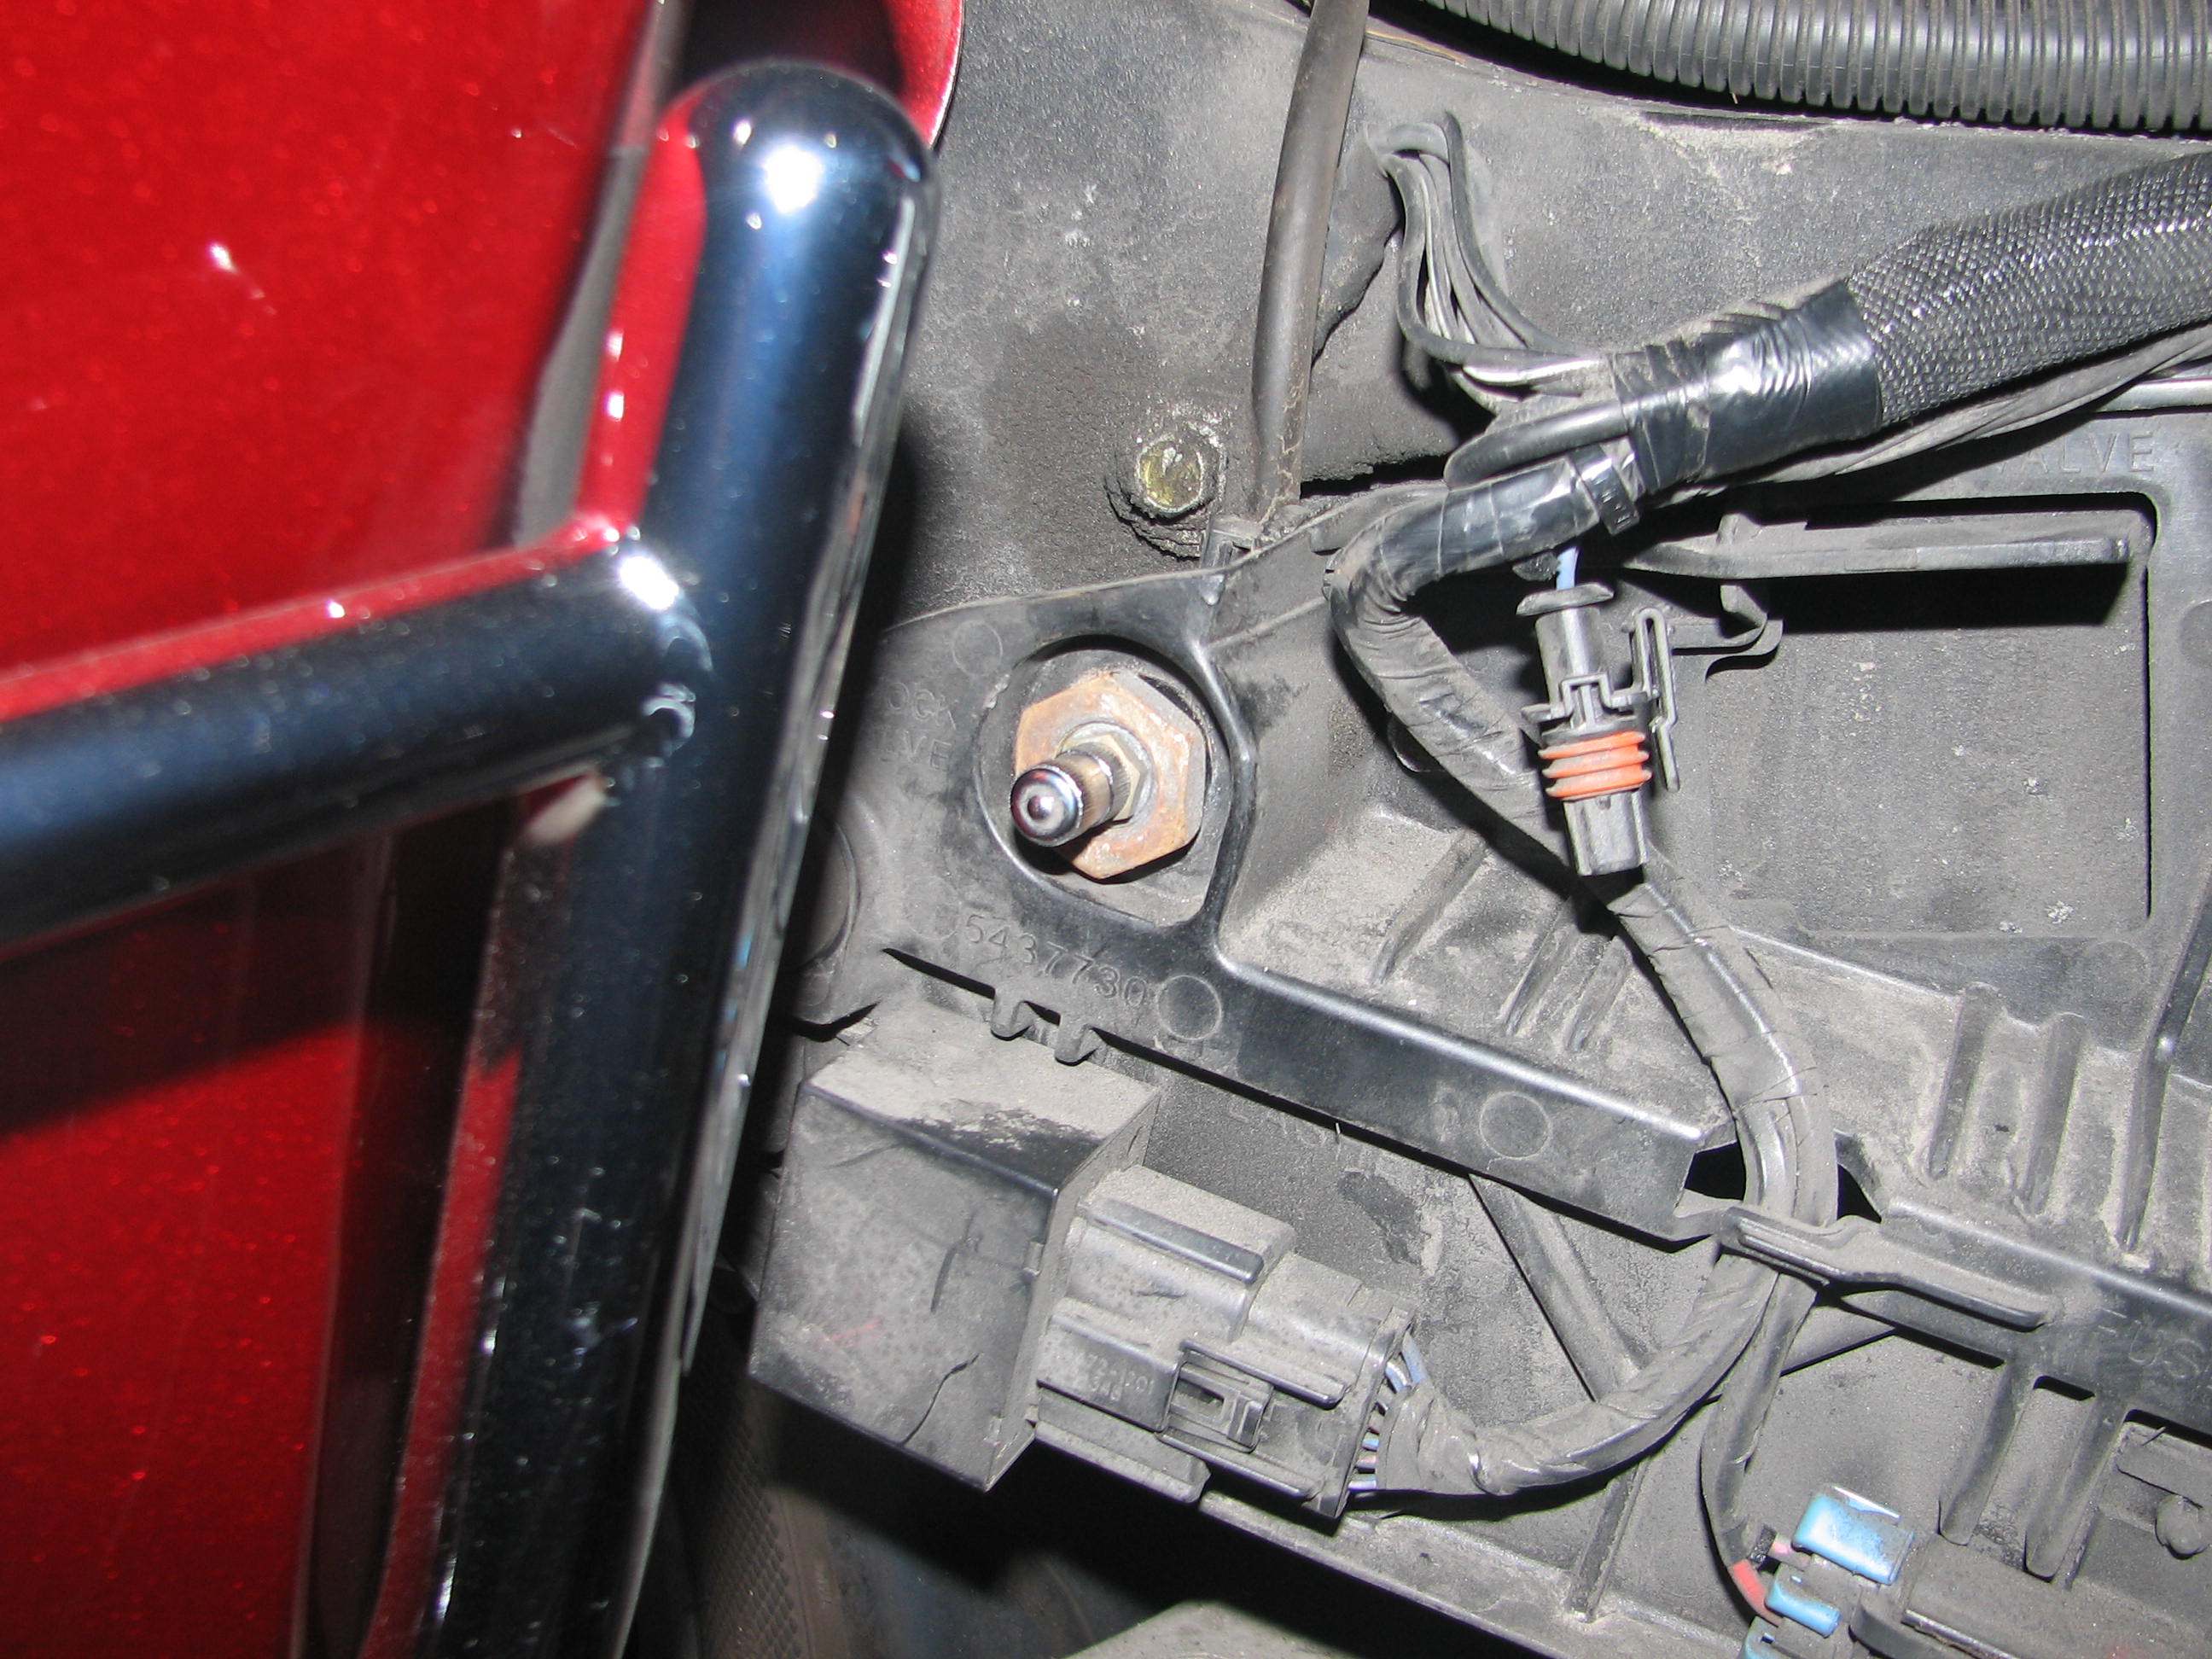
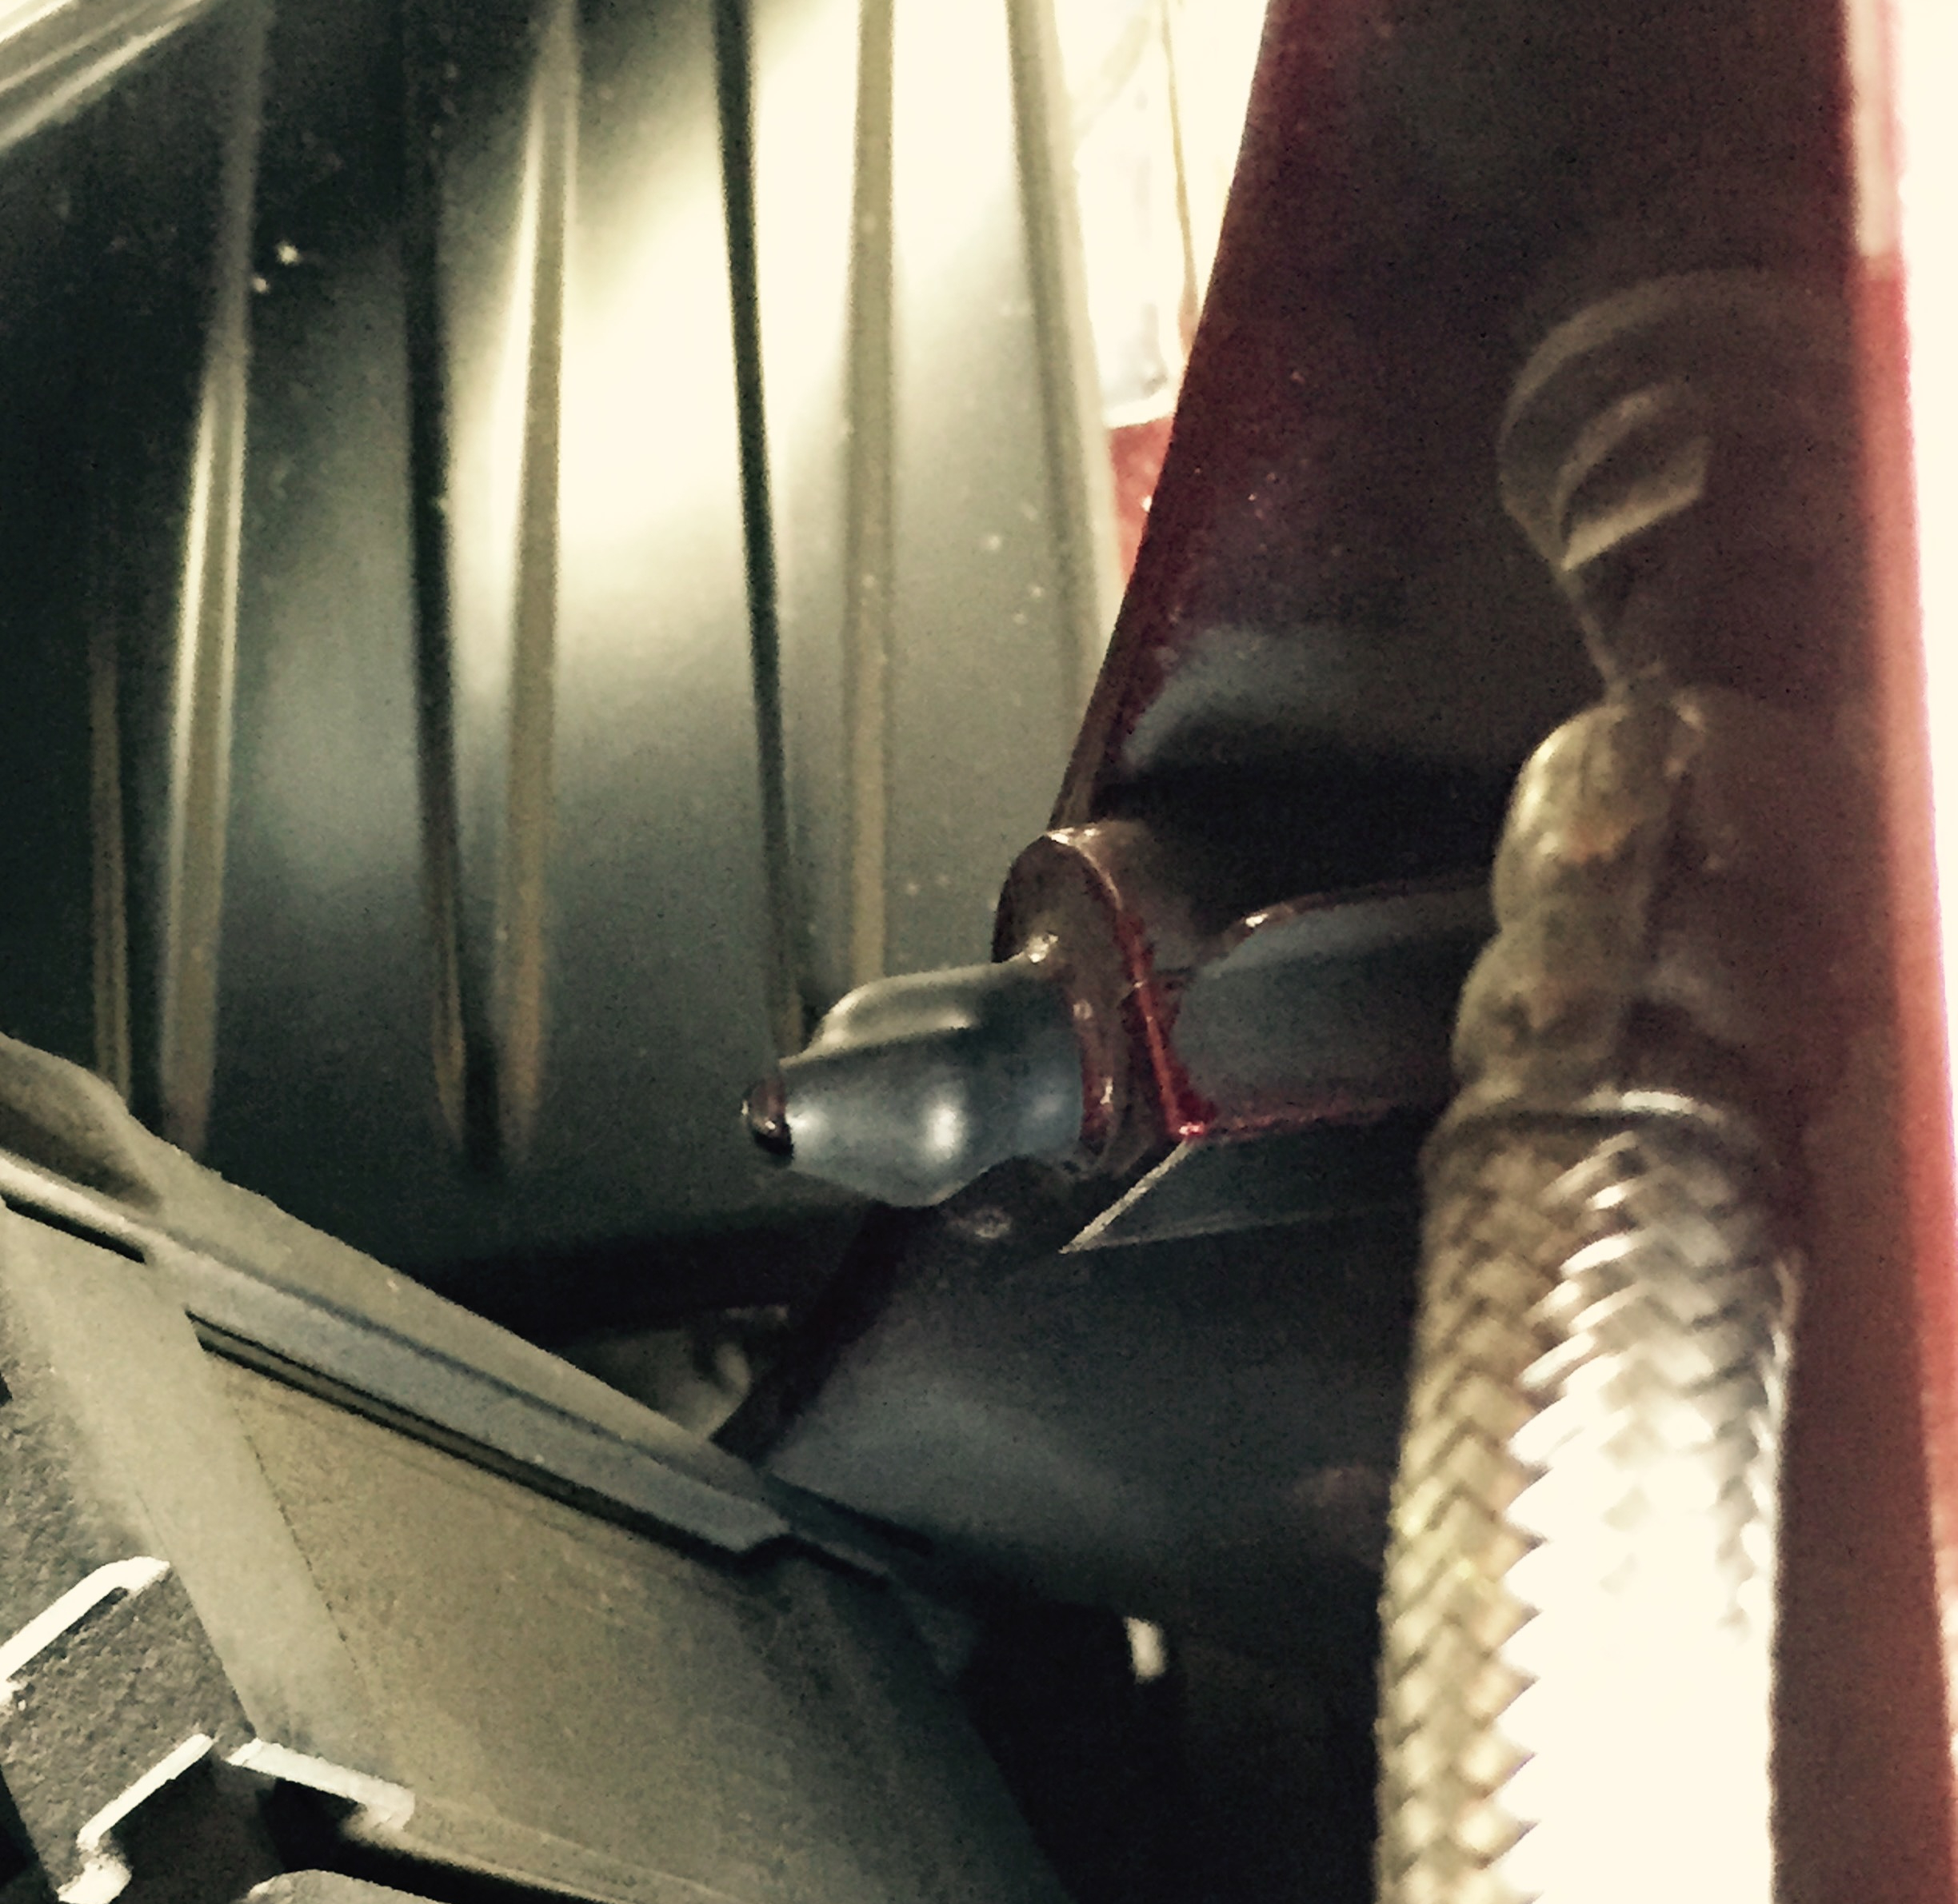
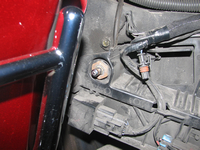
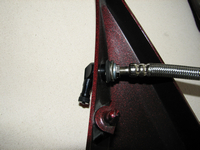
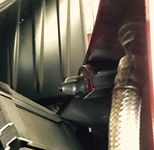
Unfasten the existing Schrader valve. You'll need a 22mm socket to take the nut off. Next, there's a wire-tie cable, with a barb that has been inserted into the plastic surround, that needs to be removed. I left this attached to the shock hose, but forced the barb out of its hole by using some needle-nose pliers, both on the inserted ribs and as a lever on the hose side of it:
-
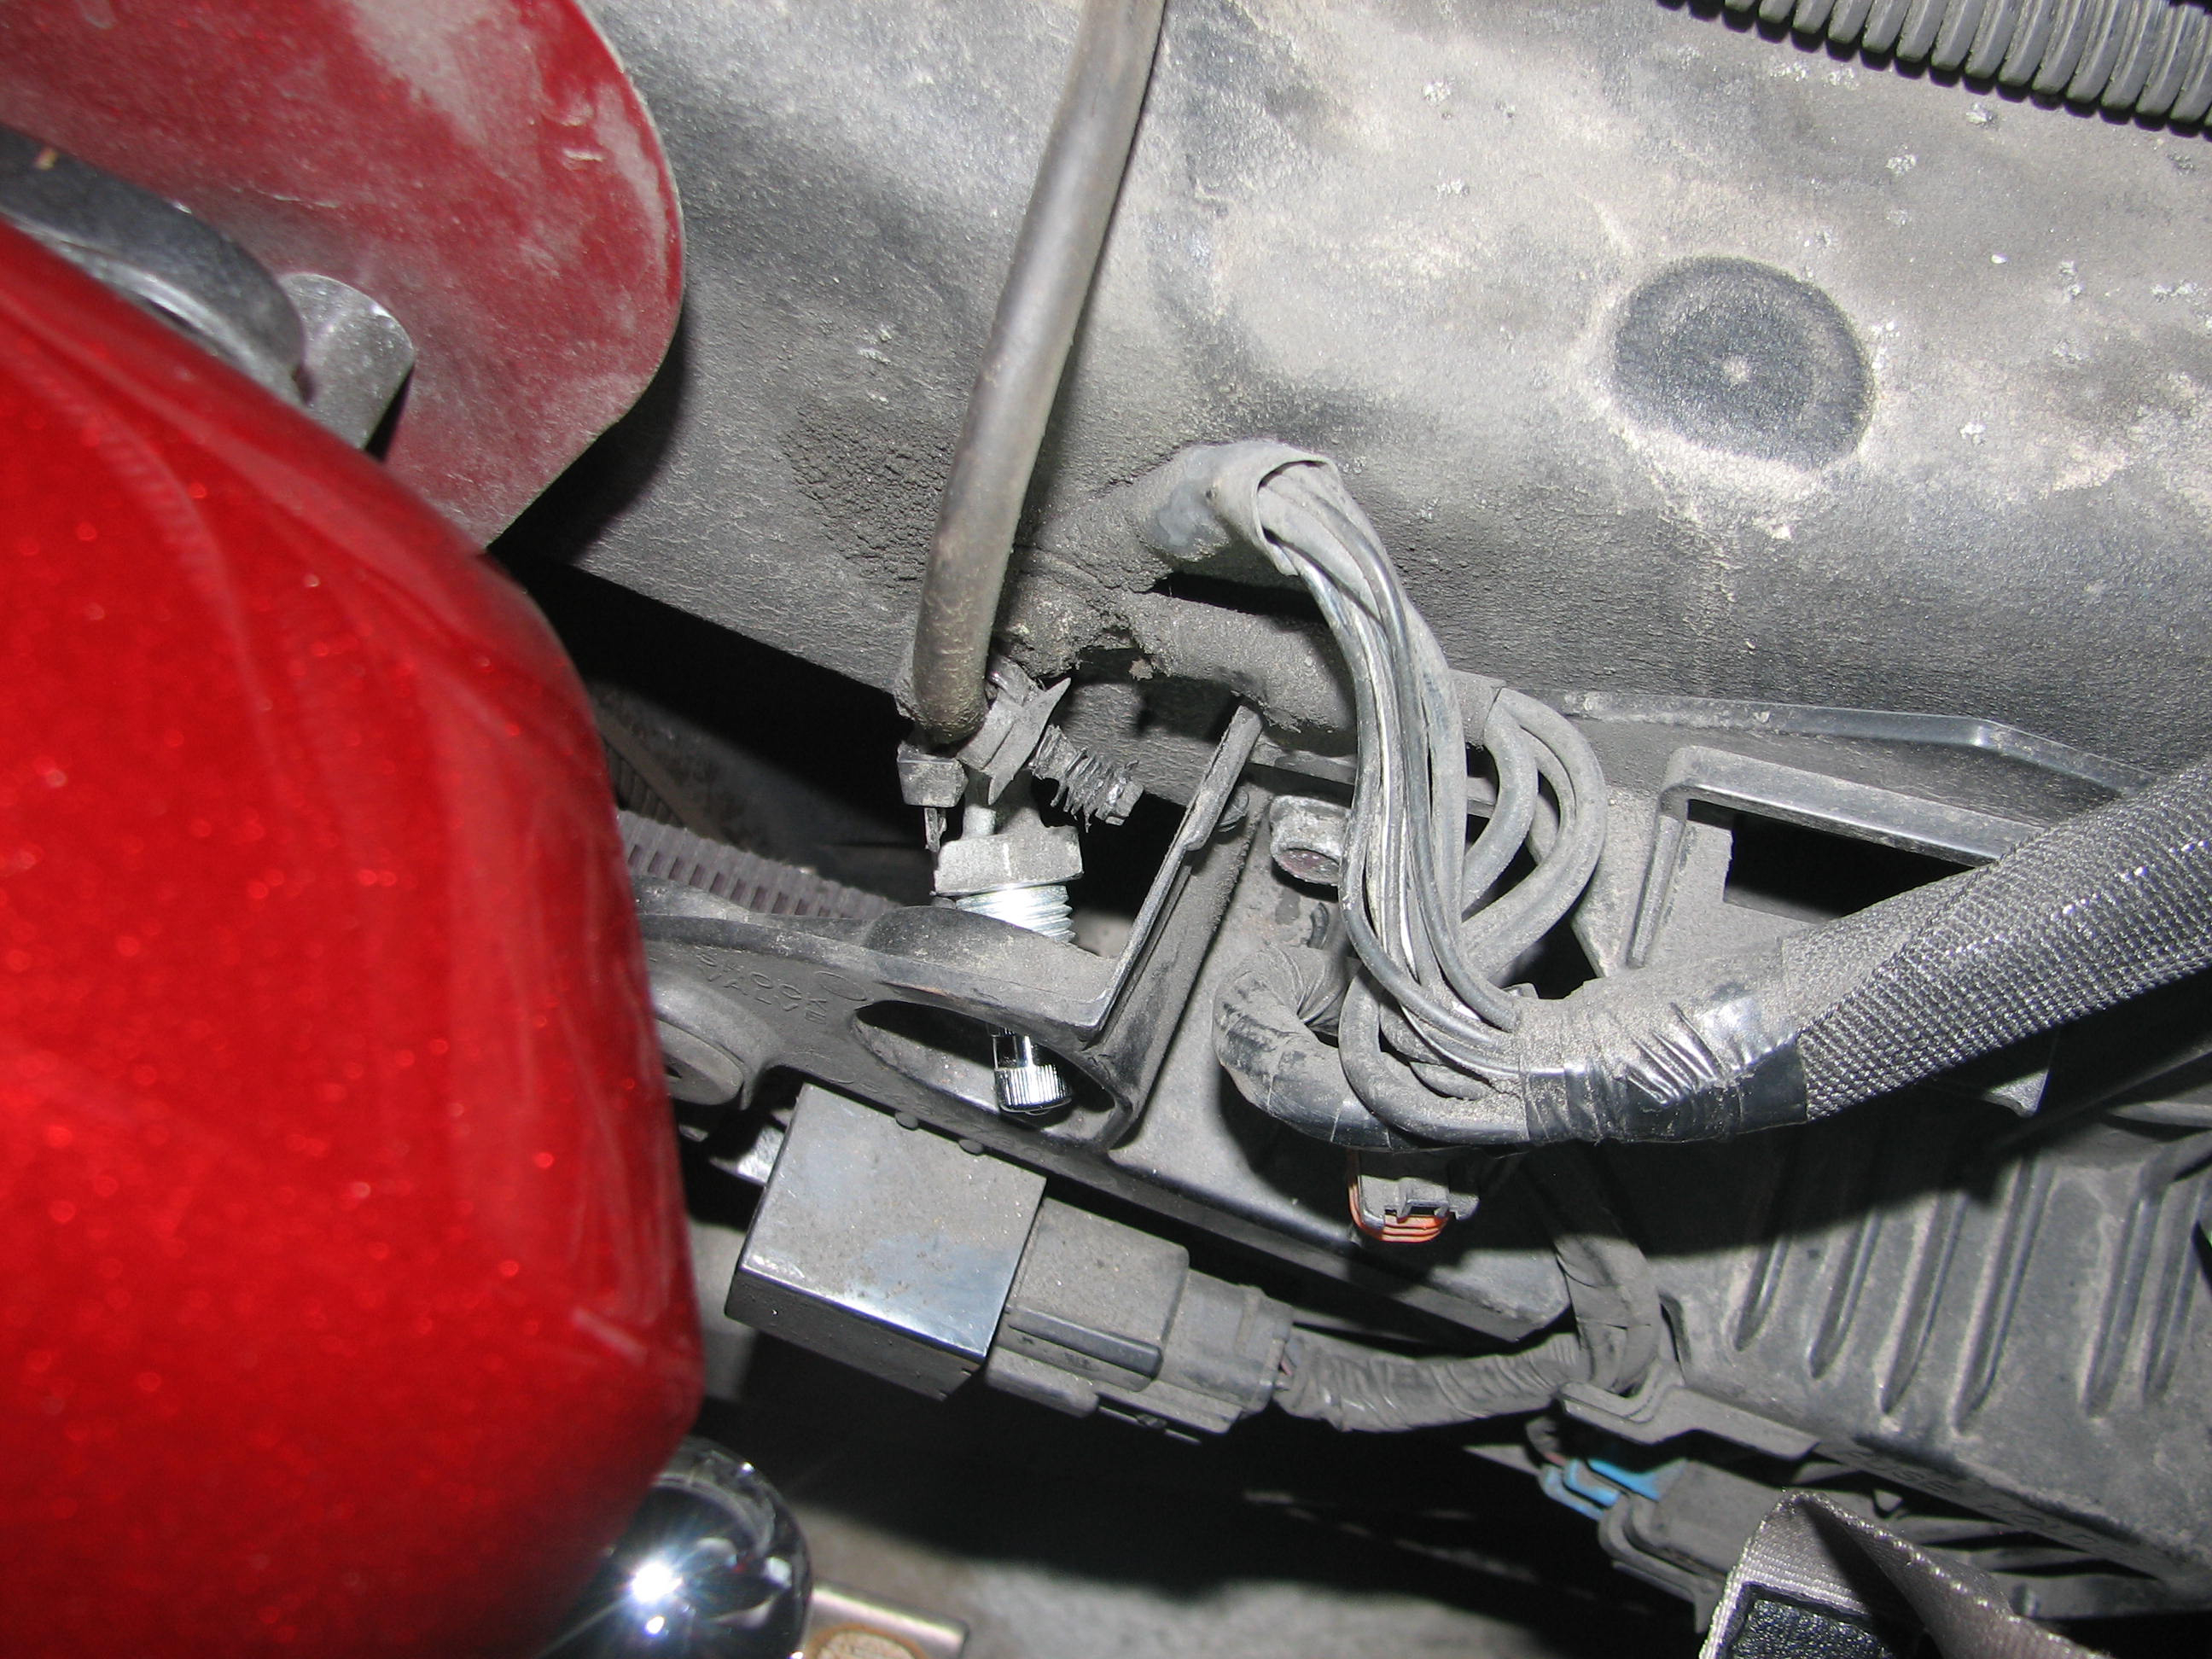
Wiggle the Schrader valve assembly out of its hole. I didn't find it necessary to loosen the bolts that hold the surround in place in order to do this:
-
Remove the hose from the clip in the rear fender. That clip holds the hose in place, but you need to gain some slack. I added a couple of wire-ties around the hose, where it comes up over the fender, in order to keep it from working its way down (i.e., to serve the same function as the fender clip):
-
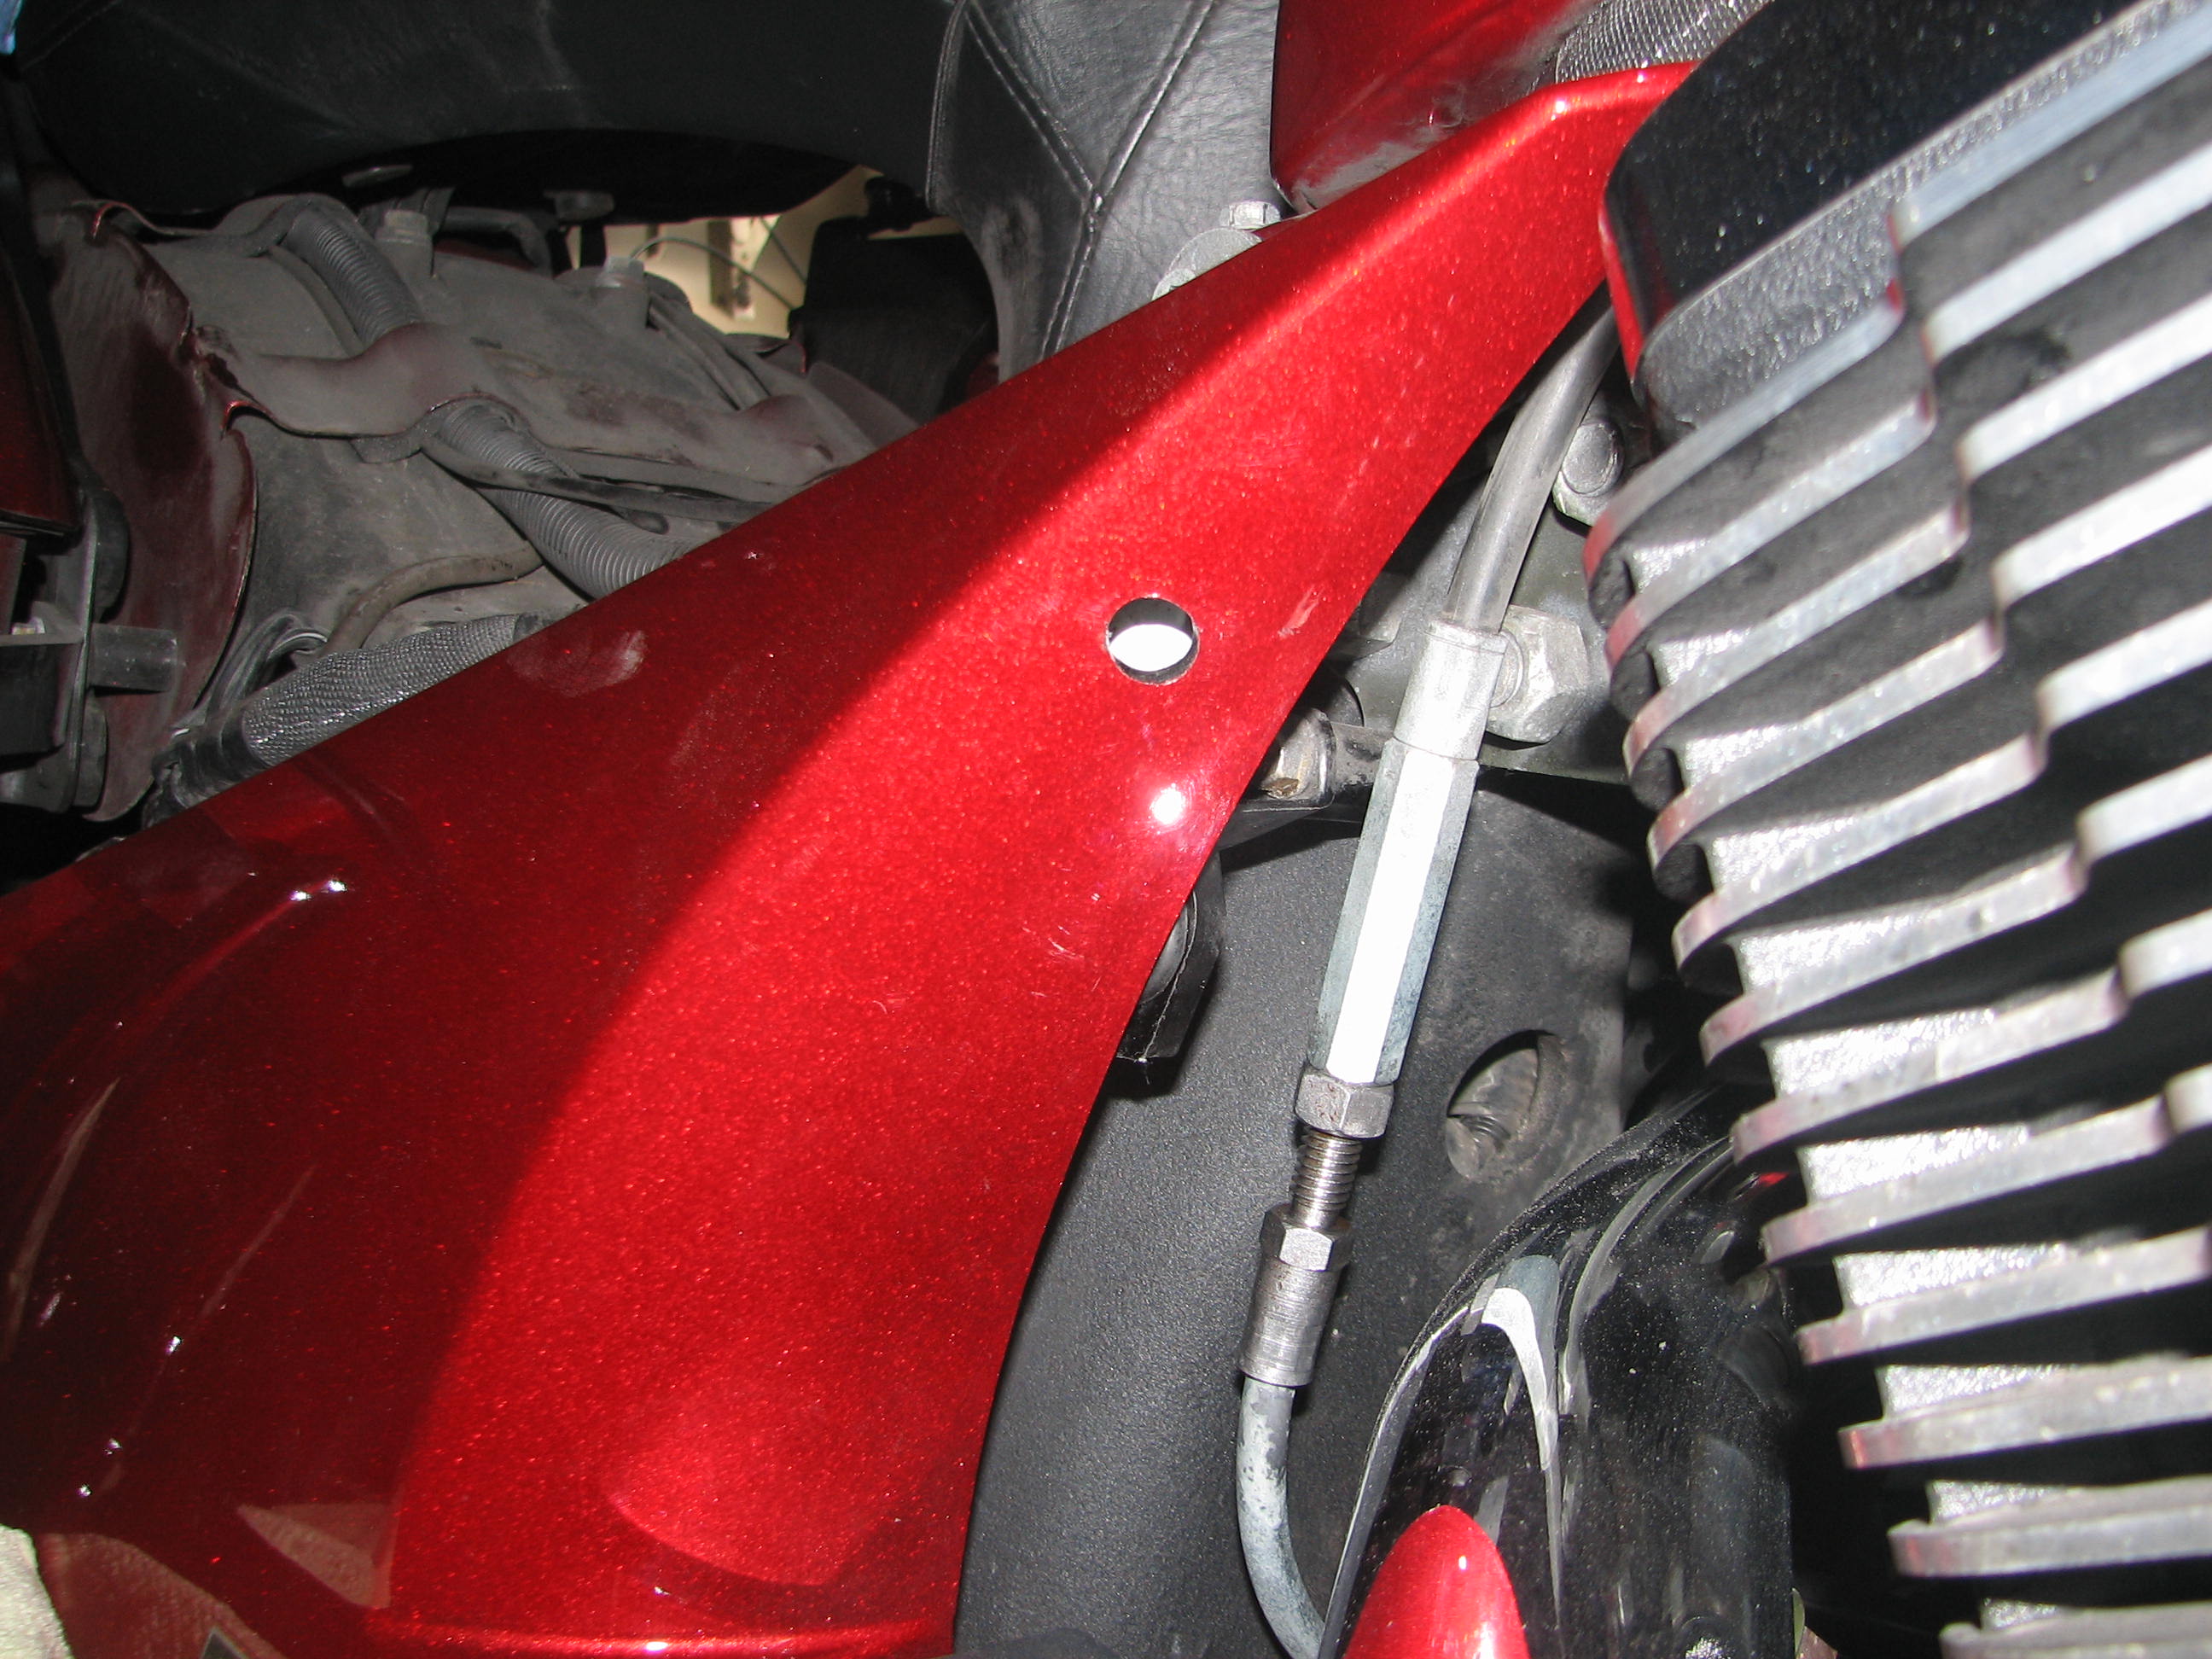
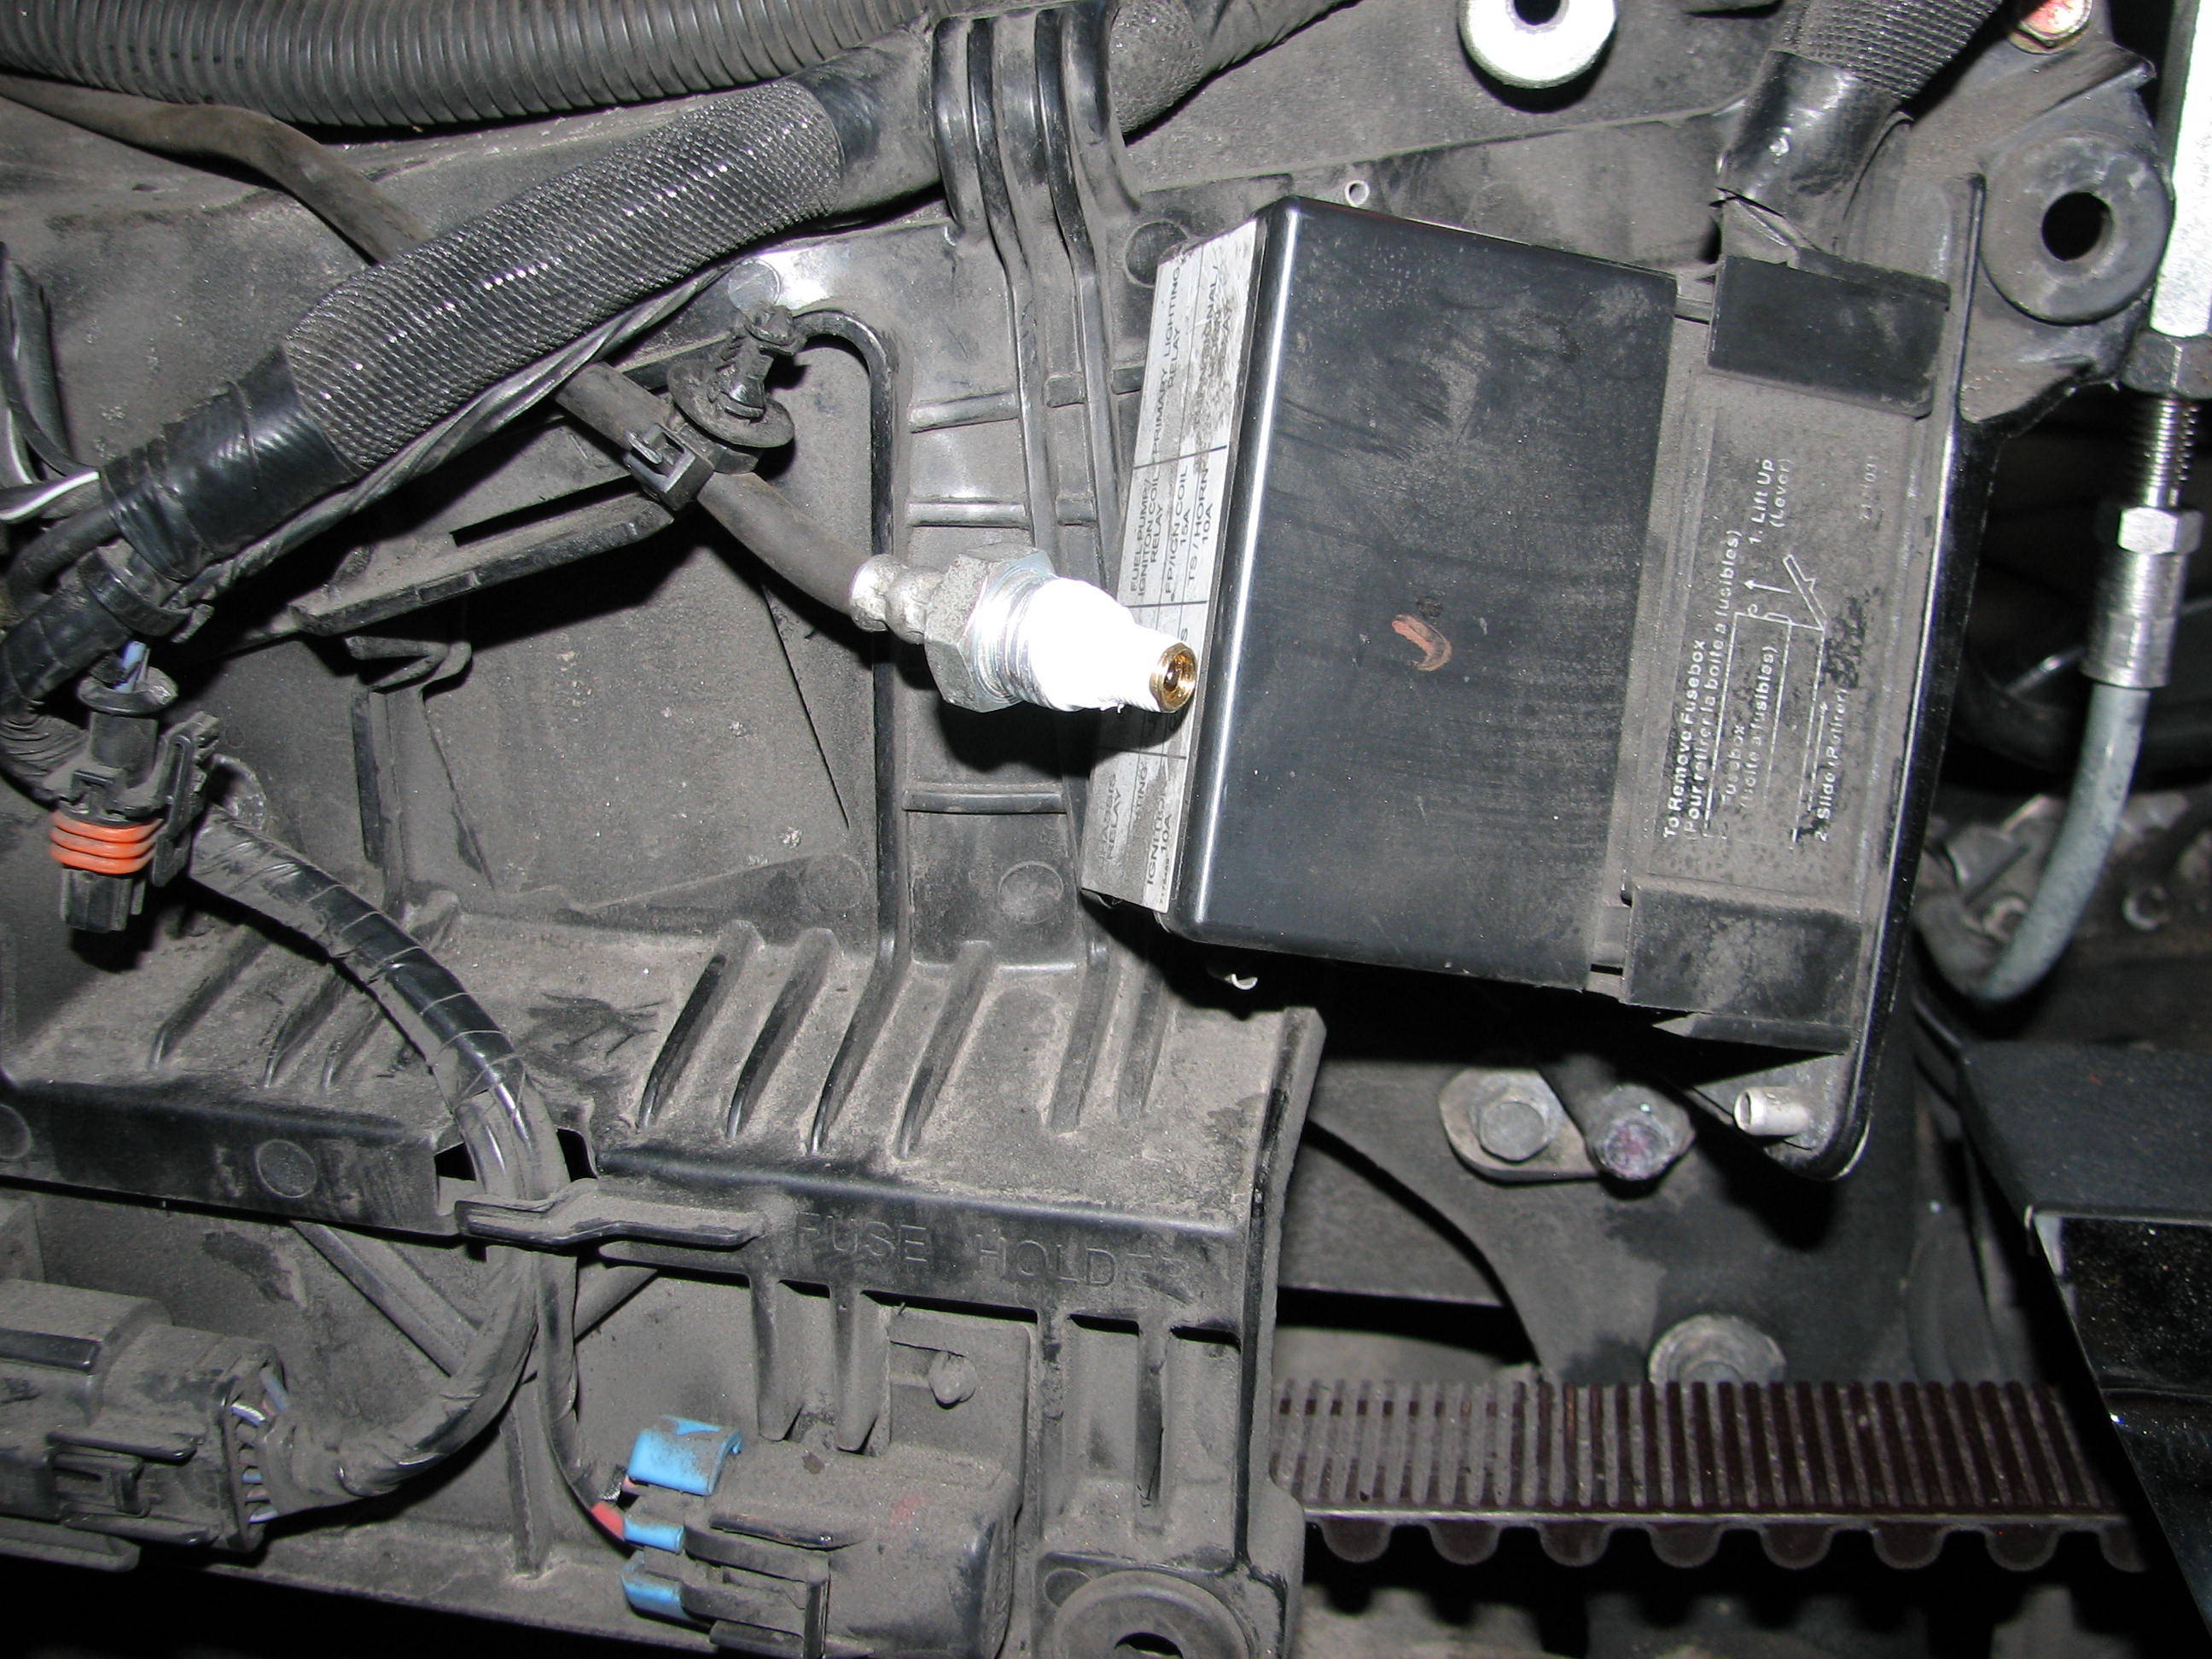
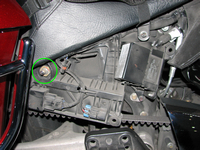
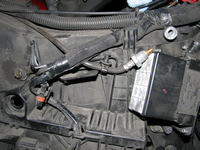
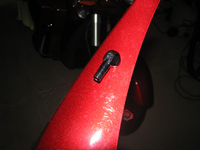
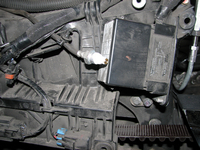
Reposition the air hose and its Schrader valve. You'll want it to end up just aft of the main fuse box:
-
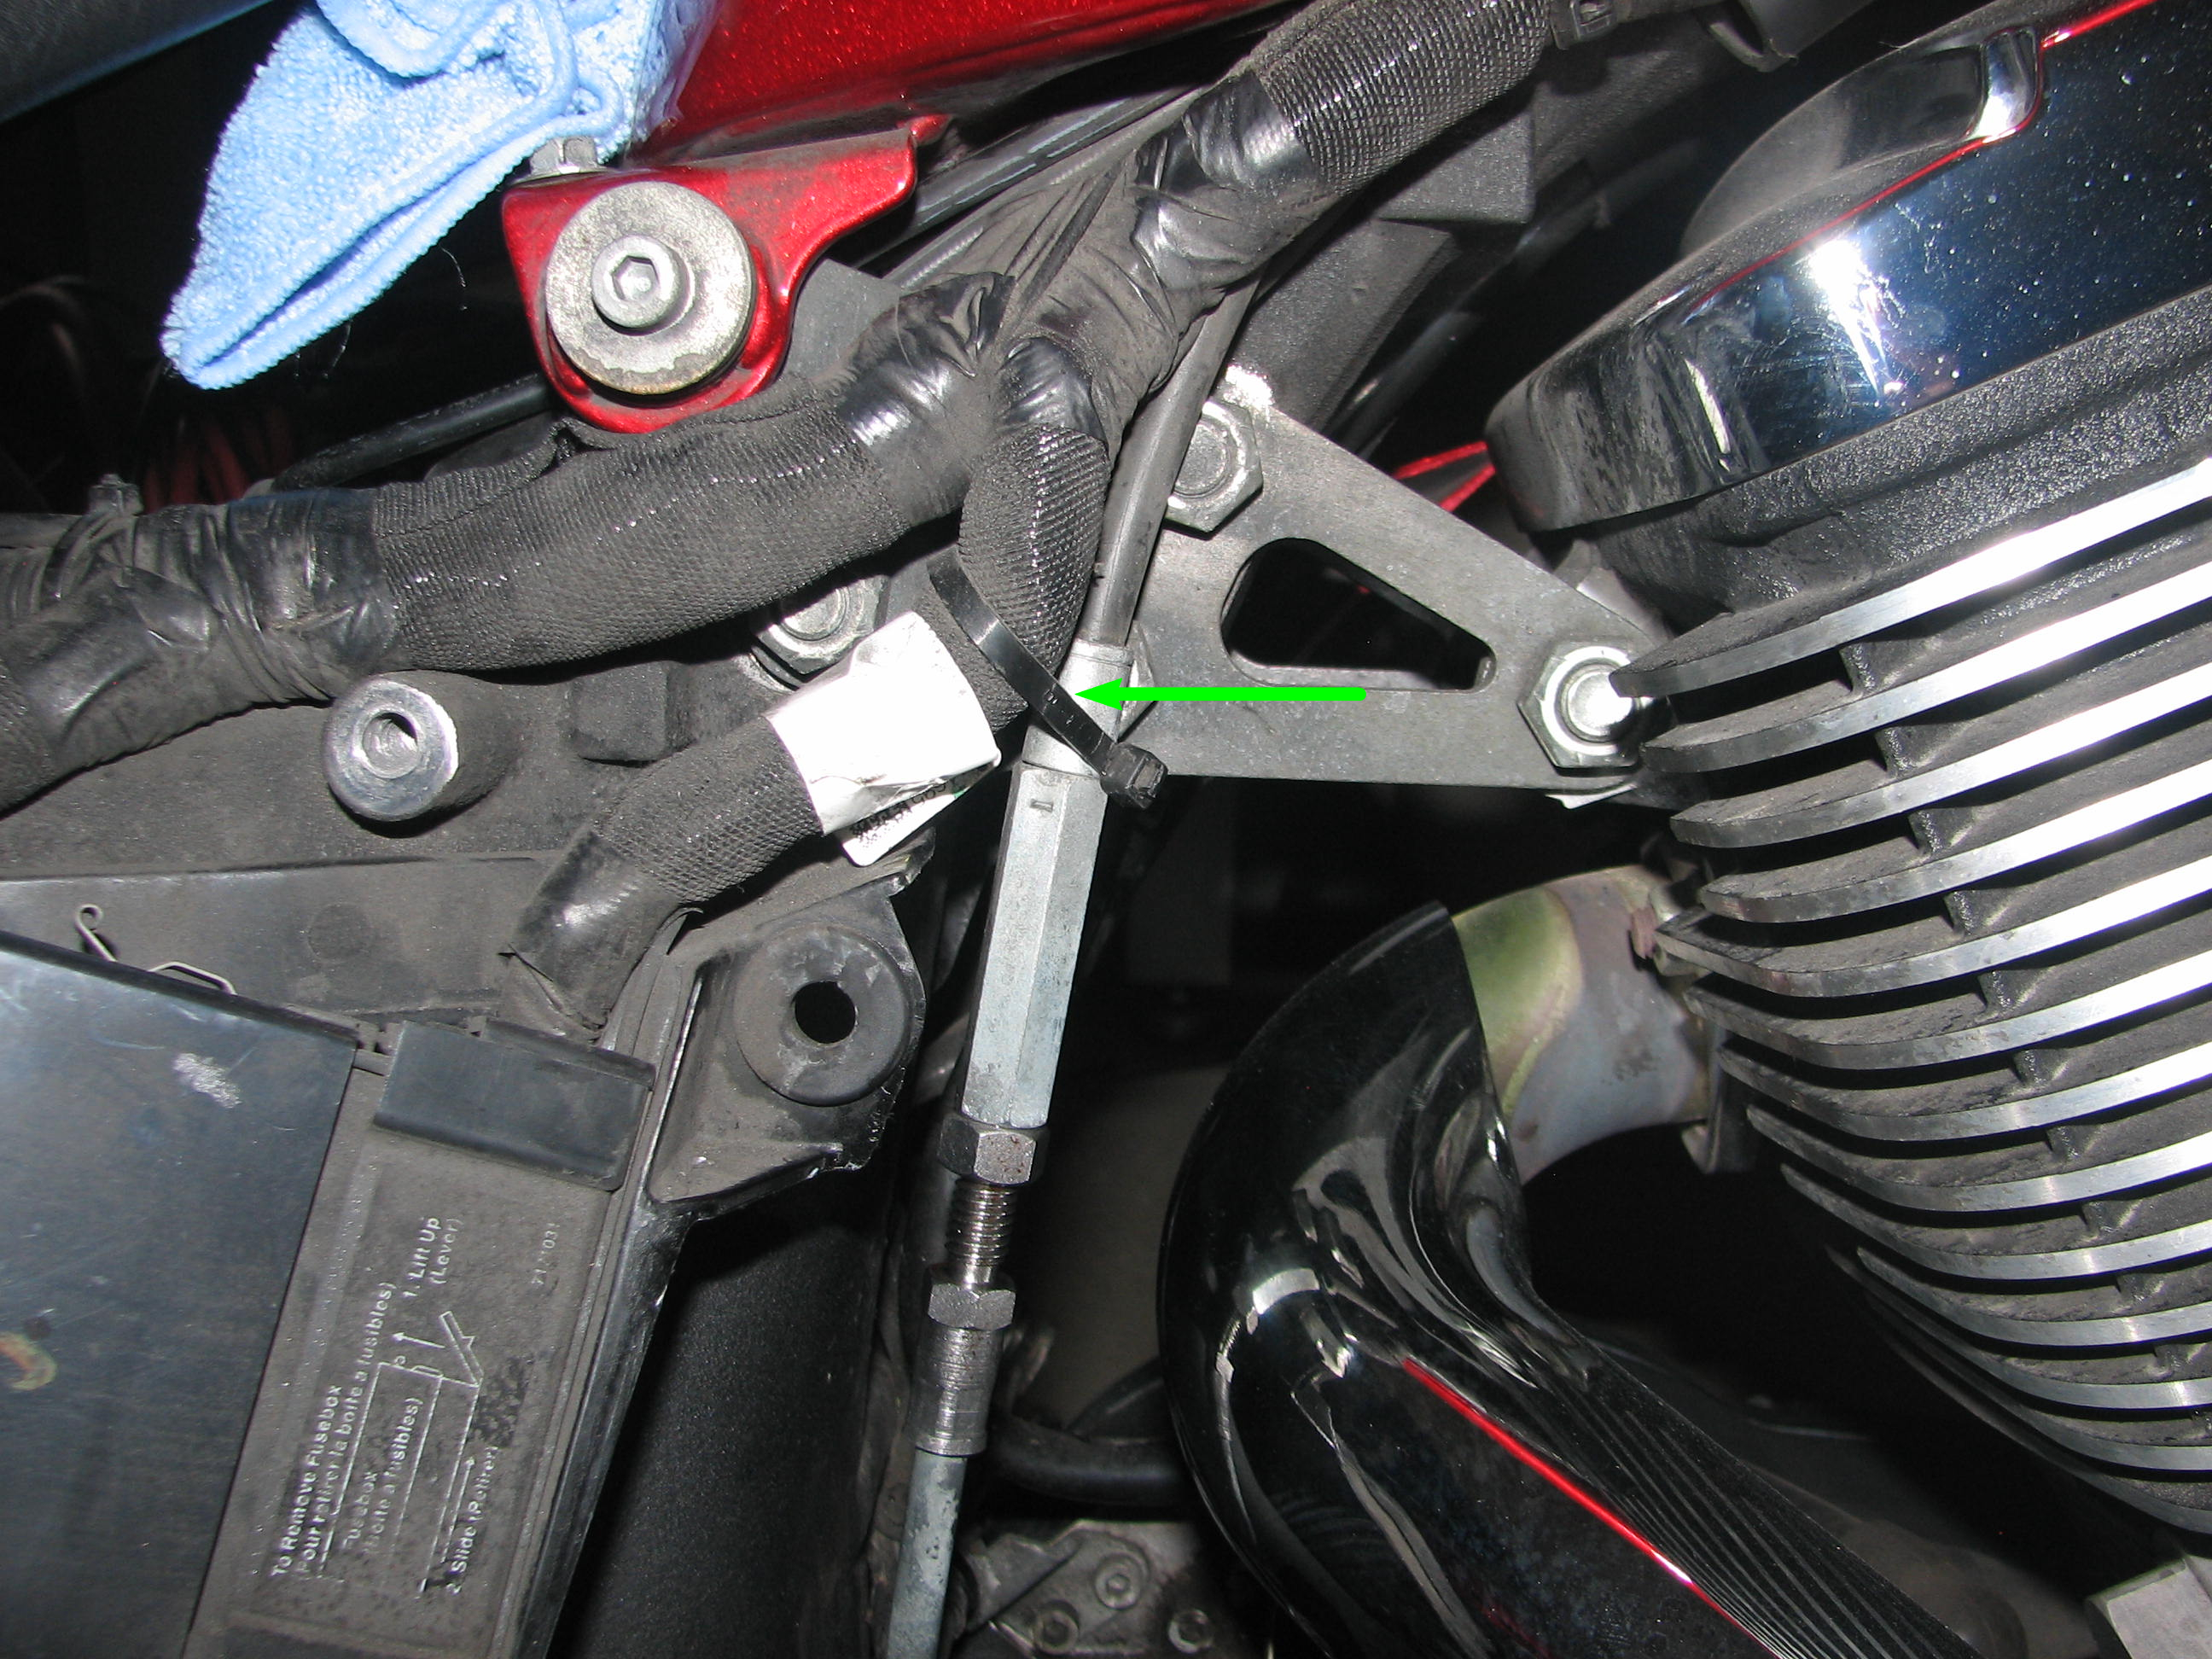
Cut the stock wire tie up front. This wire tie is not necessary, and its removal will allow some slight movement of the wire bundle in the area where the new Schrader valve and extension hose will be present:
-
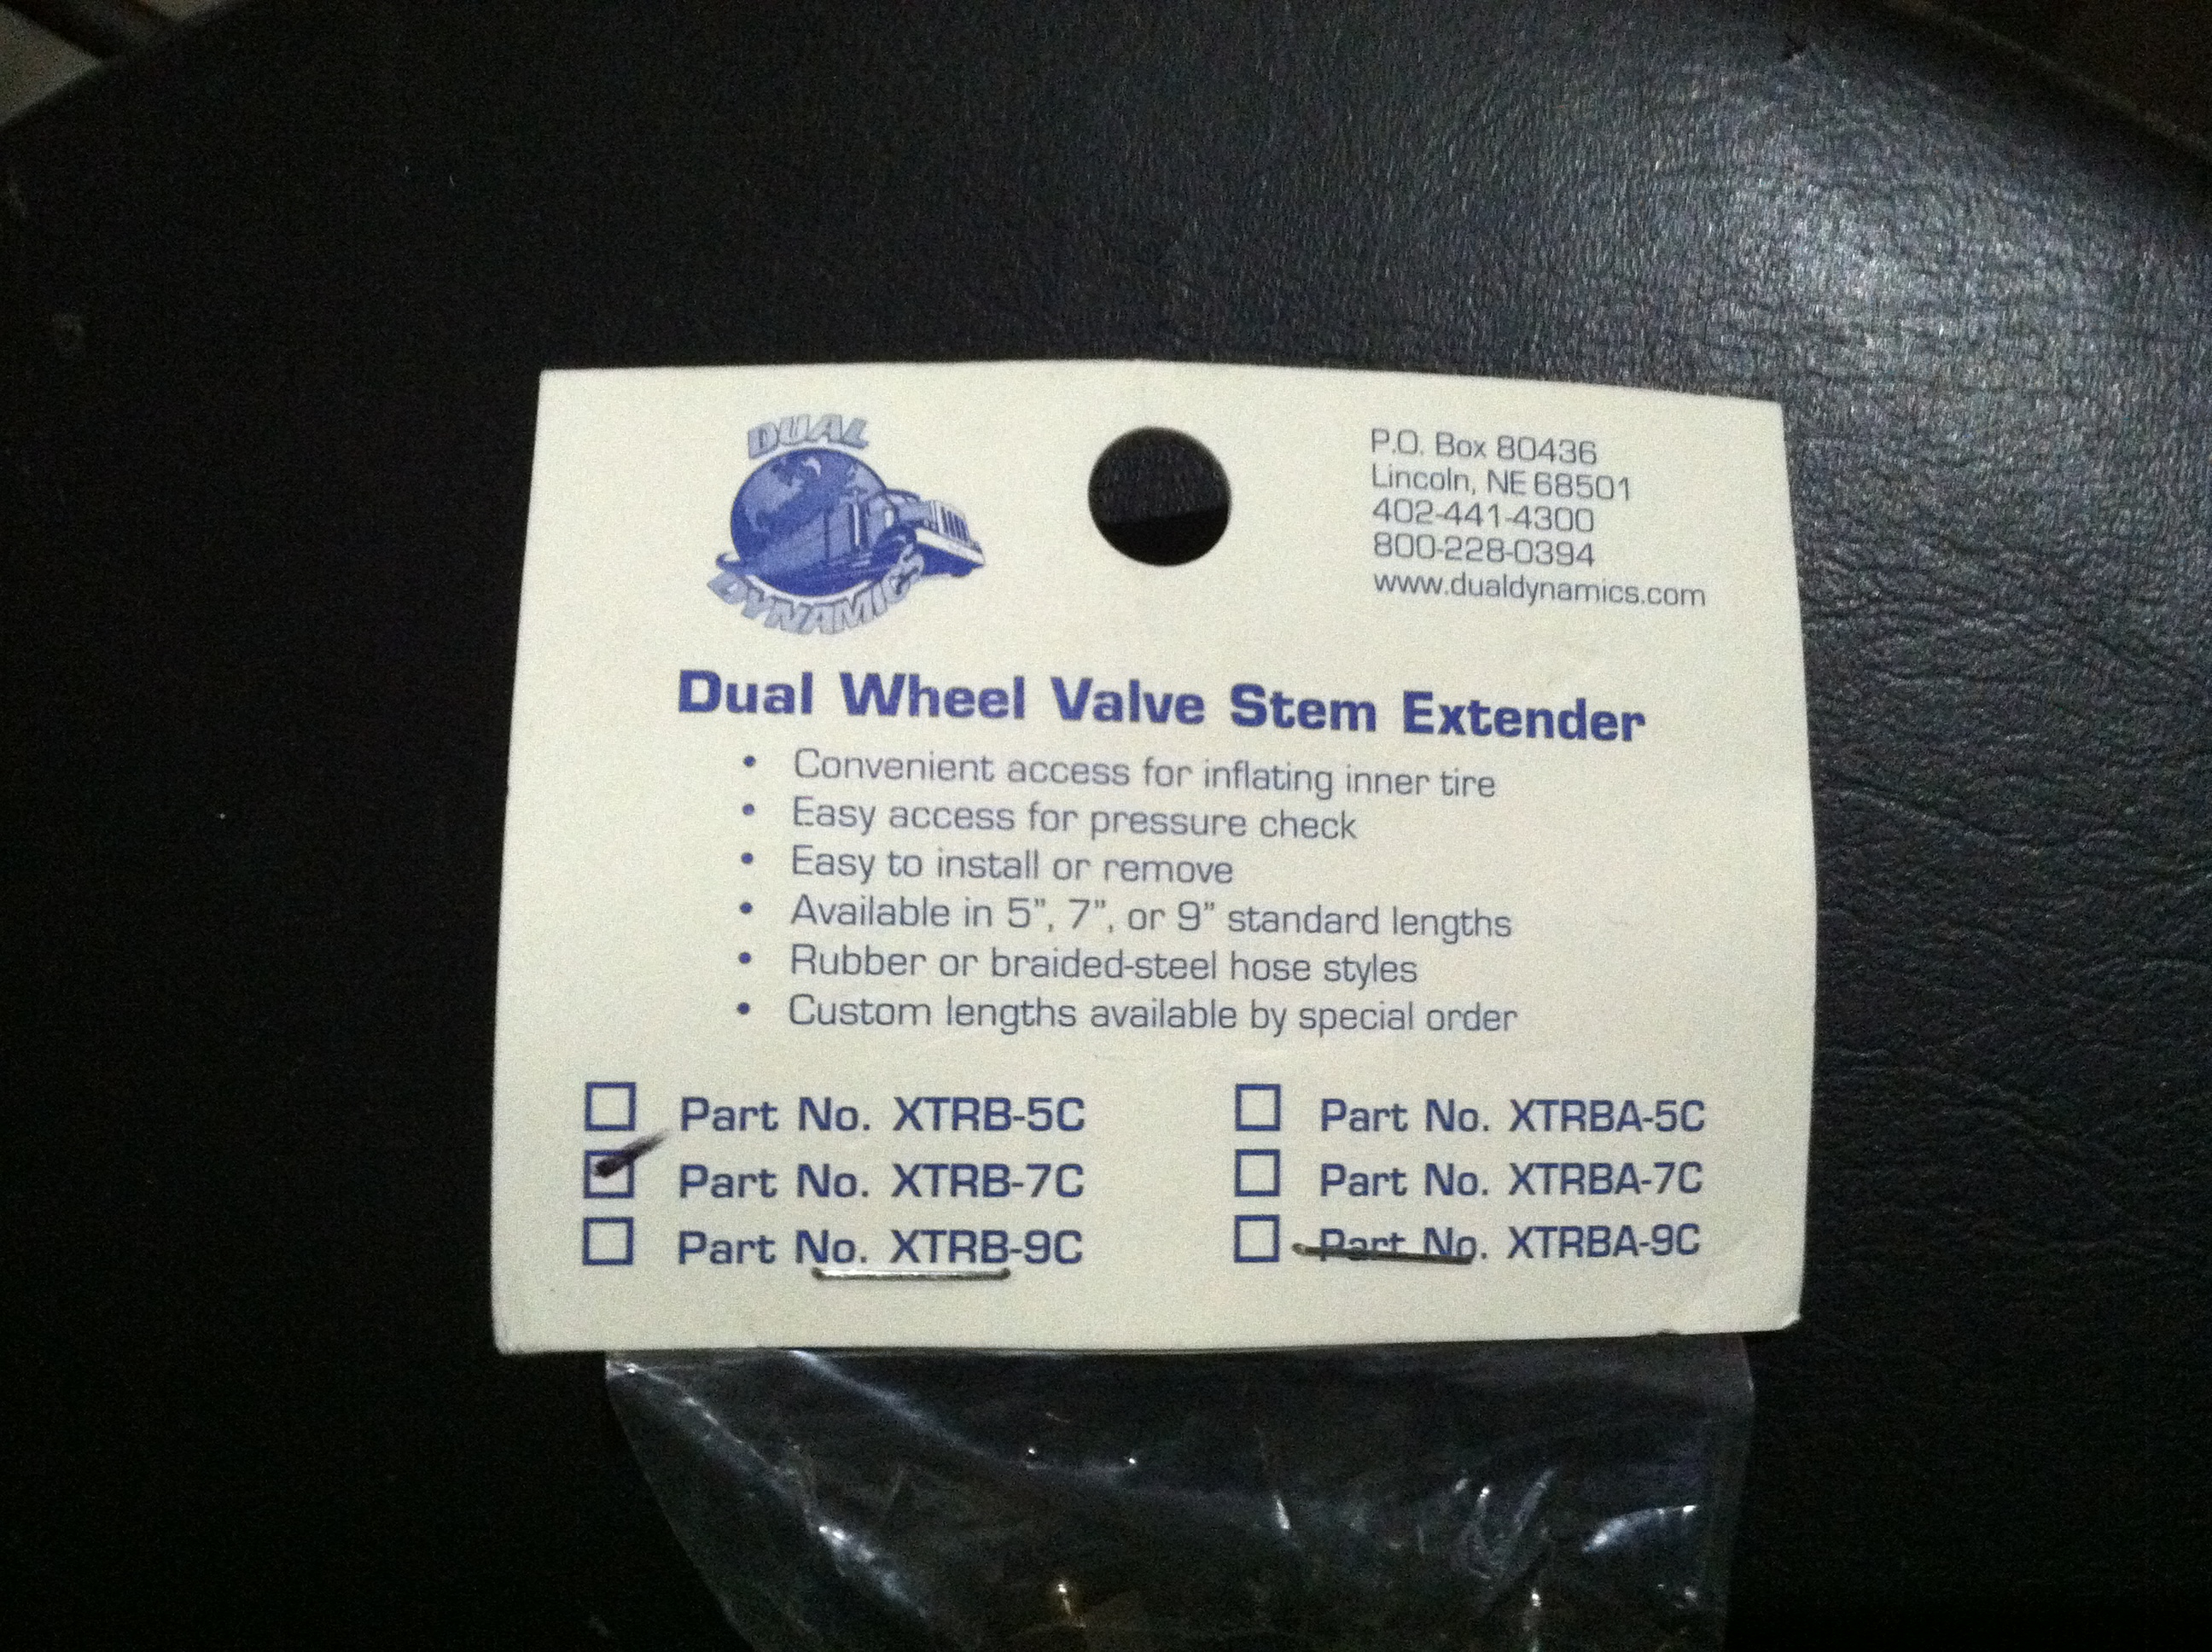
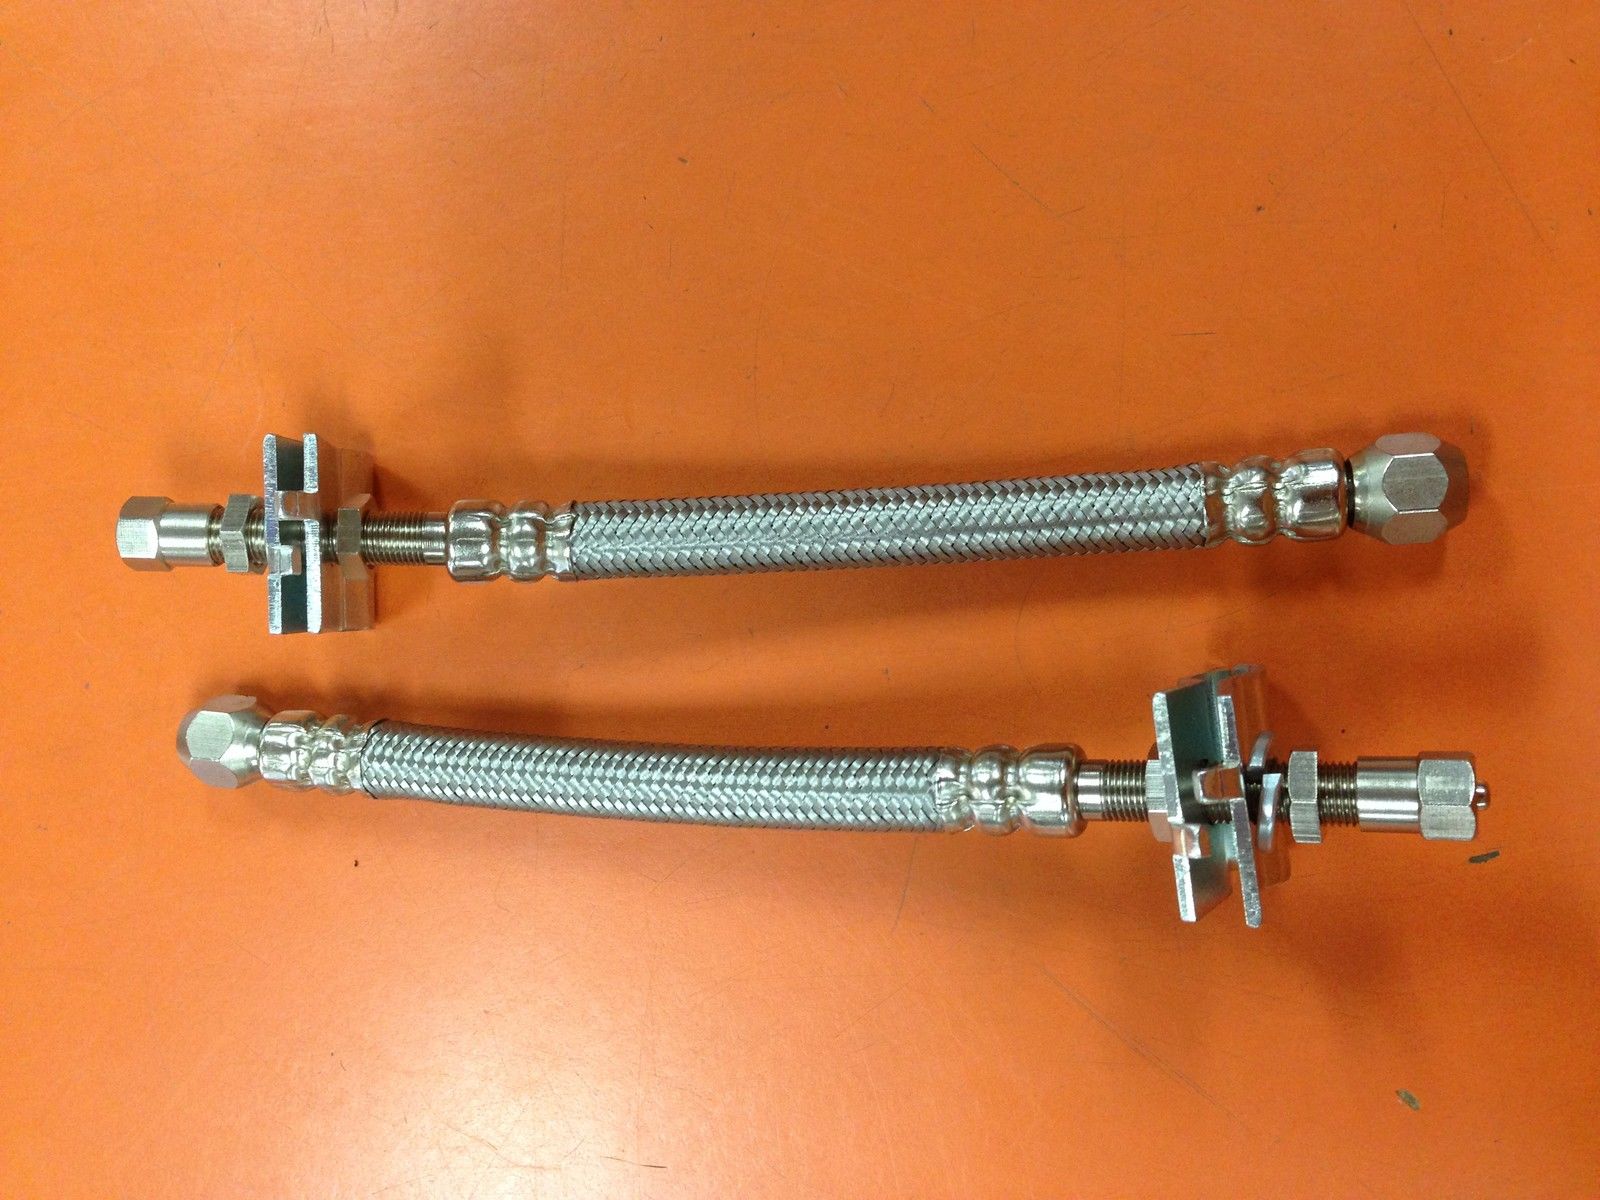
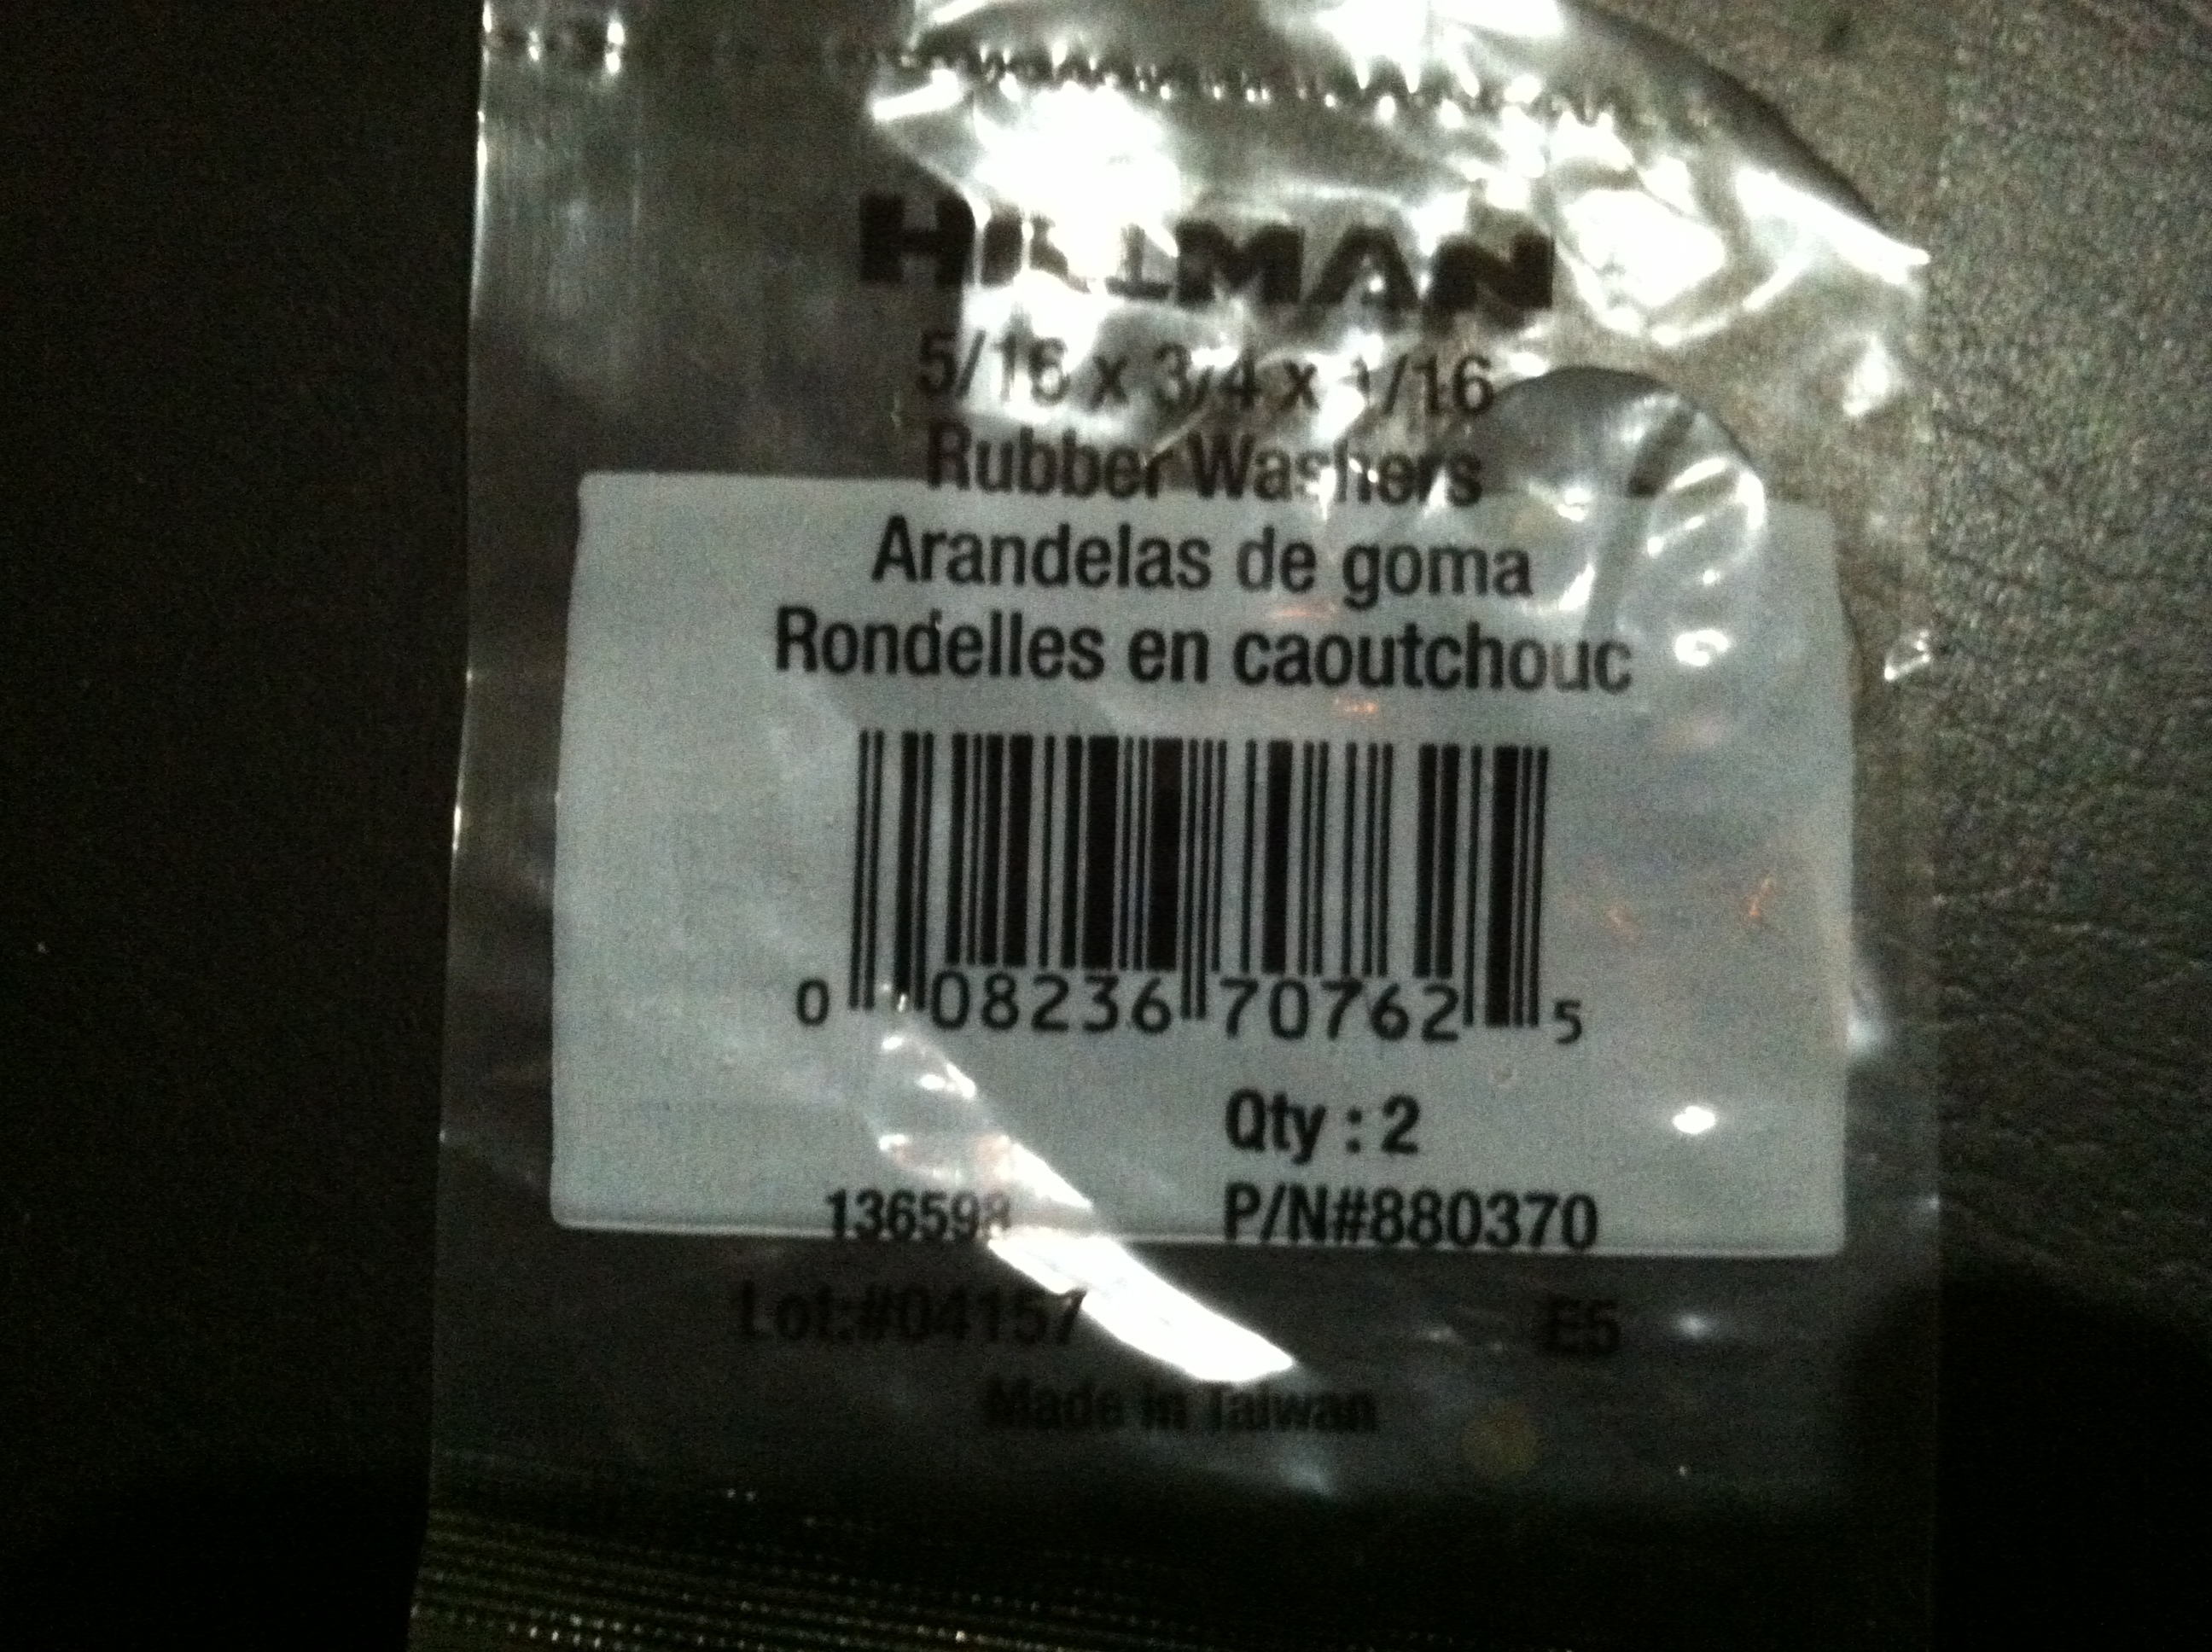
Buy an extension hose. I bought a pair of "STEEL DUAL WHEEL VALVE STEM EXTENDER EXTENSION 7IN STAINLESS STEEL HOSES" from truckpartsworld, for $22:
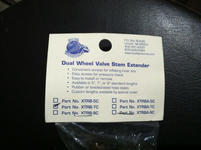
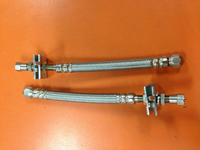
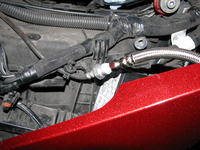
However, if I were doing this again, I'd get the slightly longer 9" version, for a few dollars more; this would allow a little more flexibility when repositioning the stock Schrader valve. Keep in mind that you don't want the stock hose, valve, or your extension hose to be anywhere near the final-drive belt, a few inches of which are exposed near the bottom, front, area behind the side cover.
-
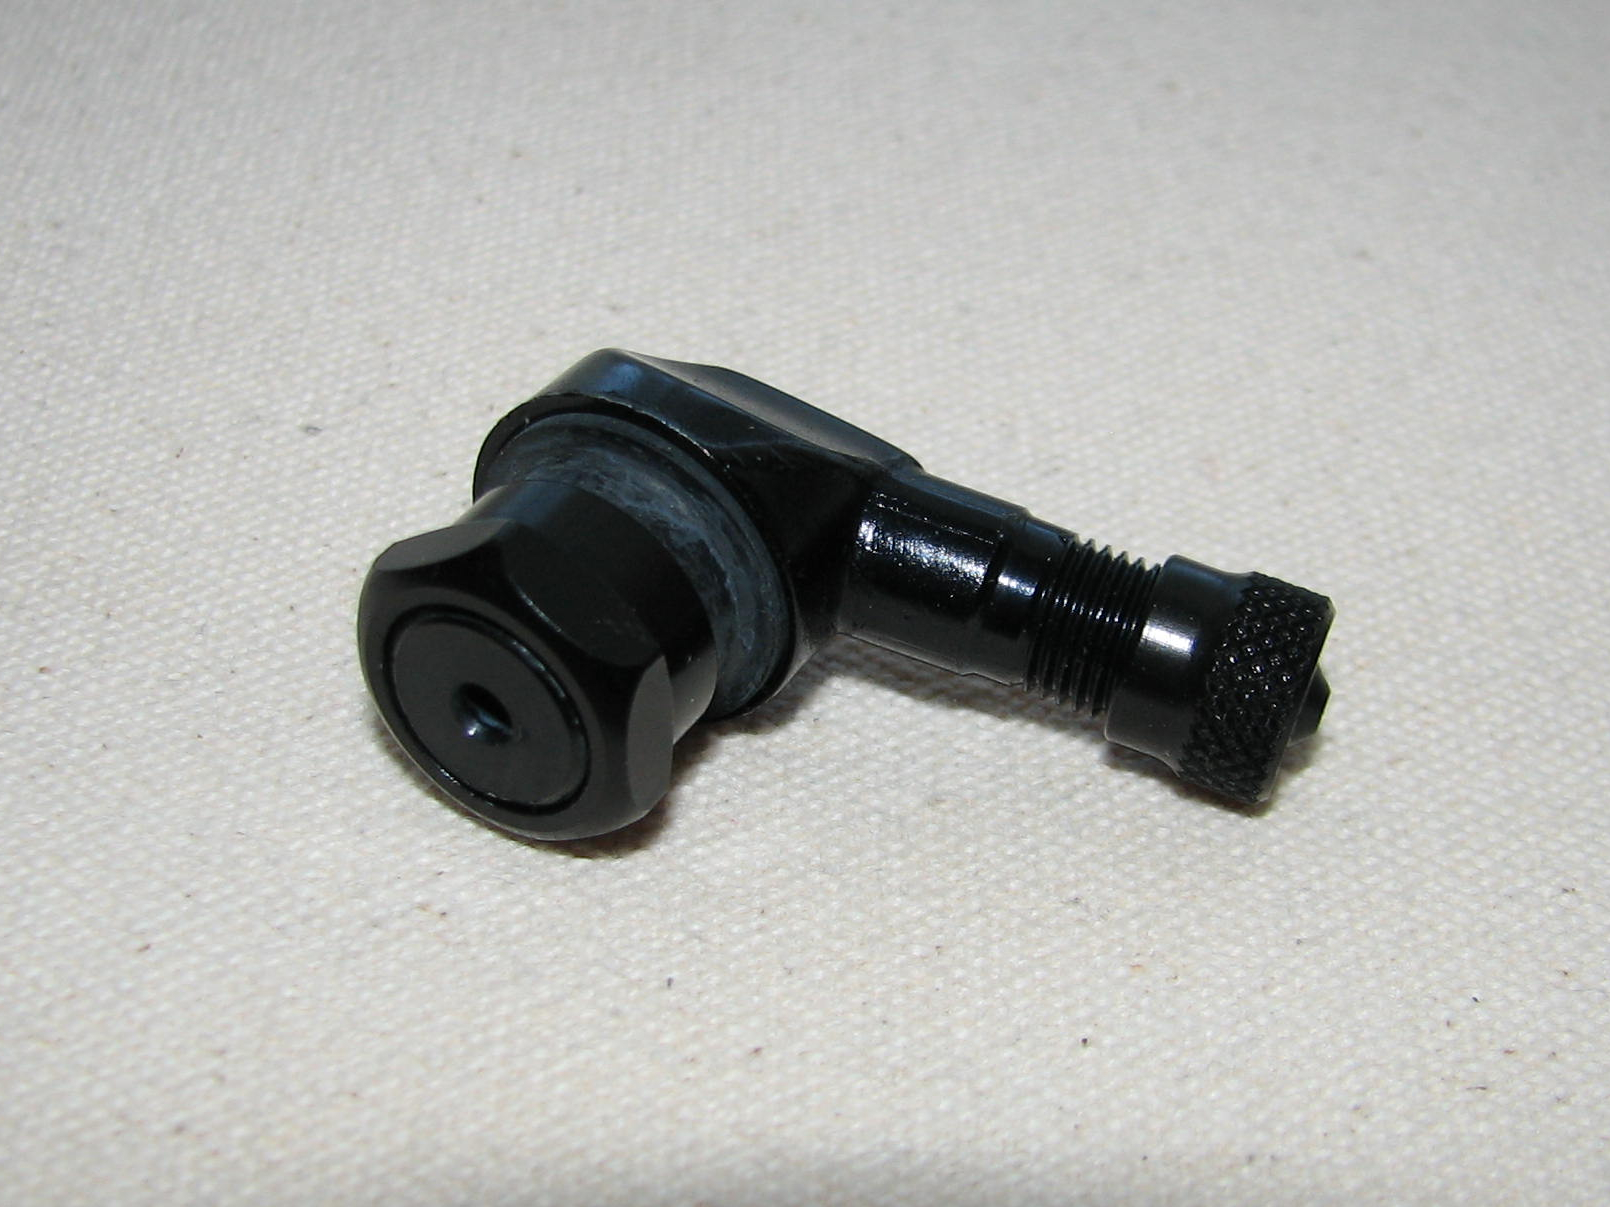
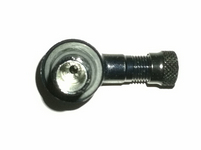
Buy a new Schrader valve. I ordered a pair of "83deg Aluminum 11.3mm GEN2 Angled Valve Stem" (part # GEN2BPUSBK) from KurveyGirl2, for $29.99:

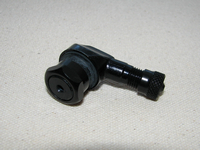
KurveyGirl sells these valves in a variety of colors, but for aesthetic reasons I wanted a black one. (It also matches the black Powerlet socket I added through the left side cover; you can take a look at that project in this series of photos and captions.)
-
Tap the new Schrader valve. The end of the Schrader valve that would be inside the tire, if the valve were actually used as a tire valve, will be accepting the male end of the newly purchased extension hose. So, you will need to tap this for the external thread pitch of an ordinary tire-sized Schrader valve3.
There is just barely enough width in this area of the new valve to accommodate this tap. Using the small existing air hole as a guide, I very carefully enlarged that hole, to a depth approaching the top outer area of the valve. I used a series of bits, culminating with a 9/32" bit (which, at 0.281", is negligibly smaller than the recommended bore size for this tap, 0.287"):
Good tapping practices require that you keep the tap oiled, and only add a few thread turns at a time, before backing out the tap. I then temporarily de-cored4 this drilled-and-tapped Schrader valve, and blew out the inside in both directions, to make sure that no filings were left inside.
-
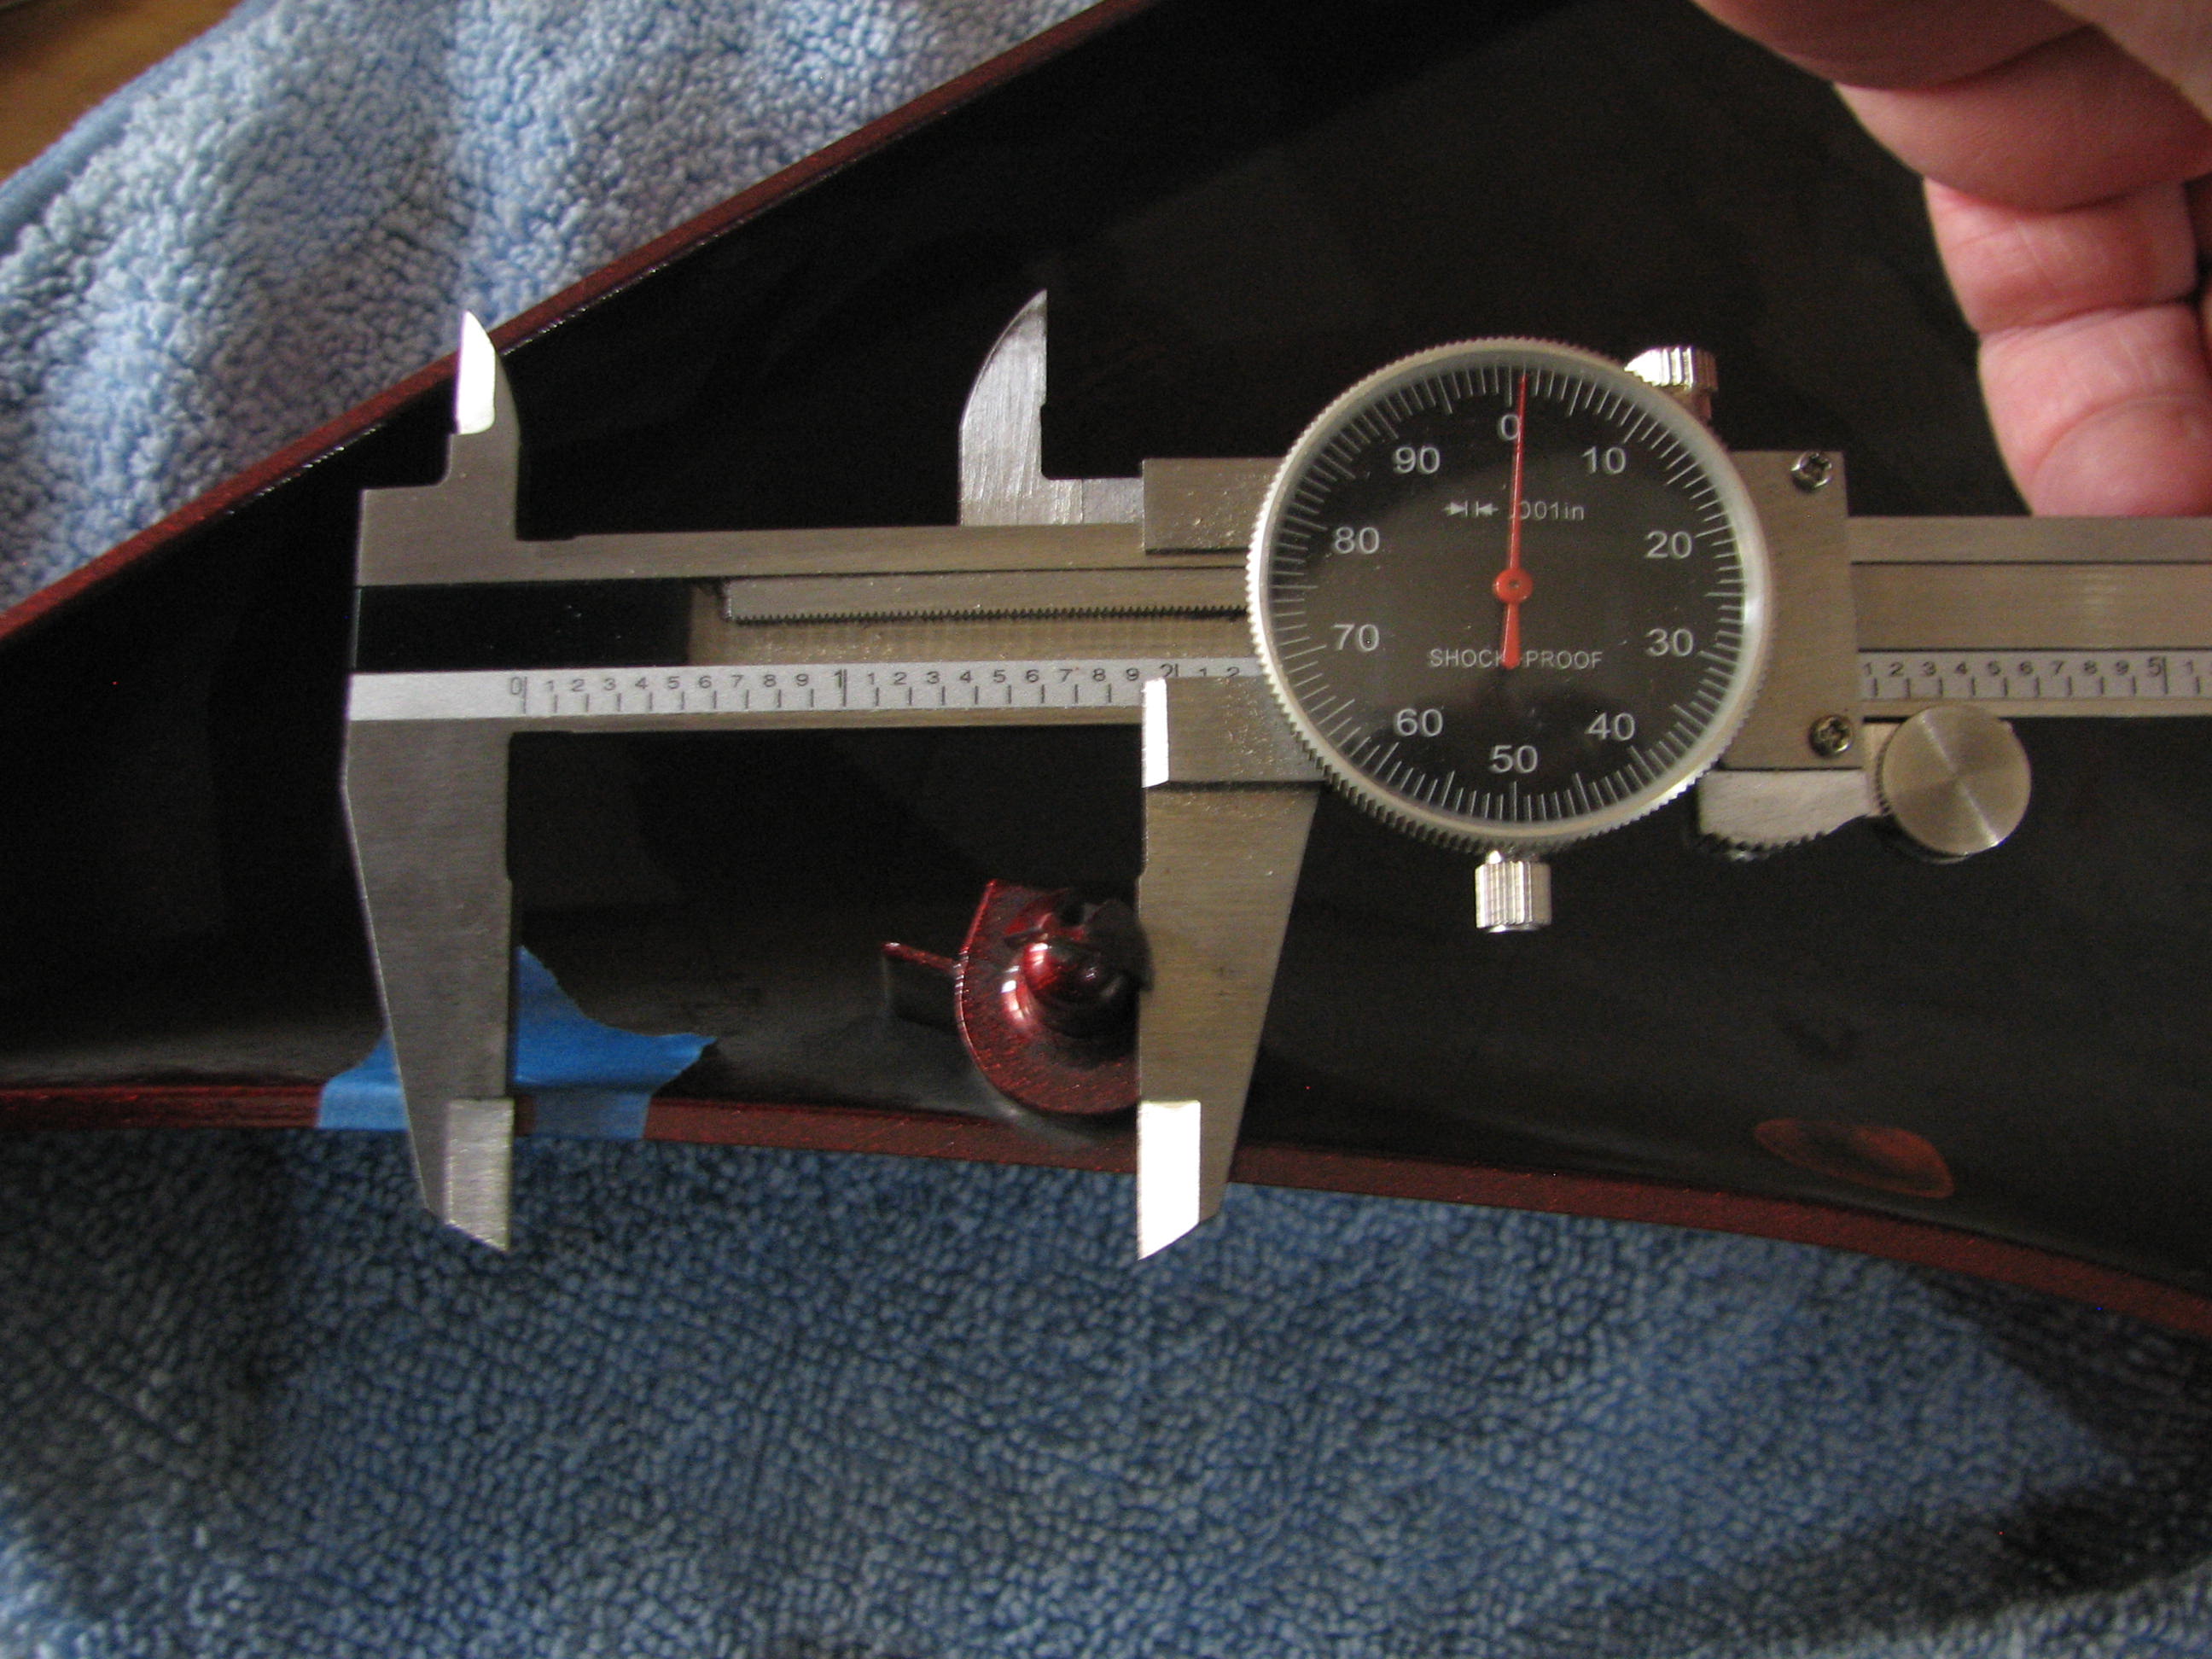
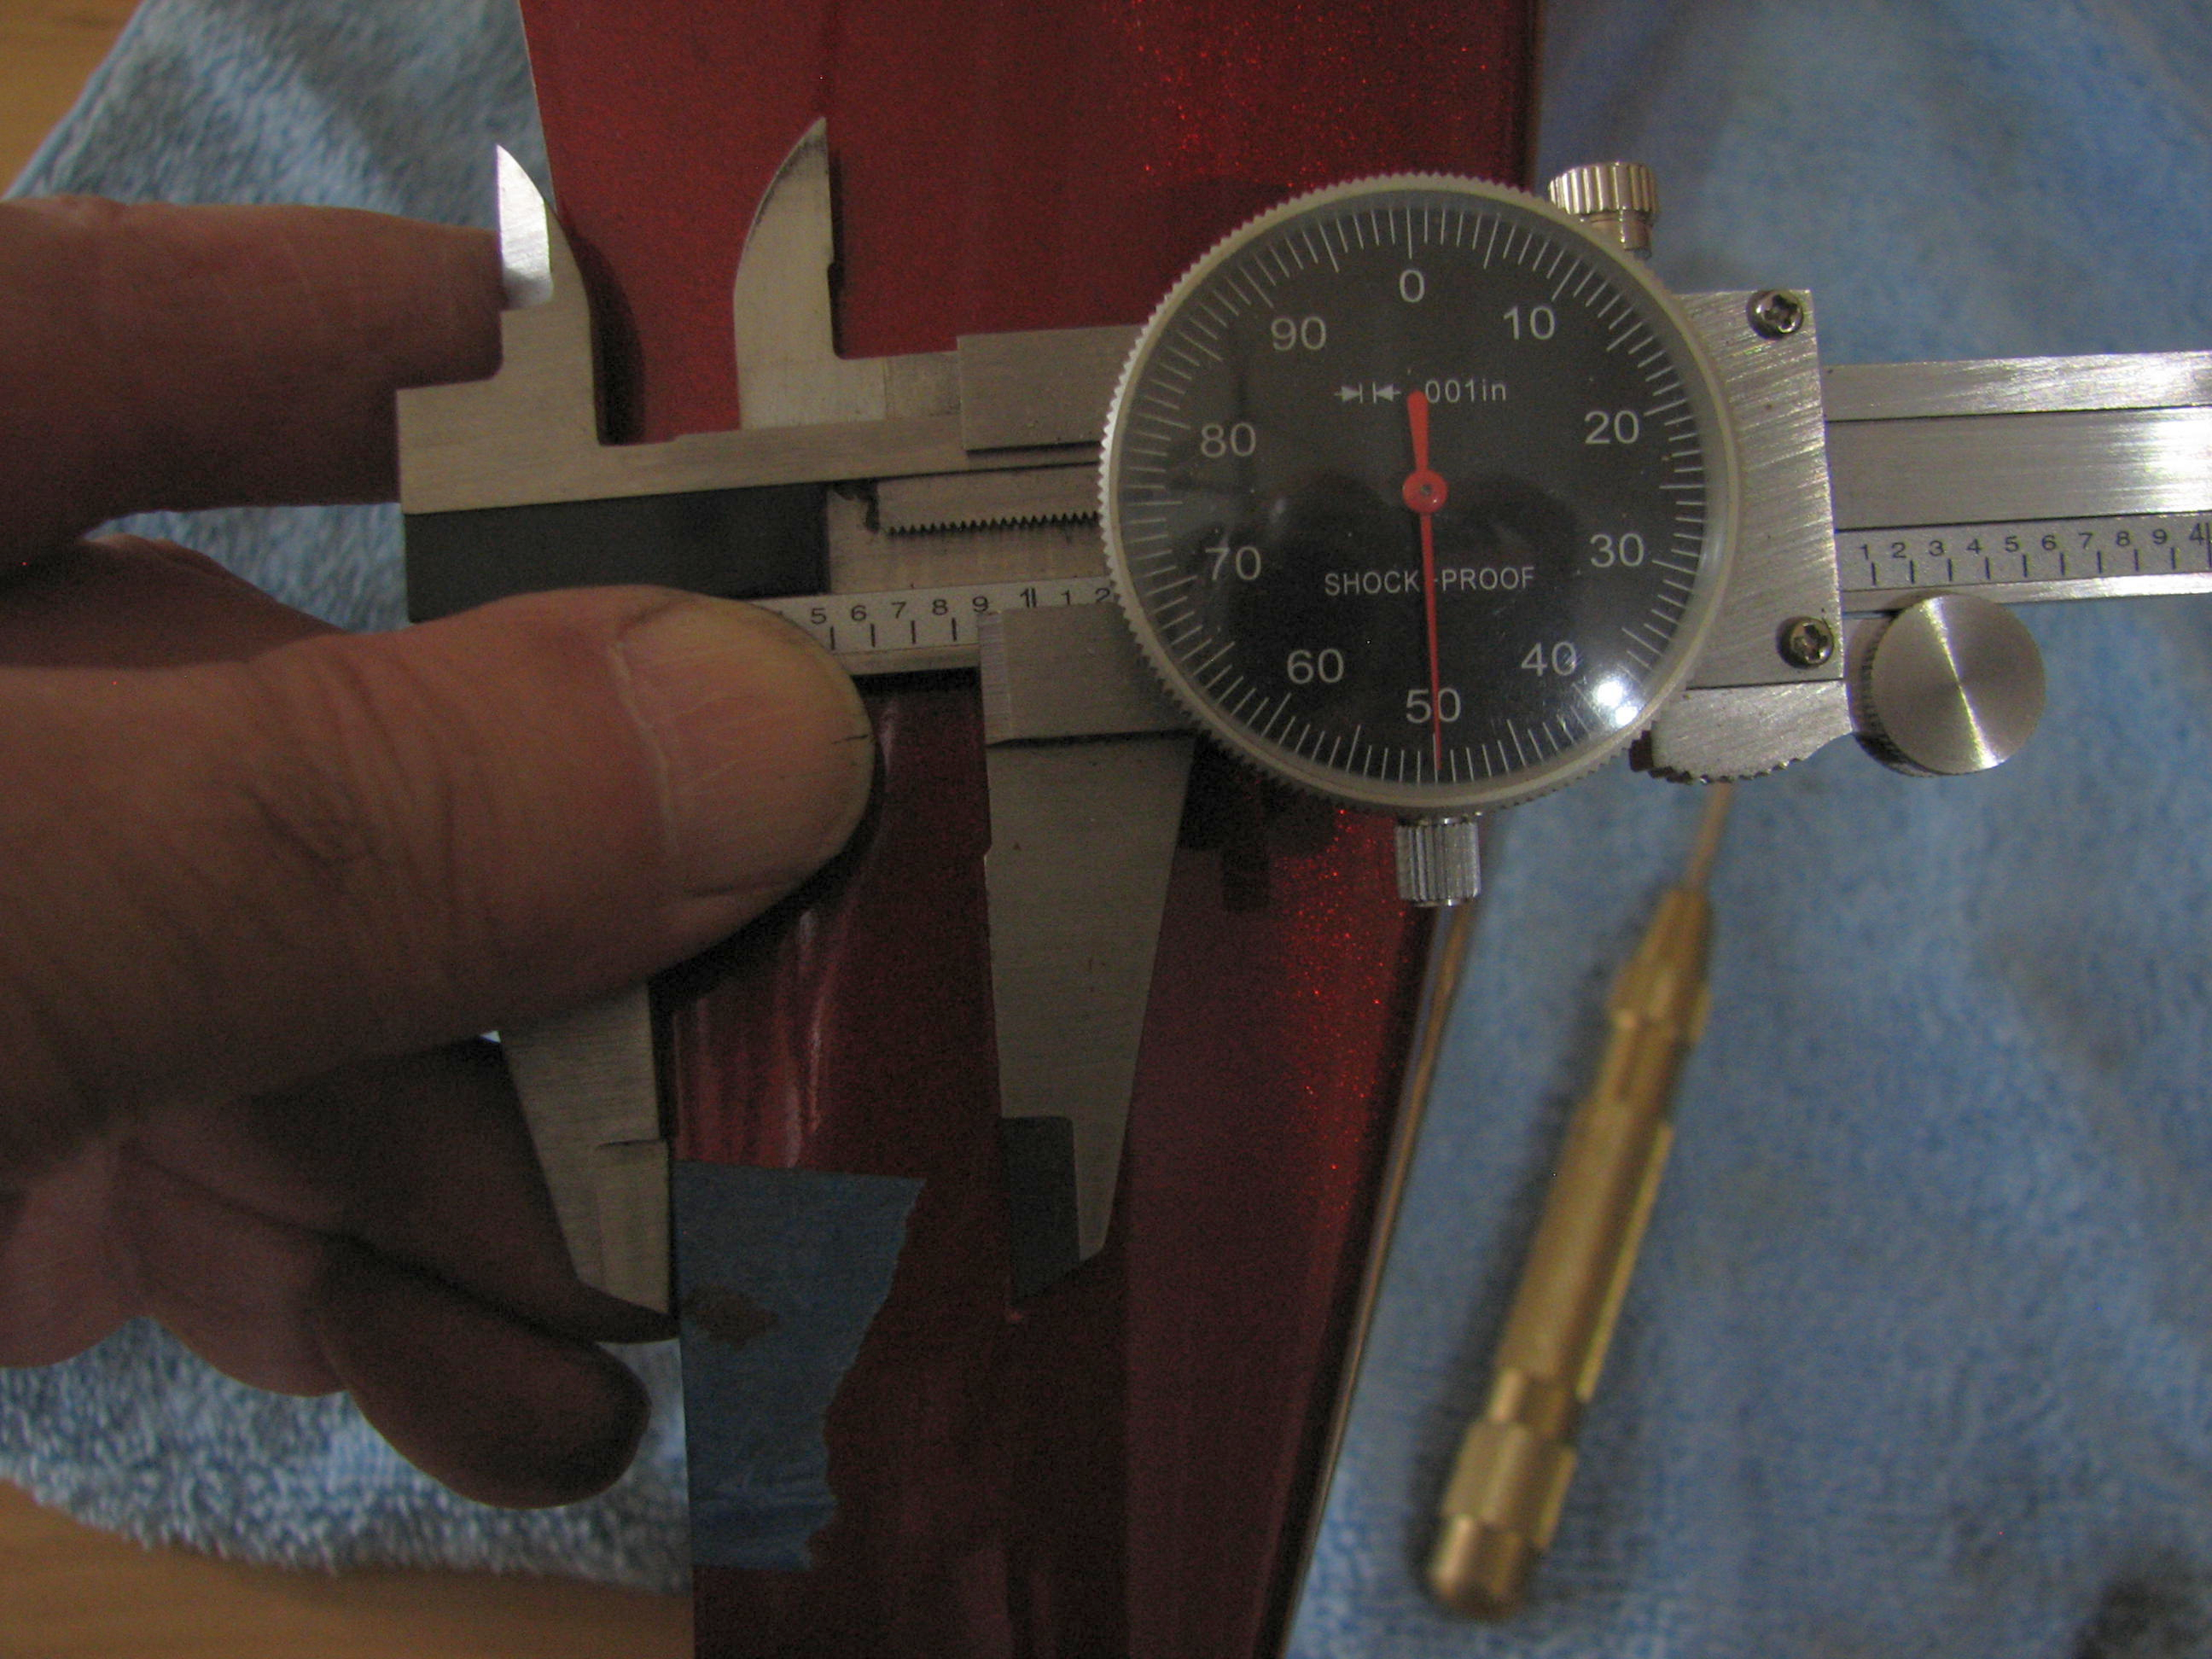
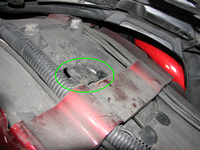
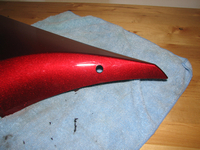
Drill a hole in the side cover. This hole will be on the front curve of the side cover, near the tank, about 1.9" up from the bottom of that area's barb shaft and about 0.9" in from the edge:
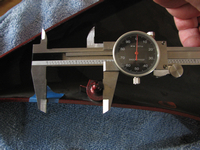
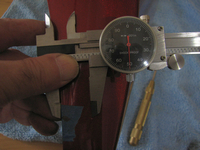
As the hole will be designed to mimic an 11.3mm rim hole2, I used a 29⁄64" bit (which is just a tad larger), after first using a spring-loaded center punch, followed by a few intermediate-sized bits, drilling from the finished side of the side cover:
-
Put the new Schrader valve into the side cover. Tighten snugly, but don't go crazy — you're working with a piece of plastic here, with a slightly curved surface, to boot:
-
De-core the extension hose4. The male end of the extension hose is designed to have air added to it, and so has its own internal Schrader valve. However, in our application, there will be nothing to depress that valve, so it gets removed.
-
Shorten the male end of the extension hose. The external threaded section of the hose extension is far longer than needed for our purposes, and would prevent the hose from being sufficiently curved, near the new Schrader valve, to fit behind the cover. I took a hacksaw and removed about an inch of the threads.
-
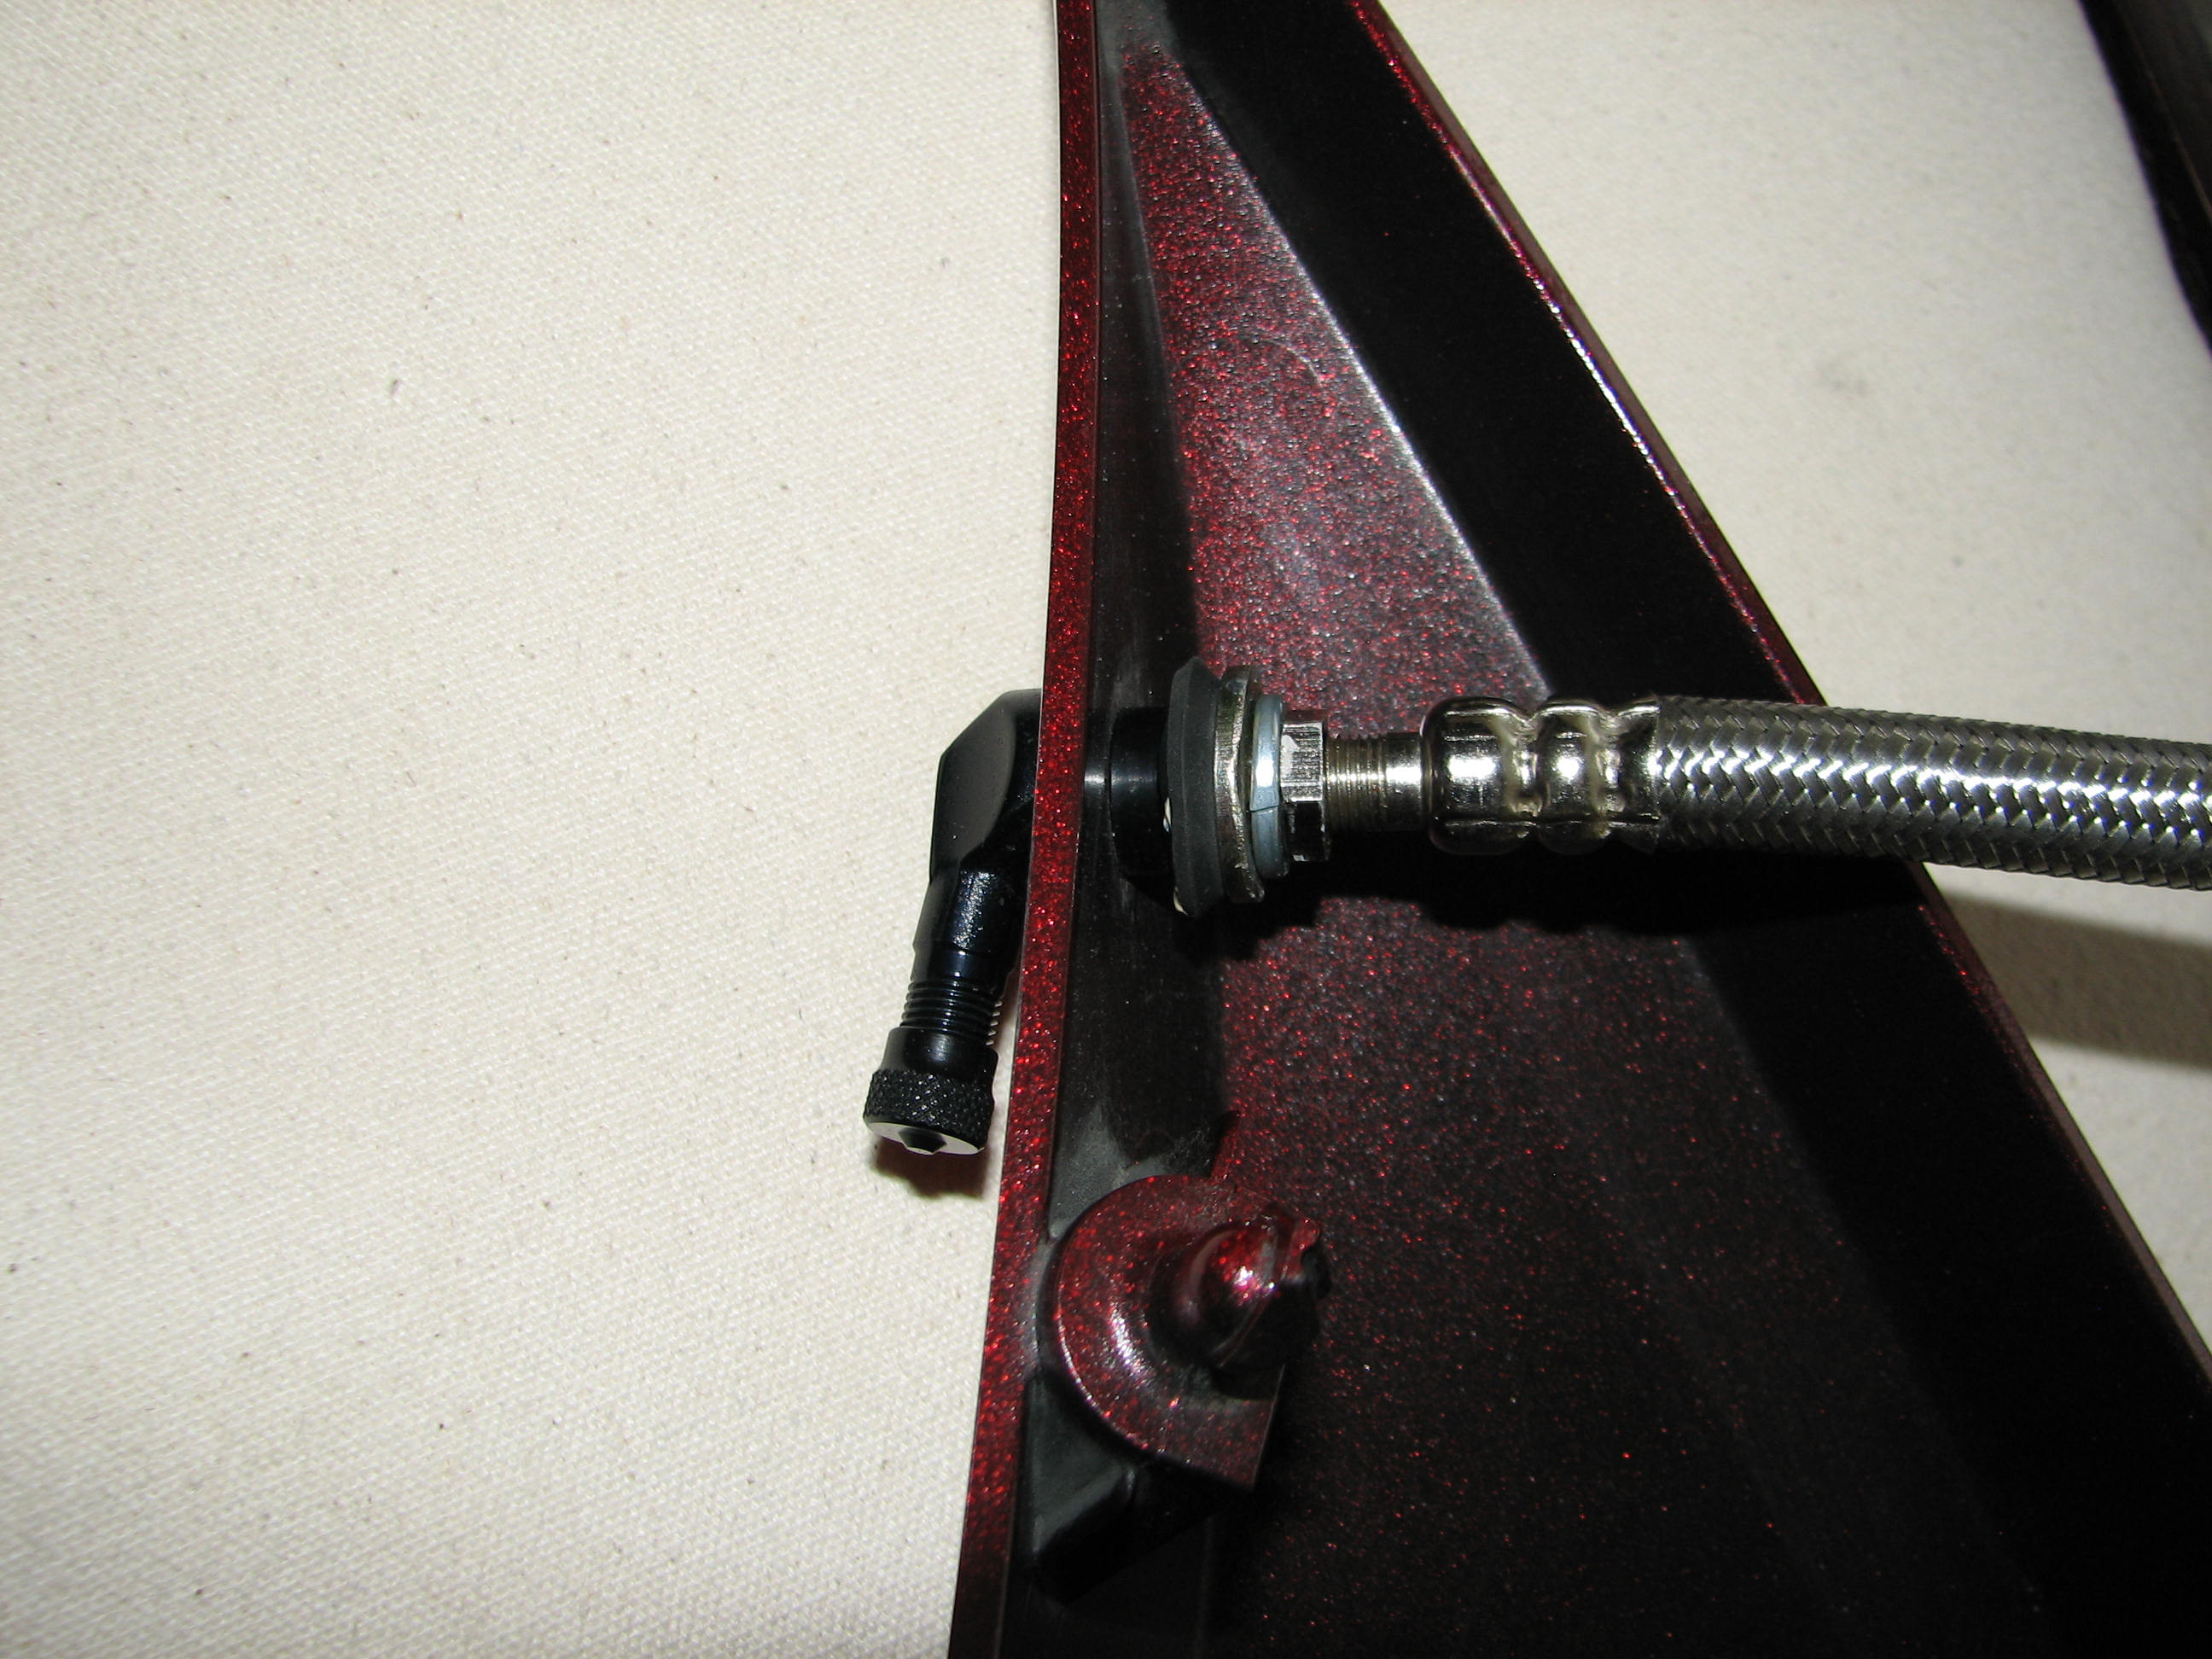
Insert the male end of the extension hose into the new Schrader valve. Because there are no internal rubber washers and suchlike here, I sealed this connection with a very liberal amount of Permatex® "High Temperature Thread Sealant 59214" (or you could use similar products from Loctite® and other manufacturers). I slathered this on the male threads of the extension (except for the very end), and added a rubber washer (also slathered with the sealant as it met the end of the newly tapped housing), a thick metal washer, and the split-ring lock-washer and nut that came on the extension hose:
I let that set up, in the house (as opposed to my chilly garage), for several days5.
-
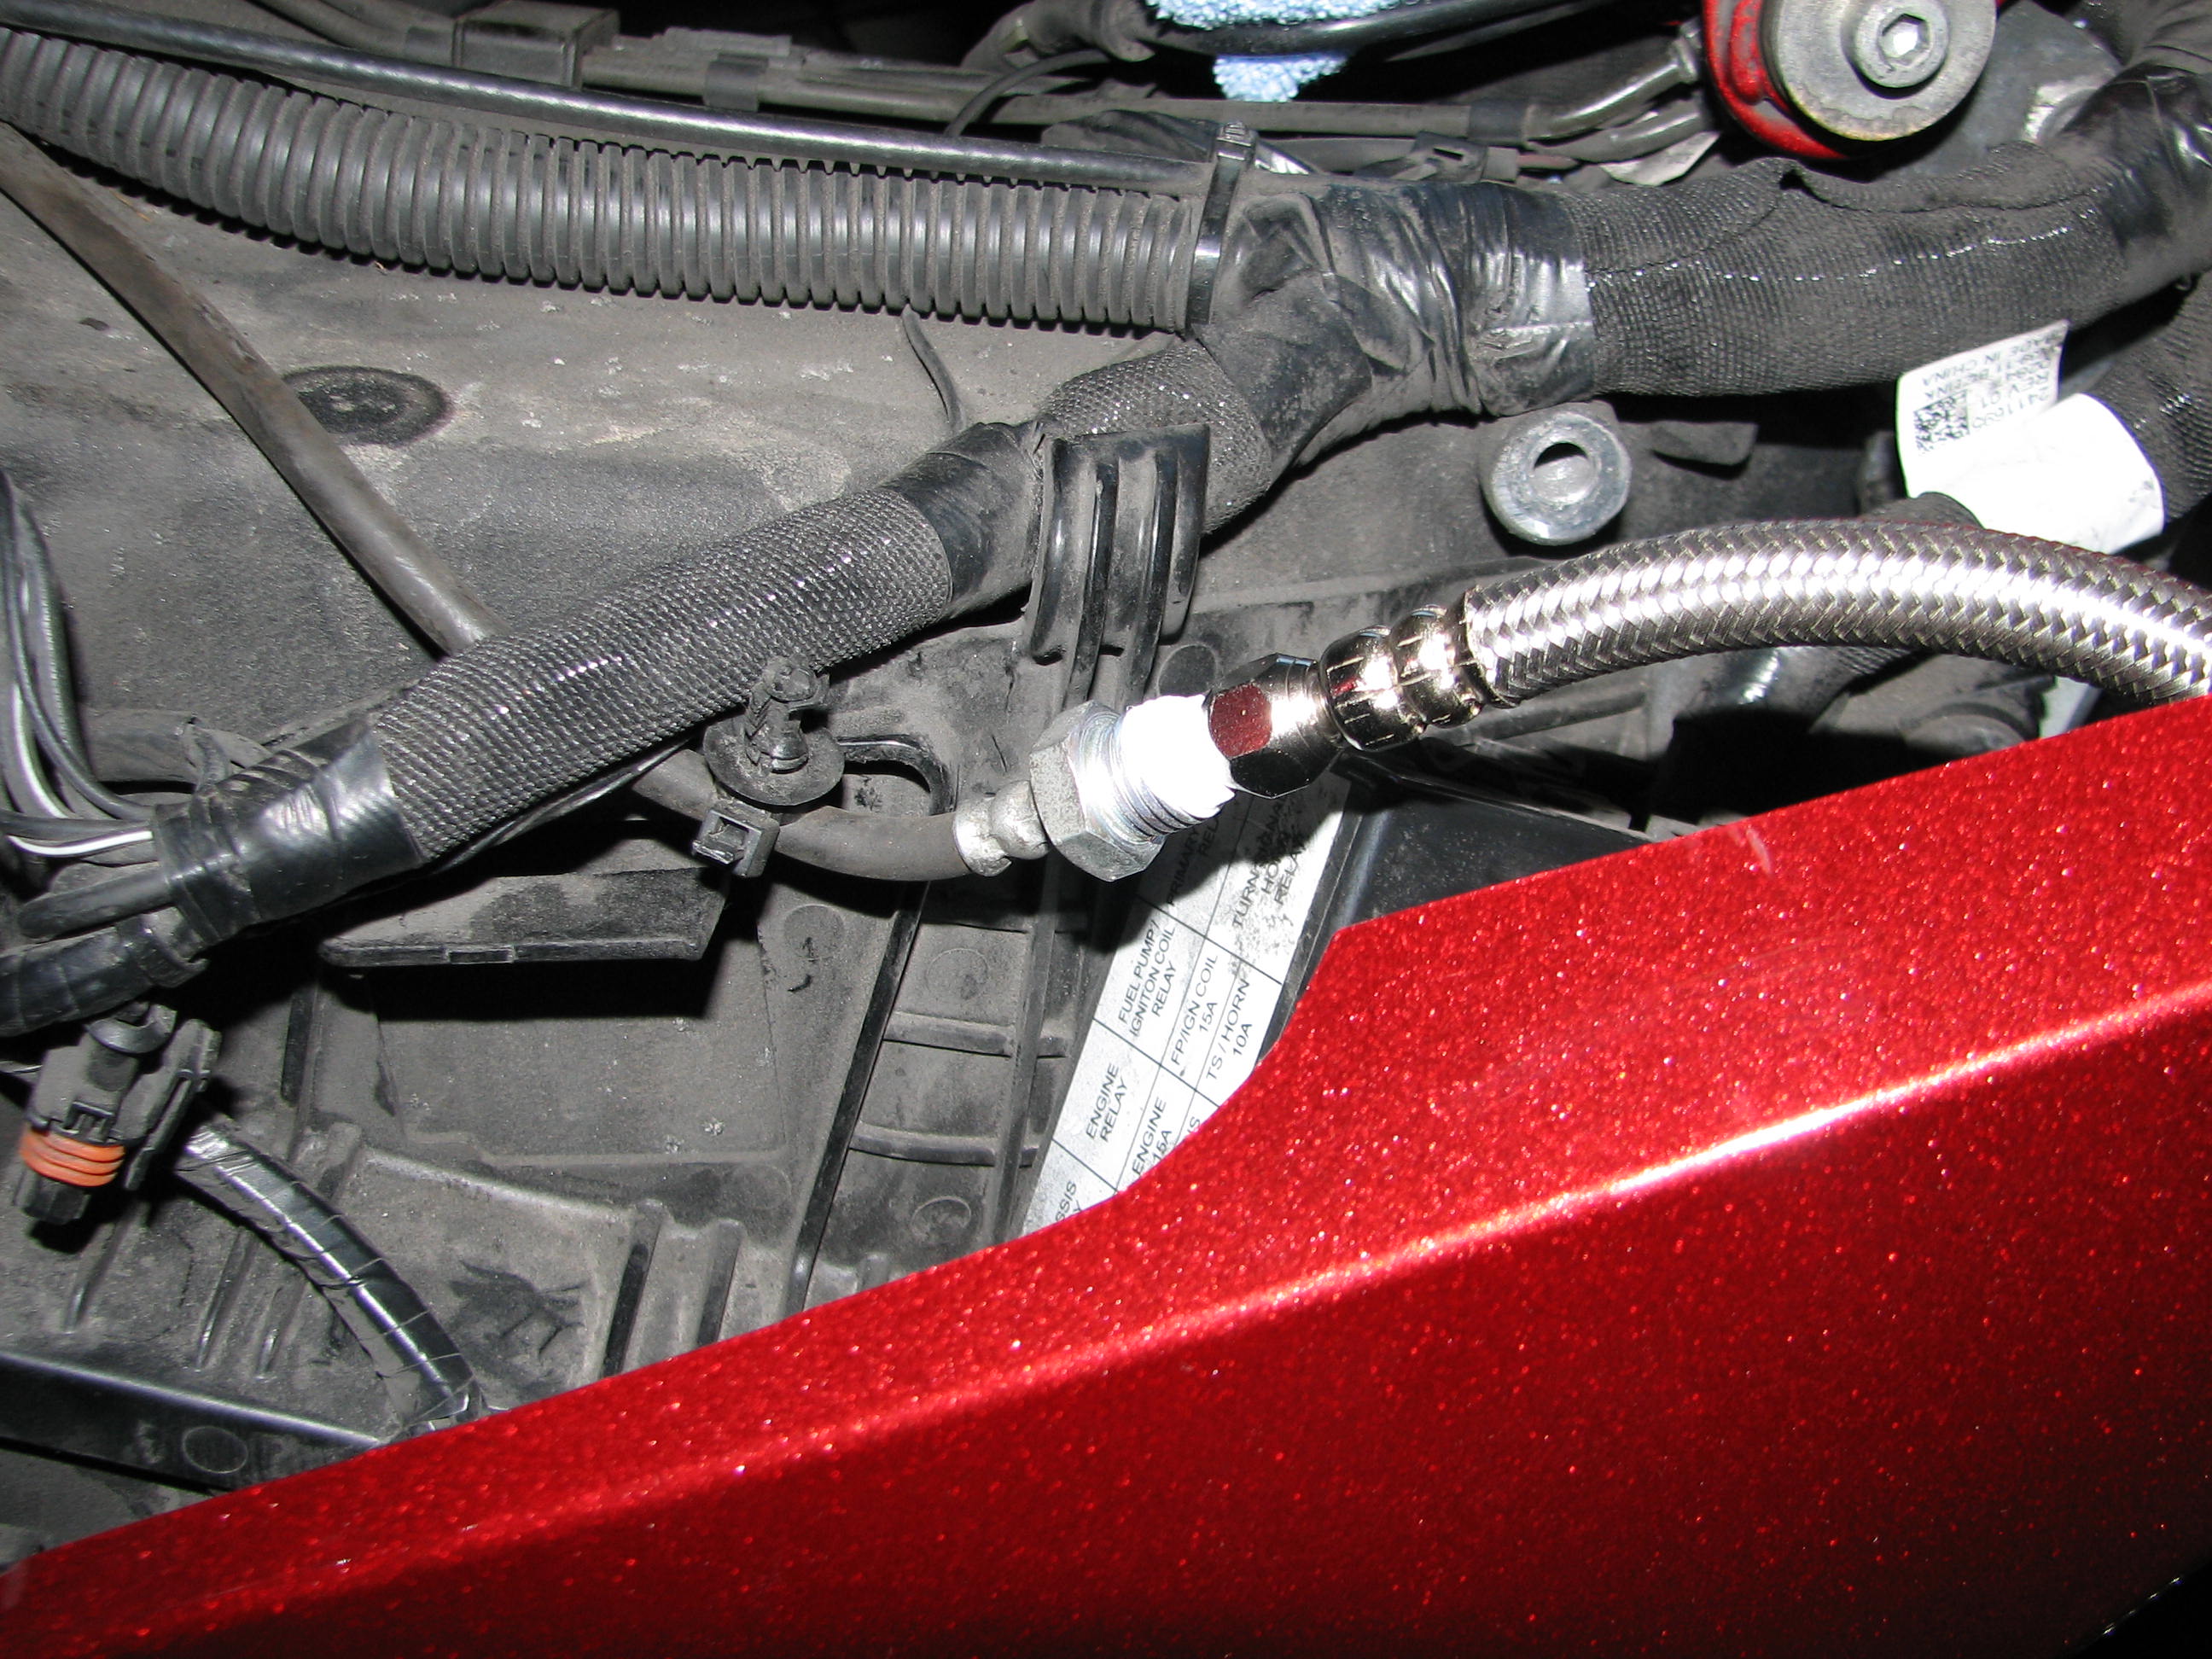
Connect the female end of the extension hose. The assembly consisting of the side cover, the added Schrader valve, and the extension hose will be put on as a single unit, with the extension hose folded over a bit. The (dis)connection point to the bike will be the stock Schrader valve. Because this will be a possible removal point, we don't want to use thread sealant; because we're adding a connector, we don't want a leak, either, so I used ordinary Teflon™ tape here:
Keep in mind that for just accessing a fuse or the seat hold-down bolts, it isn't actually necessary to disconnect anything. Just pulling the side cover out of the three grommets and setting it off to the side, as much as a still-connected extension hose permits, will provide enough room for these tasks.
-
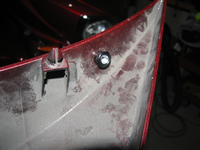
Put the cover back on. Tuck the extension hose behind and underneath the top edge of the side cover, and snap the side cover back in place in the three grommets:

You'll wind up with the ability to add or subtract air from the rear shock, without removing the side cover:
That's it. If you tackle this yourself, good luck. Regardless, thanks for reading this, and I welcome your comments.
Notes:
-
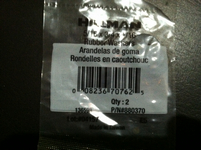
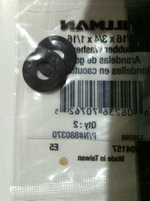
To keep properly re-installed side covers securely in place, I have two recommendations. First, replace the grommets every couple of years. They cost about $1 each, and are Victory part "Grommet, Round, 5413055."
Second, based on a suggestion made by "thumbgone" in this VictoryForums thread from 2014, I added some 3⁄8" heat-shrink tubing (aim the heat gun away from the bulk of the plastic) that I had lying around to the upper front barb on each side:
This change has worked extremely well for several years now.
-
That Schrader valve from KurveyGirl is not for most Victory wheels, so forget about using the extra one on a rim. Most stock Victory rims have an 8.3mm hole, while these are for the more common 11.3mm openings found on the majority of motorcycles. KurveyGirl does sell the valves for the smaller opening, but for our use here you want the larger size, in order to be able to tap it for the extension hose's outside thread.
Another source for a very similar valve (and there are others, as well) is Sound RIDER!, with whom I have also done business. You can buy a single 11.3mm valve from them for $10 plus a reasonable shipping charge. In my case, I wanted a spare, in case I encountered problems tapping it, and I liked that $1 of my KurveyGirl order was a donation to the Roadracing World Action Fund.
-
According to Wikipedia, the external thread size for garden-variety Schrader valves is "0.305 in OD, thread root diameter 0.271 in × 32 tpi." If your toolbox doesn't happen to contain this tap, you may be surprised to learn that such taps are relatively rare.
You can buy a "Vg 8x32 Plug tap DIN7756 Dmax .305," item # GVG080X32MXD, for $55.00 plus about $10 shipping from e-taps.com, in Florida. Another source of this tap is Tracy Tools Ltd, in England. The cost for their equivalent "8V1" tap (available in "1st taper, second or the bottoming" versions) is £25.00, plus shipping to the U.S. There are also a few other, but more expensive, suppliers in England and elsewhere. (By the way, in the United Kingdom, "bottoming" as a tap description may not mean the same thing as it does in the U.S.; see the "Tap" section in Wikipedia's "Tap and die" article.)
-
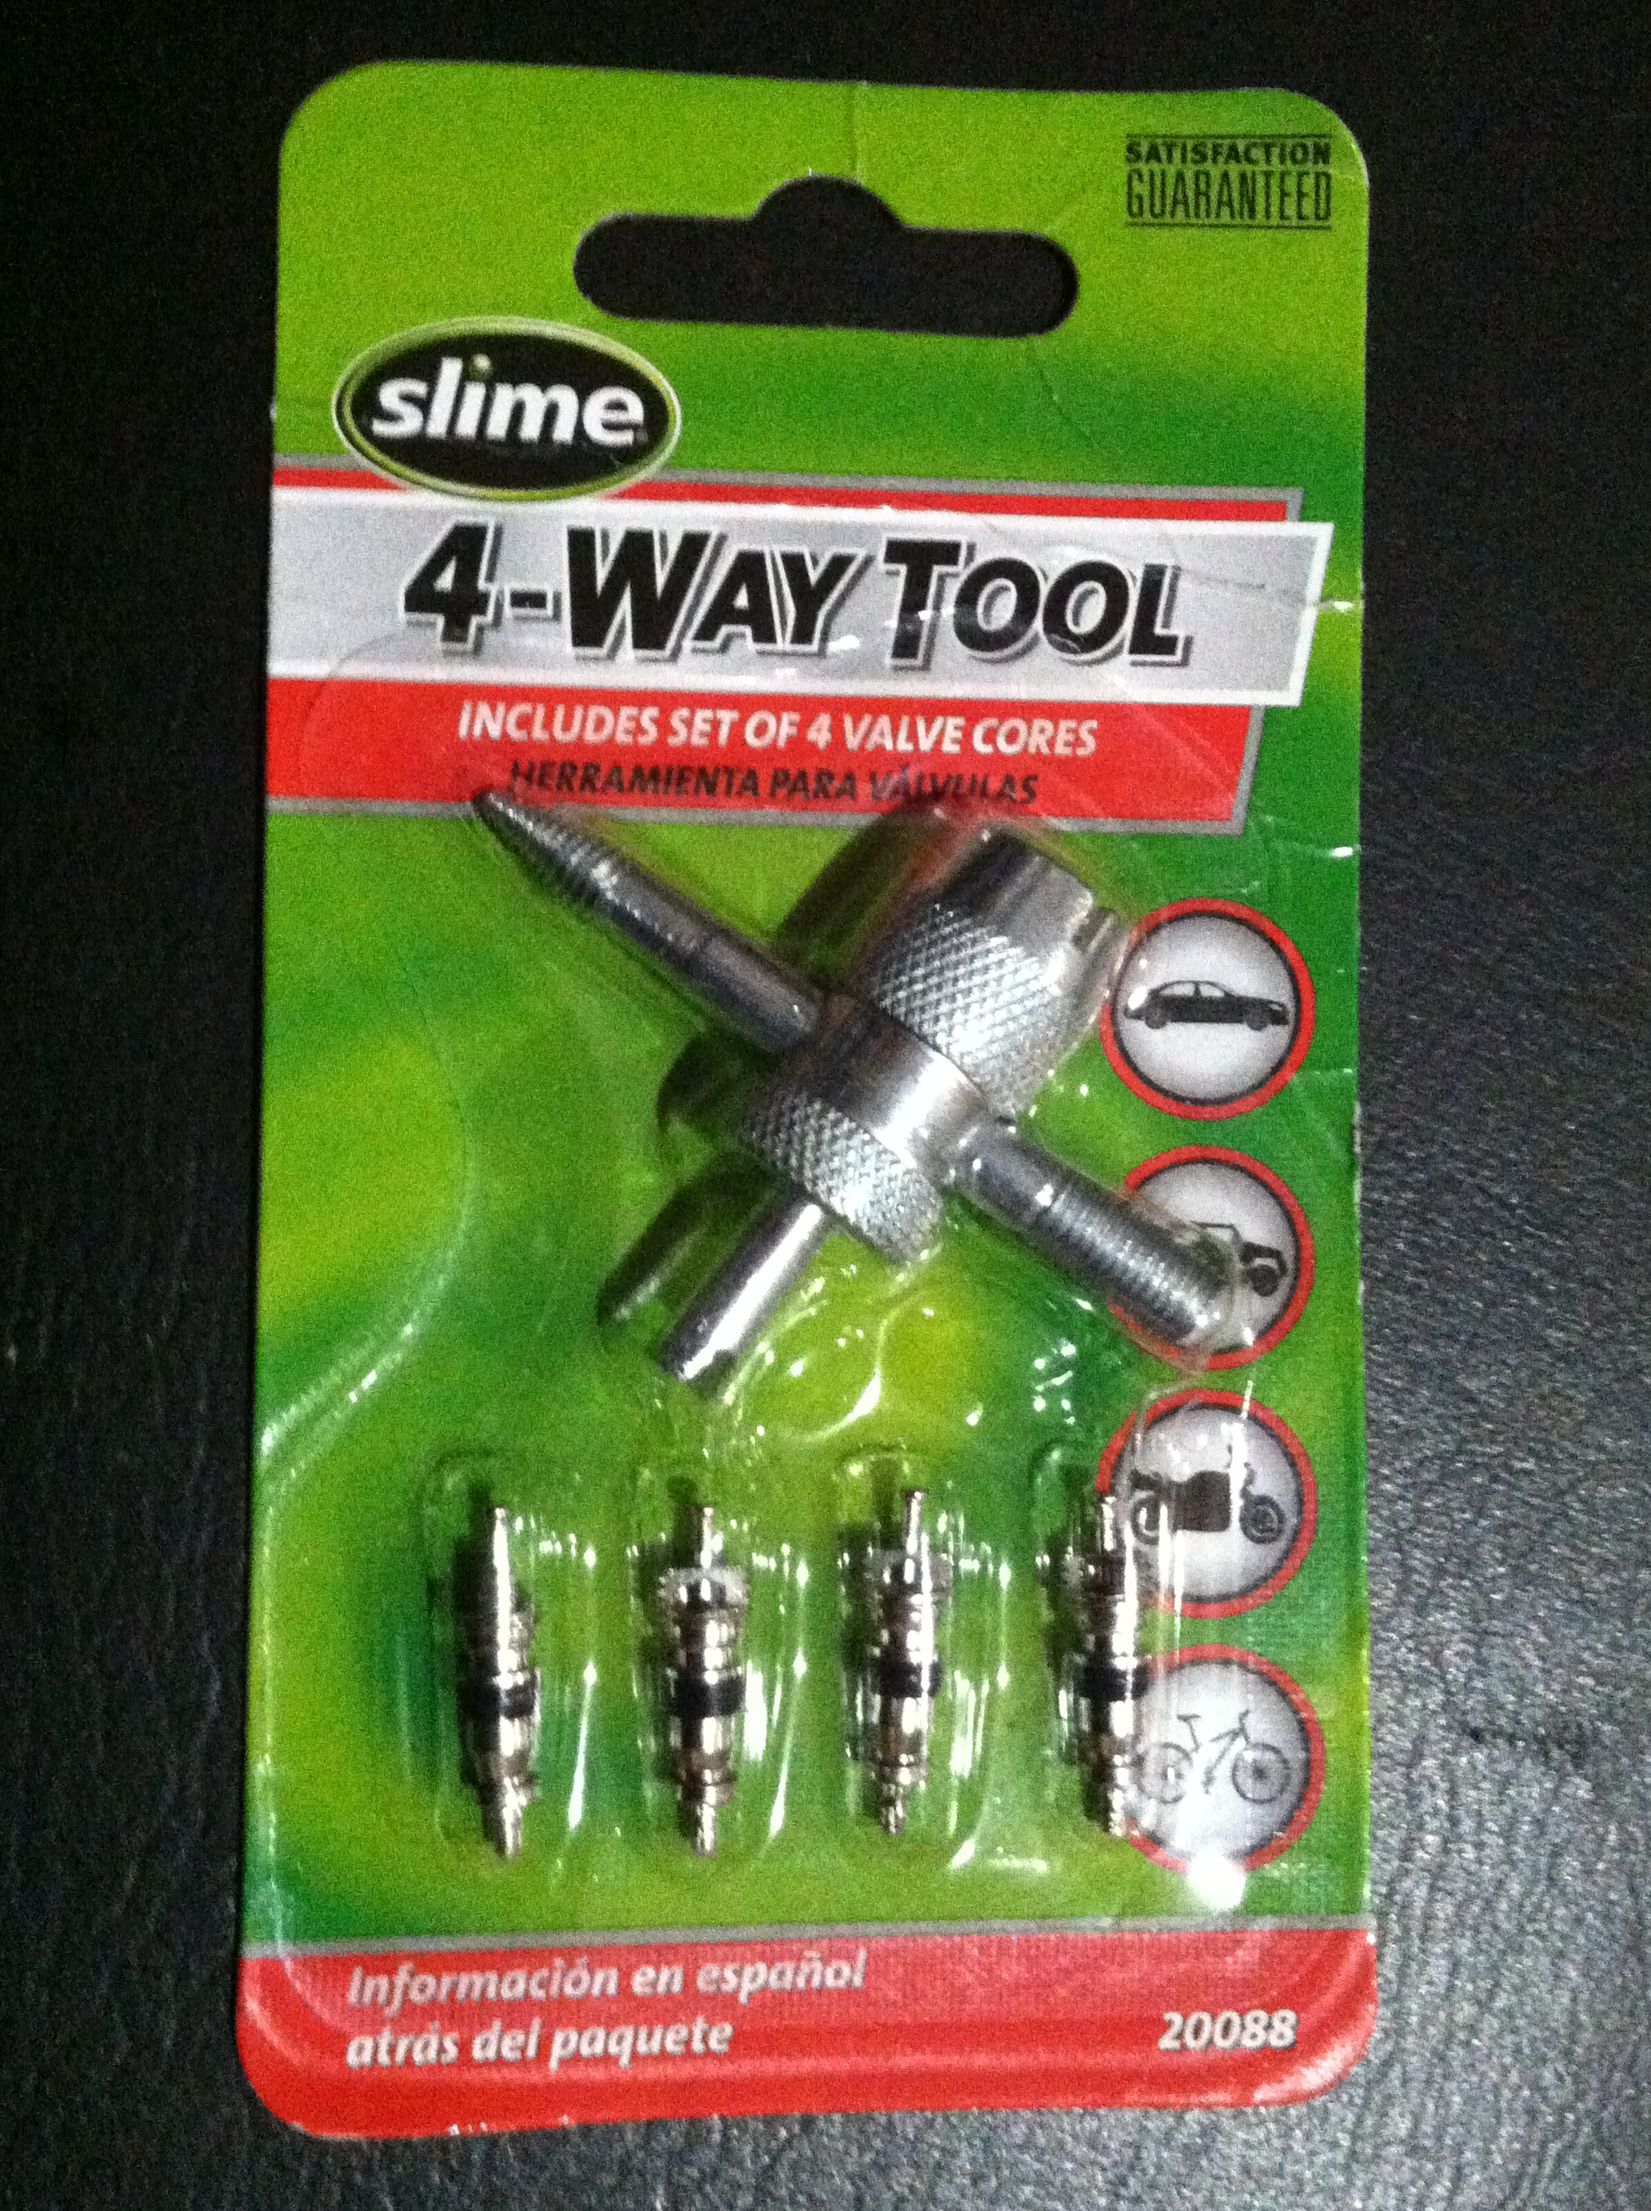
You can get a tool to de-core a Schrader valve at most auto stores, for just a few dollars. This one also includes some extra internal valves:

In the case of the temporary removal of the KurveyGirl Schrader valve, make sure you put it back just as you found it, i.e., such that the needle is even with the end of the valve's external threads.
-
The Technical Data Sheet for Permatex® "High Temperature Thread Sealant 59214" notes that "After 72 hours the joint is sealed to pipe burst pressure" and that it is "Cured 72 hours @ 75°F."
Bill Pollack
January 2014
Niskayuna, NY

|