The Ultimate Motorcycle Windshield Mounting Setup
For A GoPro Camera?
And in any case, I also have some recommendations for some good software to process your GoPro videos.
This document describes my current setup for mounting a GoPro action camera to the front of a motorcycle windshield, how I came to favor this setup, and the products — hardware and software — that I've used. I've been experimenting with similar setups for about six years now, and I explain why I've settled on and am very pleased with my current mounting system and some new and old software.
For those who like to know what's in store, or for returning readers who wish to click back to a given section (as this is a fairly long document), here are the main sections that follow:
-
THE GOALS
-
A NOTE ABOUT MOUNTING LOCATIONS
-
LET'S LOOK AT SOME CAMERA-MOUNTING HARDWARE
-
HARDWARE, TAKE 2
-
AND NOW, HERE'S WHAT MY CURRENT (FINAL?) SYSTEM LOOKS LIKE
-
EPILOGUE: A YEAR LATER, A NEW BIKE, AND BACK TO ONE SUCTION CUP
-
OK, LET'S TALK ABOUT SOFTWARE
-
THE EARLY DAYS — A COLLECTION OF DEVICES AND CONCOMITANT SOFTWARE
-
THE NEXT ITERATION — LESS HARDWARE, LESS SOFTWARE
-
FINISHING UP WITH TELEMETRY OVERLAYING, WITH TELEMETRY OVERLAY
-
AUTOMATED ROUTE DISPLAY WITH GOPRO TELEMETRY EXTRACTOR PREMIUM AND GOOGLE MAPS
-
VIDEO EDITING, IN THIS CASE USING MOVAVI VIDEO EDITOR
-
GOPRO SETTINGS AND MEMORY CARDS
Let's get to it, then.
I. THE GOALS:
My goals — and if yours differ from mine, much of this document may be irrelevant to you — have been the following:
-
Have the camera mounted on the bike, as opposed, for example, to a helmet-mounted system.
-
Have this mount secure enough to withstand potholes and similar abuse.
-
Be able to record a full day's ride, with minimal fuss.
-
Be able to easily remove the camera for lunch stops and suchlike.
-
Be able to easily re-mount the camera after lunch, in its prior position, with minimal fuss.
-
Not have to worry about rain during the ride.
This means, for instance, that I have an external power source, instead of swapping out batteries during the day. Also, that wired connection must be weather-resistant. And, once adjusted, the camera should stay put, and no further adjustments should be necessary, even after removing and reattaching the camera.
II. A NOTE ABOUT MOUNTING LOCATIONS:
Before you send me an irate email, telling me that you prefer a camera mounted elsewhere — say, on a helmet — let me note that I'm aware of such alternatives.
A helmet-mounted camera has several advantages. It has the rider as a built-in shock absorber, for potentially smoother videos. And you can turn your head, to capture views off to the side, which would not be in the field of view of a camera pointed straight ahead. Those are valid concerns, and there are probably other advantages.
Nevertheless, I prefer a more bike-centric video, one that captures the direction and view traveled, and leans with the bike. Further, when watching videos taken via helmet-mounted cameras, I often feel like I'm getting whiplash, as the videographer turns his or her head off to the side and back.
If you do mount the camera on a bike, where exactly do you put it? Some possibilities:
-
On the front of the windshield.
-
On the rider's side of the windshield.
-
Someplace else.
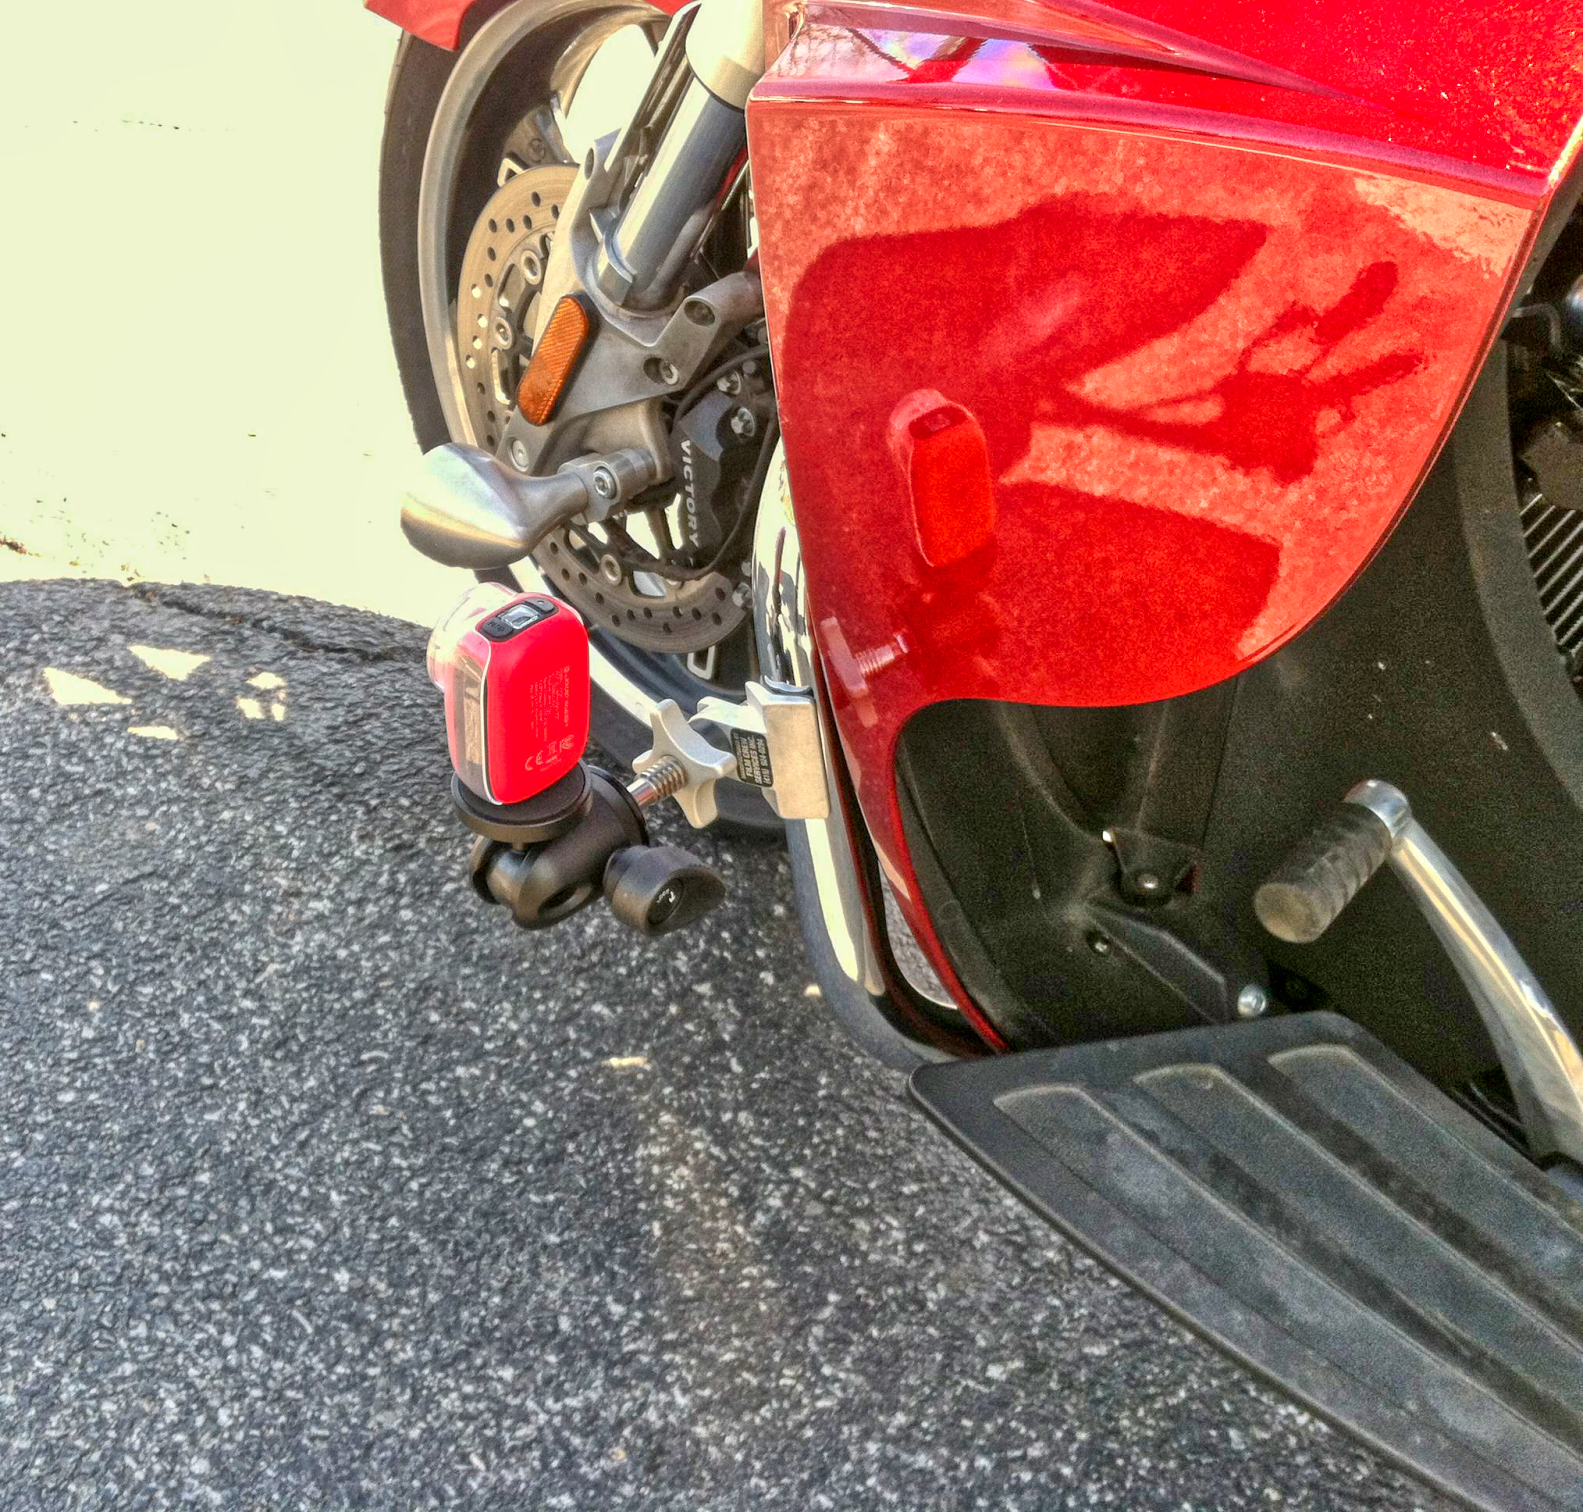
For instance, in the "someplace else" category, for a few rides back in 2013, I mounted my first action camera (a Liquid Image Ego 727) low, on the left side crash bar of a Victory bagger.
As with this and all subsequent pictures on this page, click on the image to enlarge it, and then press Escape or Enter or click the "X" (which appears if you hover your mouse over it) to close the enlargement:
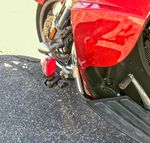
Here's a video made with that mounting setup:
It's an interesting perspective for occasional use, for a change of pace, but I wouldn't want to record a few hours of a travelogue-like video that way.
Getting back to a more prosaic location, if you mount the camera on the rider's side of the windshield, you have the advantage of protecting the camera's lens from road debris and errant bugs. And I've experimented with this location, with both suction-cup and crossbar mounts. The problem here is that you often get reflections off the windshield; also, if the windshield is tinted, you lose brightness.
And so, I generally settle on a front-of-the-windshield, suction-cup-based, mount. You may have to clean off the lens more often, but if you do, it's much easier to clean the one square inch of a GoPro lens cover than it is to keep a much larger area of the windshield spotless, if you were to mount the camera behind that. If worse comes to worse, you can even replace the stock lens cover on a GoPro for about $20. But that's about it, for the negative aspects of this location, for my easy, routine, trip-documentation purposes.
Probably the best riding travelogues employ multiple cameras, mounted in those (and other) ways. Then the results can be synchronized and masterfully combined, sans whiplash, via video-editing software. If you've ever watched some of Itchy Boots' videos on YouTube, you can get a feel for this professional level of combining cameras (and, yes, she mostly relies on helmet-mounted cameras for those videos); me, I don't have the time or talent to do that kind of editing.
III. LET'S LOOK AT SOME CAMERA-MOUNTING HARDWARE:
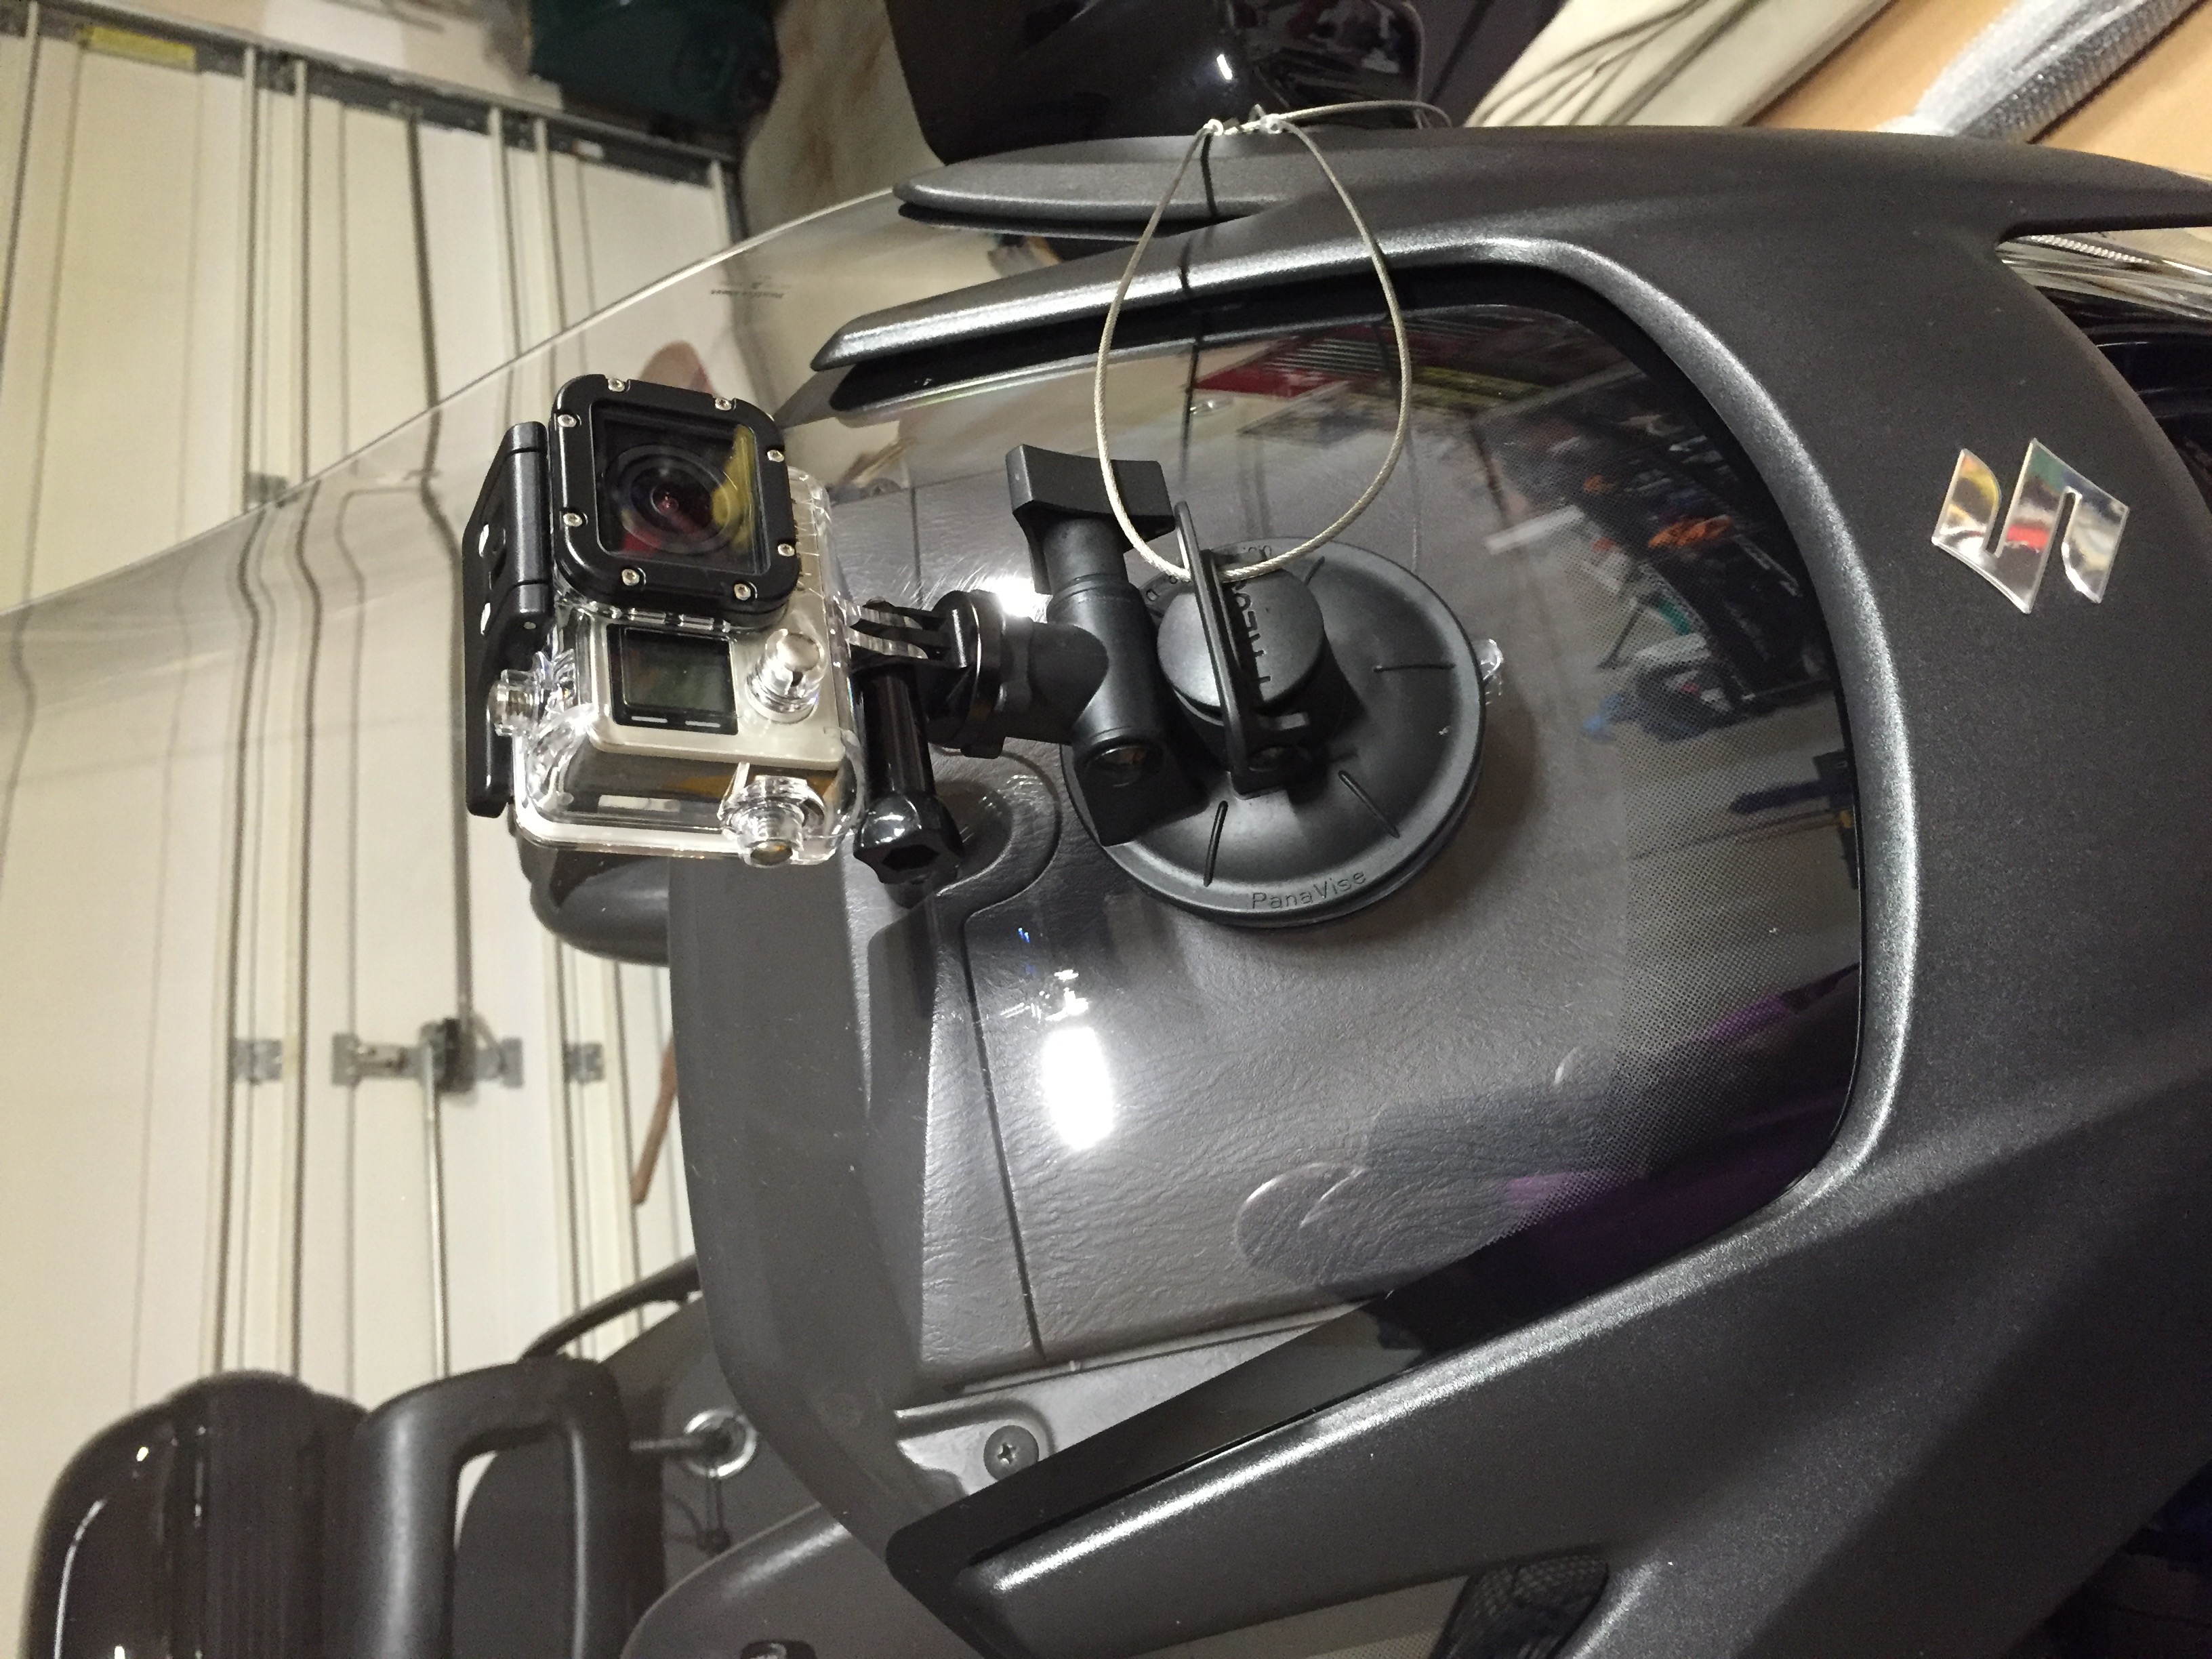
The system I used for a few years, attempting to achieve my goals, initially looked like this:
That original system consisted of the following components:
-
A PanaVise 13101 ActionGrip Shorty Suction Cup Camera Mount (available at Amazon).
-
A Smatree 4-in-1 Aluminum Thumbscrew Accessories Tripod Mount Adapter.
-
A GoPro Hero4 Silver camera, in a corresponding GoPro waterproof case.
This was my initial, basic, setup. It failed to meet several of my goals, in that it couldn't be charged, i.e., externally powered, while being protected from the elements. Also, temporarily stowing it away, and precisely repositioning it, could not be accomplished with the ease that I wanted.
IV. HARDWARE, TAKE 2:
So eventually I moved on, somewhat in conjunction with my purchase of a Hero7 Black camera. With the release of Hero5 and later models, two (of many) features GoPro added were worth the upgrade cost to me: a built-in GPS, enabling the capture of telemetry data, and a very well implemented software-based image stabilization capability.
In any case, my modified setup now looked like this:
That setup, which I used for a few years, consisted of the following physical components:
-
The same PanaVise 13101 ActionGrip Shorty Suction Cup Camera Mount as before.
-
A Manfrotto 494 Mini Ball Tripod Head.
-
The same Smatree 4-in-1 Aluminum Thumbscrew Accessories Tripod Mount Adapter as before.
-
A GoPro Hero7 Black camera, with its corresponding GoPro mounting bracket.
-
A 3BR Powersports X~PWR H5 All-Weather External Power Kit.
-
A bike-powered USB outlet, e.g., the 3BR Powersports PANEL TAPP.
This setup pretty much checked all the boxes:
-
The Manfrotto ball head allowed the camera to be positioned precisely, and the tripod screw locked into a single position. This meant that for lunch-time removal, I could leave all the adjustment points — the thumbscrew in the Smatree adapter connected to the GoPro, the two adjustment mechanisms in the Manfrotto ball head, and the locking ring connecting the PanaVise suction cup to the ball head — intact, tightened up for the riding season.
All I had to do was unscrew the Smatree adapter, where it met the top (tripod base) of the Manfrotto ball head; post prandial, I could just twirl that connection back together.
-
The 3BR Powersports X~PWR H5 allows the Hero7 to be charged while in use, and its connection to the camera is rainproof. Surprisingly, until very recently (see below) this dual capability is not something that GoPro, the company, provided for. While the Hero7 (along with later models) is waterproof — as is, without a special case — to a reasonable depth, it has to run on battery power to preserve that capability.
The X~PWR H5 does not allow for submersion, as the waterproof side cover of the Hero7 is swapped out, but it will deal with rain just fine. You can see what this product looks like in the first picture of this setup; that's a stick-on cover, atop a special USB cable, and a thumbscrew to keep things tightly in place.
-
Also, that setup continued to be nicely secure. In 2019, I transported this gear to Europe, for a week of riding in the Alps, as part of Edelweiss' Touring Center Alps booking. The day before the tour began, I affixed the PanaVise suction cup to the windshield of the bike I would be riding (a Yamaha Niken), fiddled with the various adjustments, and tightened everything up.
During the week: 1) I did not mess with these adjustments at all, and; 2) I managed to drop the bike, twice, at little or no speed. Here is a video that starts off with my stalling the bike, which results in one of those drops, and you can see that everything remains in place, and the camera just keeps rolling. Some of the audio in the recording below is NSFW, or children, etc., so turn down the sound, if necessary!:
Did I mention, regarding the video above: some of the audio is NSFW, or children, etc., so turn down the sound, if necessary!
V. AND NOW, HERE'S WHAT MY CURRENT (FINAL?) SYSTEM LOOKS LIKE:
Moving still farther along, this year I revised my revised system. This was in conjunction with two events: once again, I bought a newer GoPro, and I also discovered another source of connection hardware.
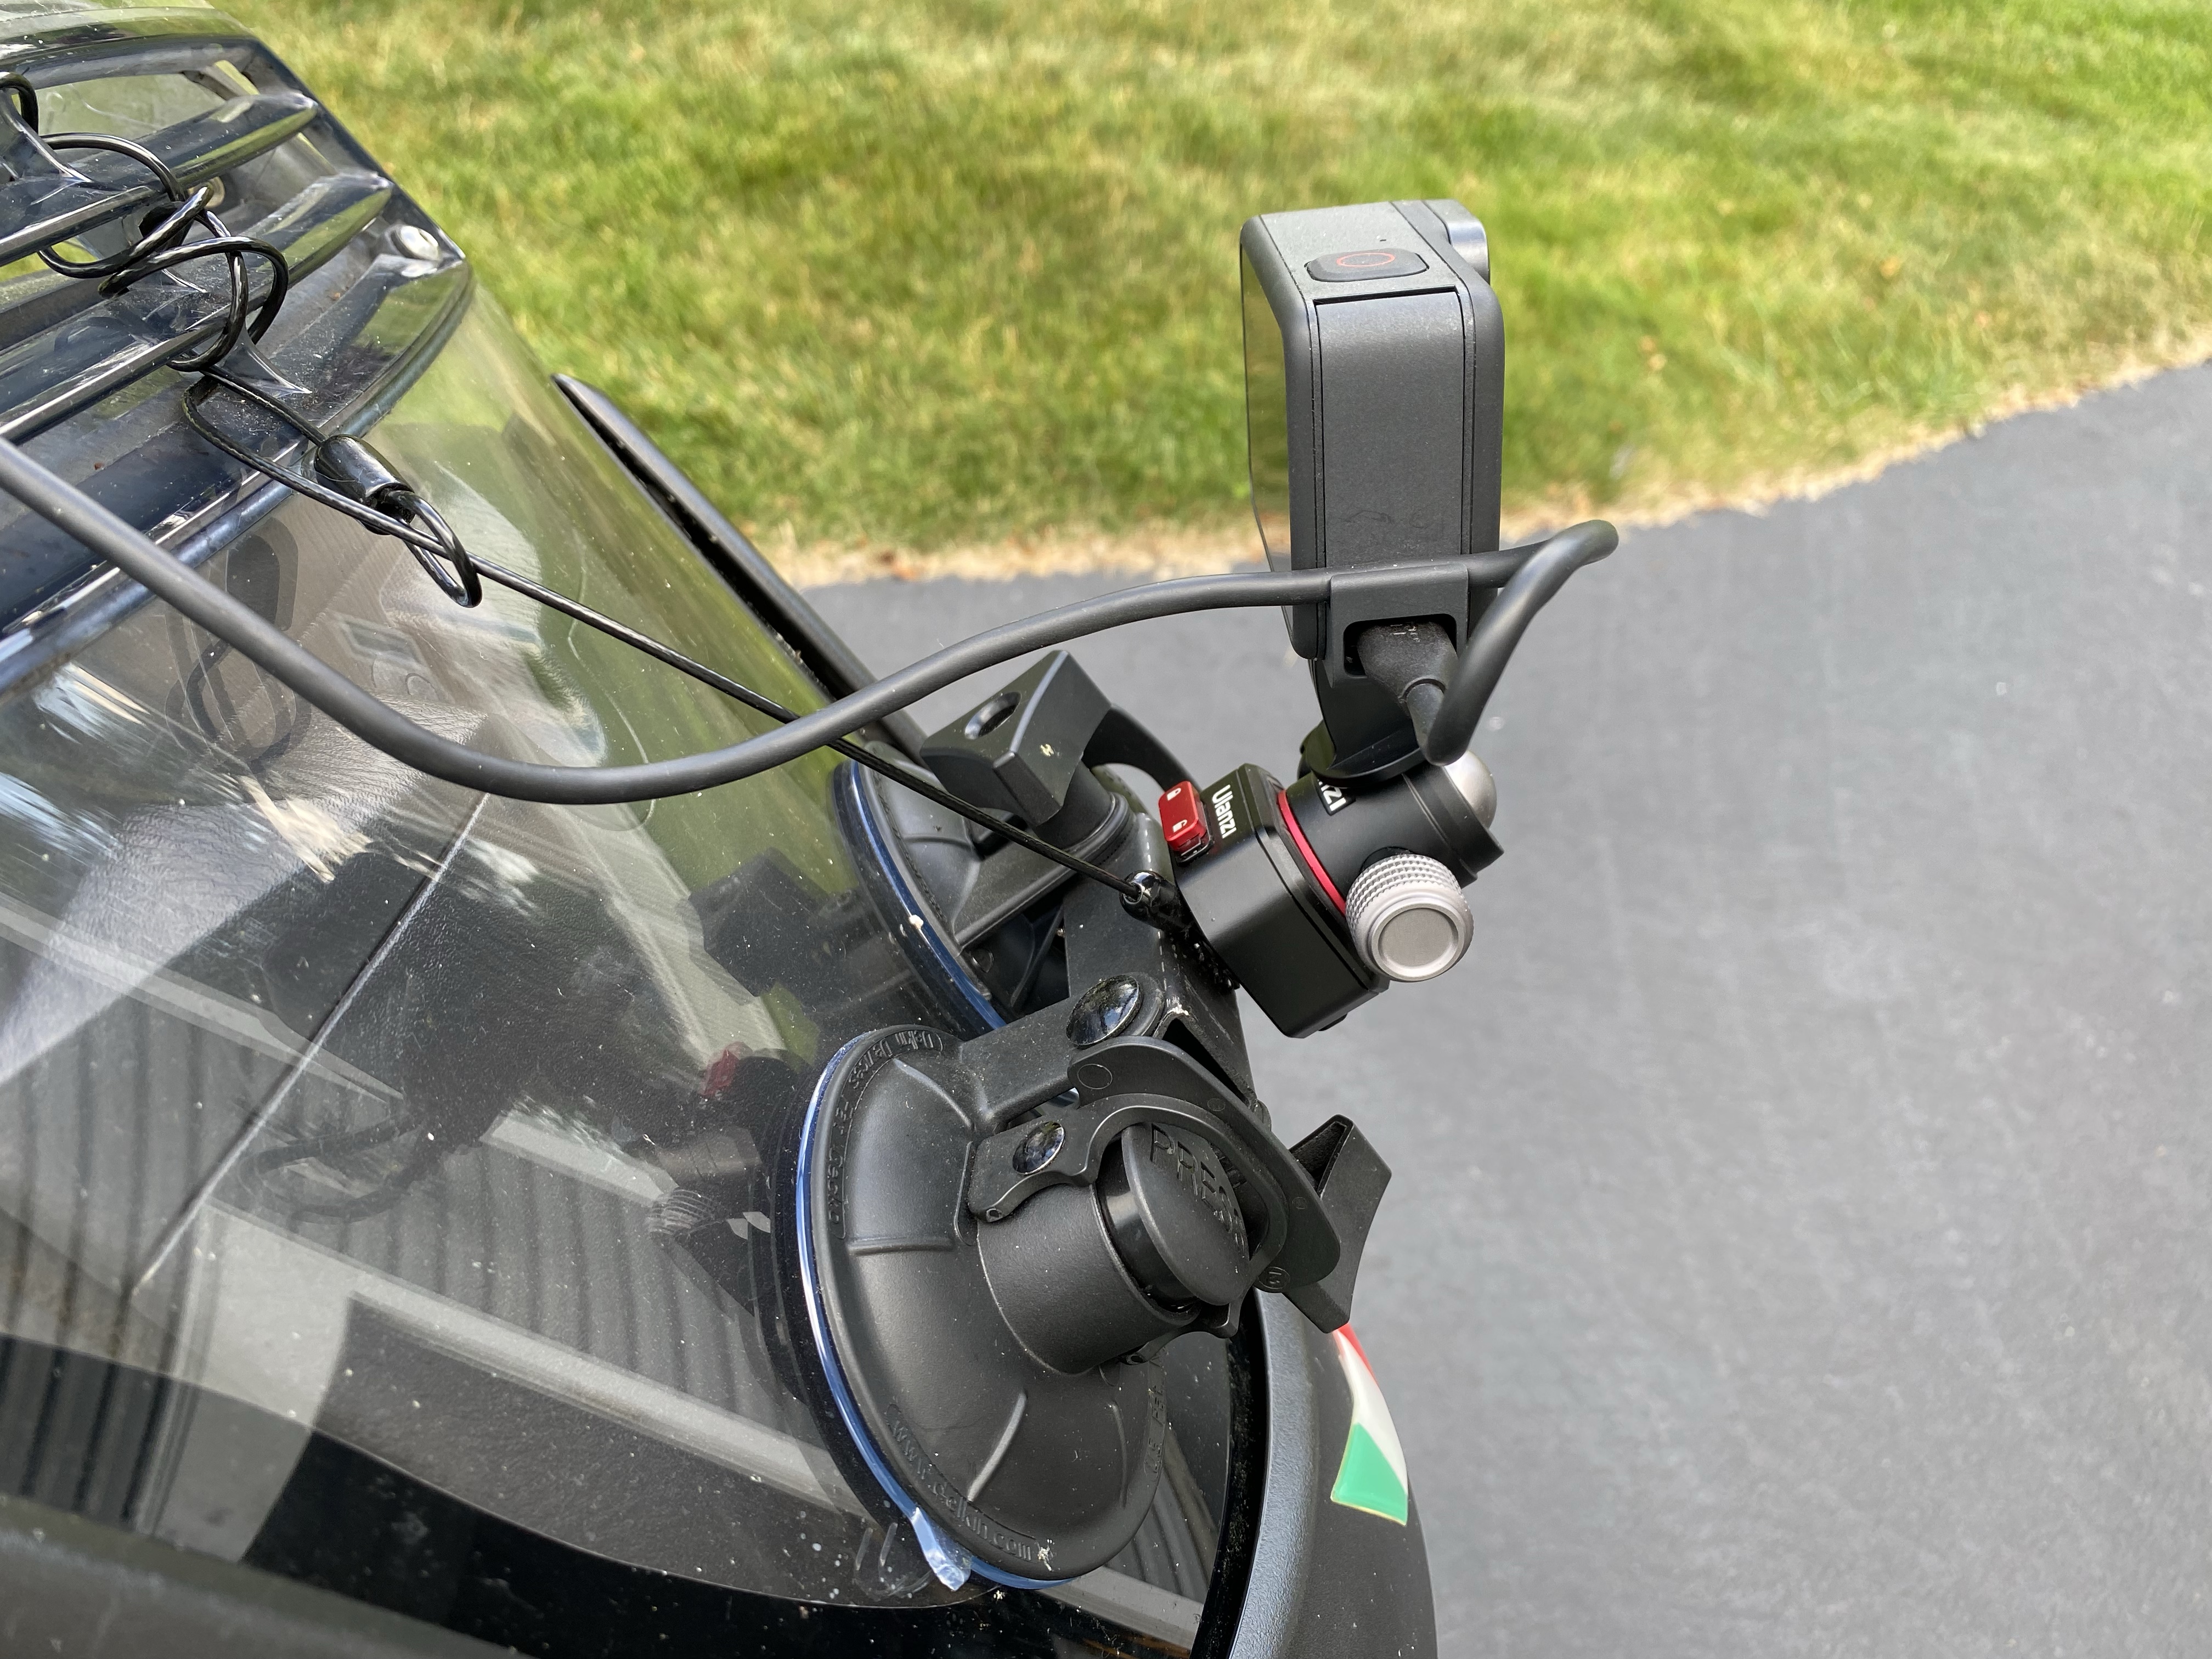
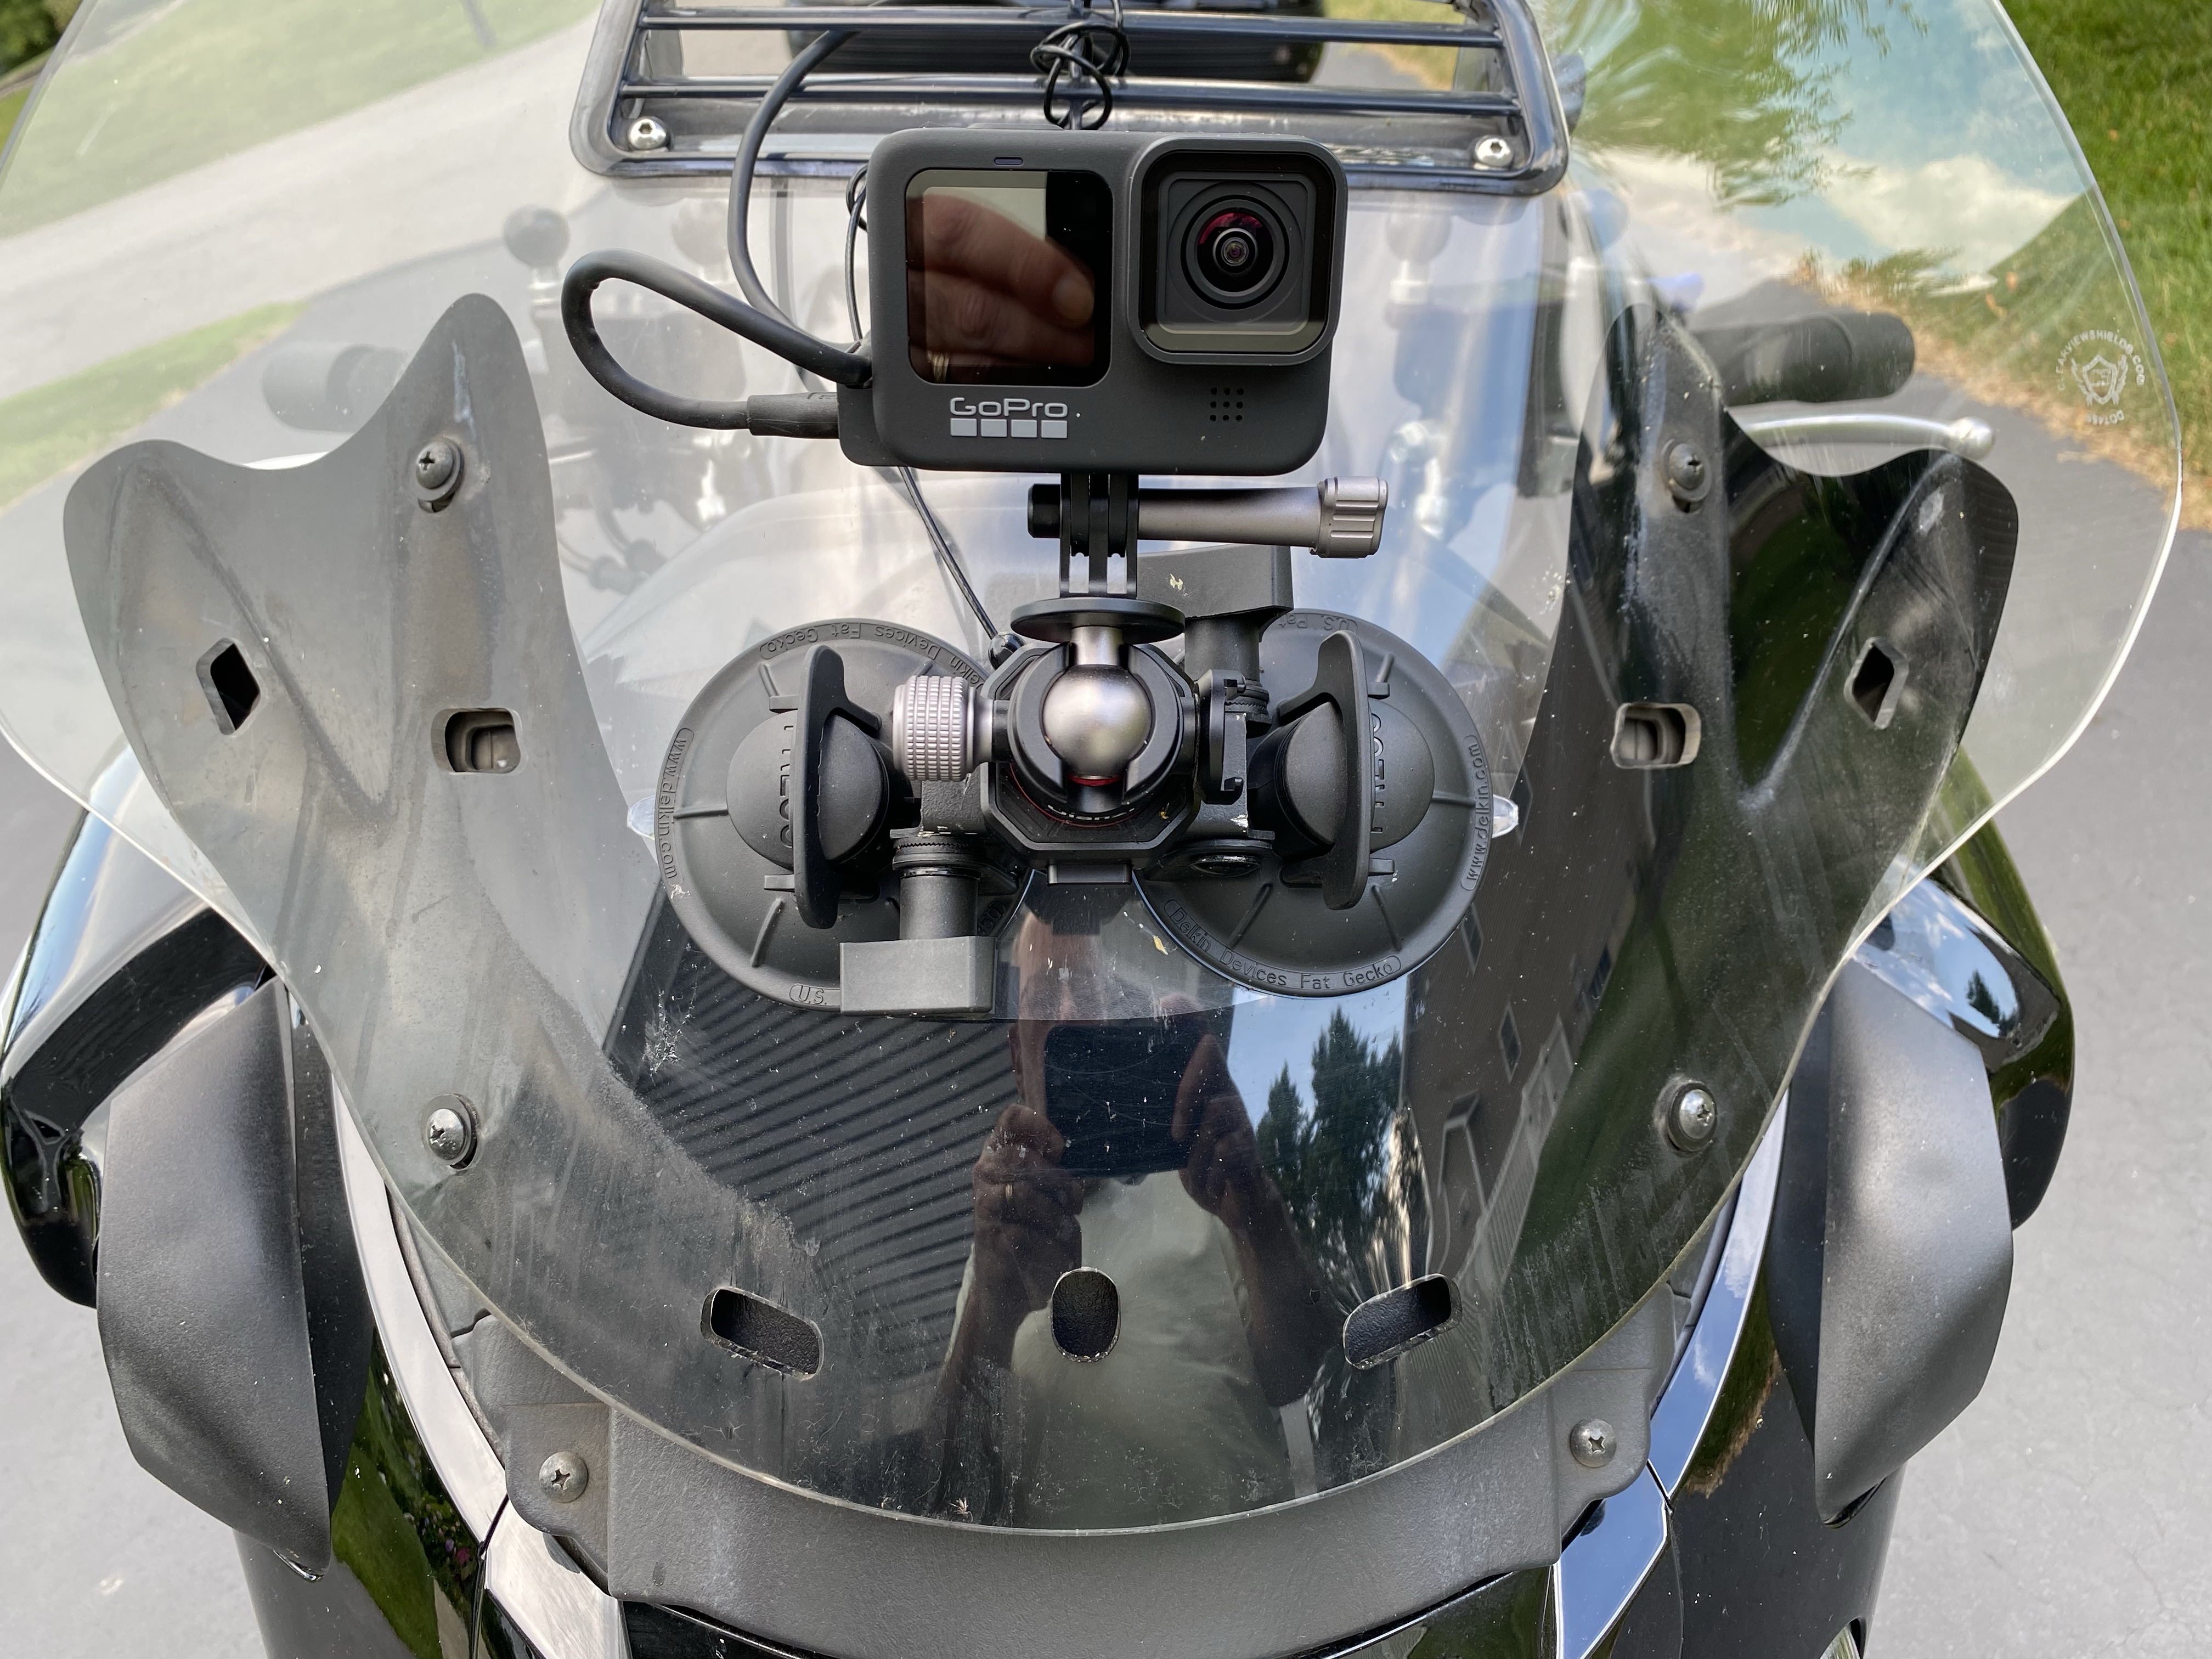
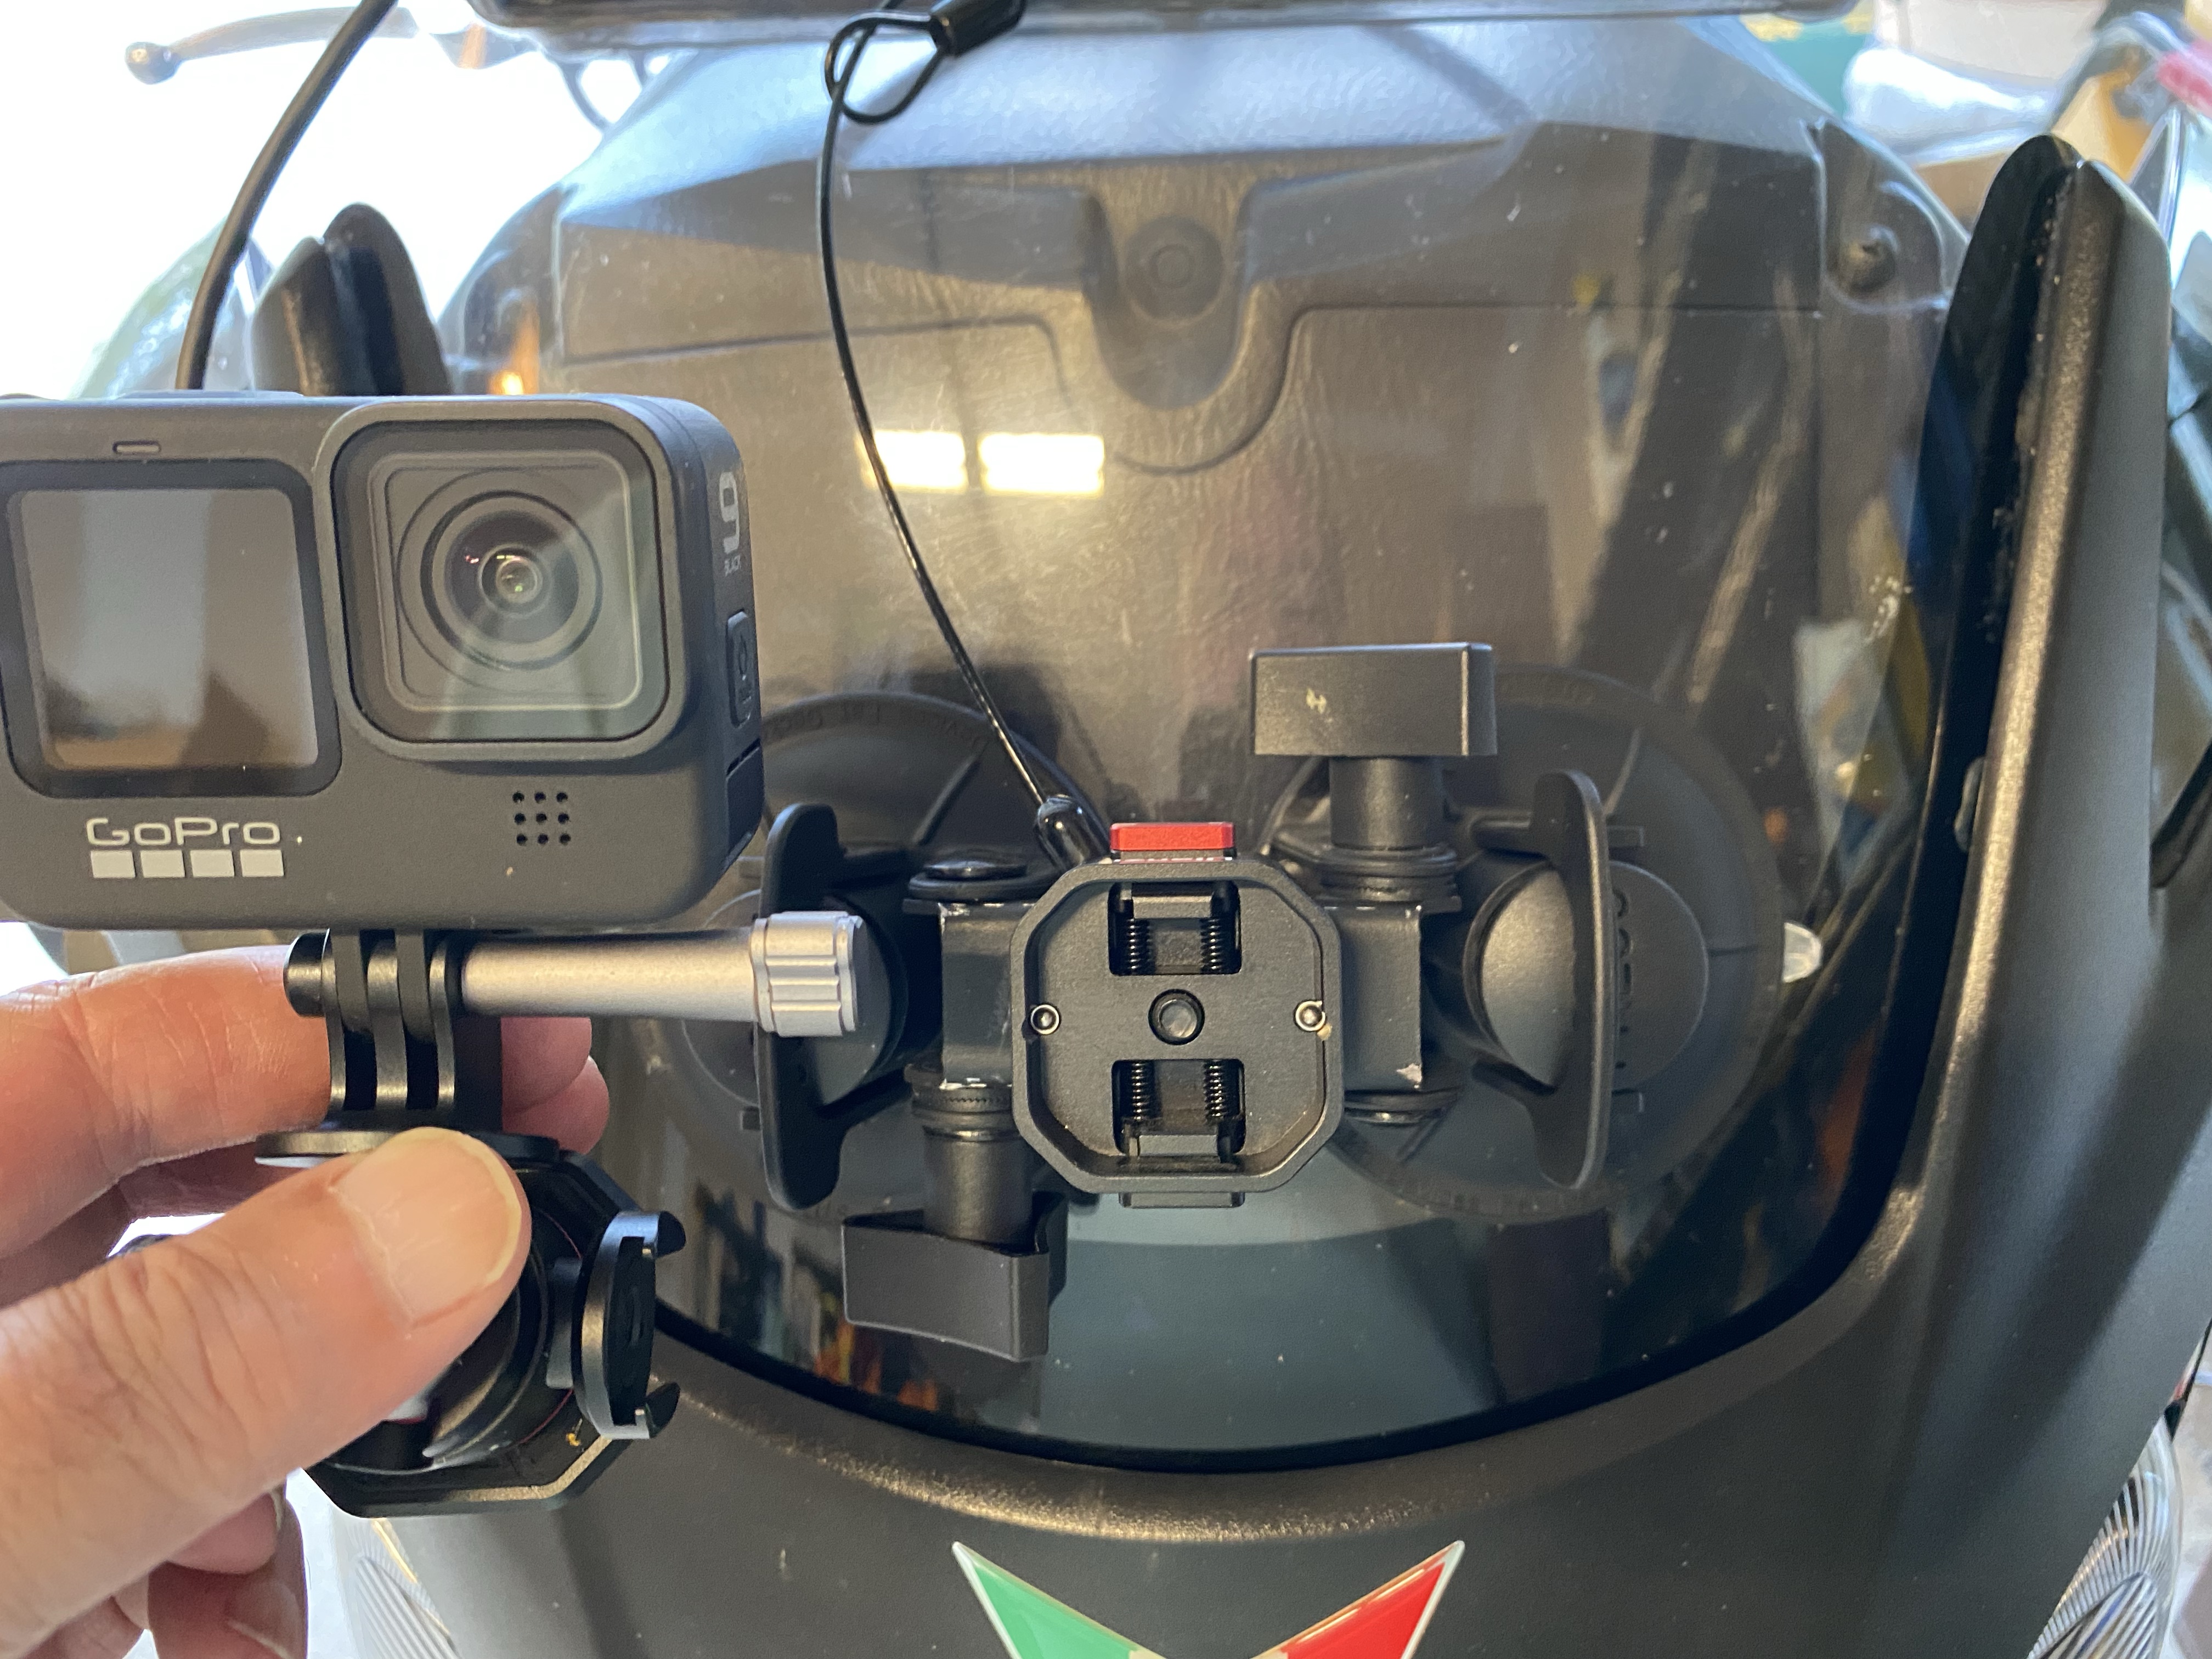
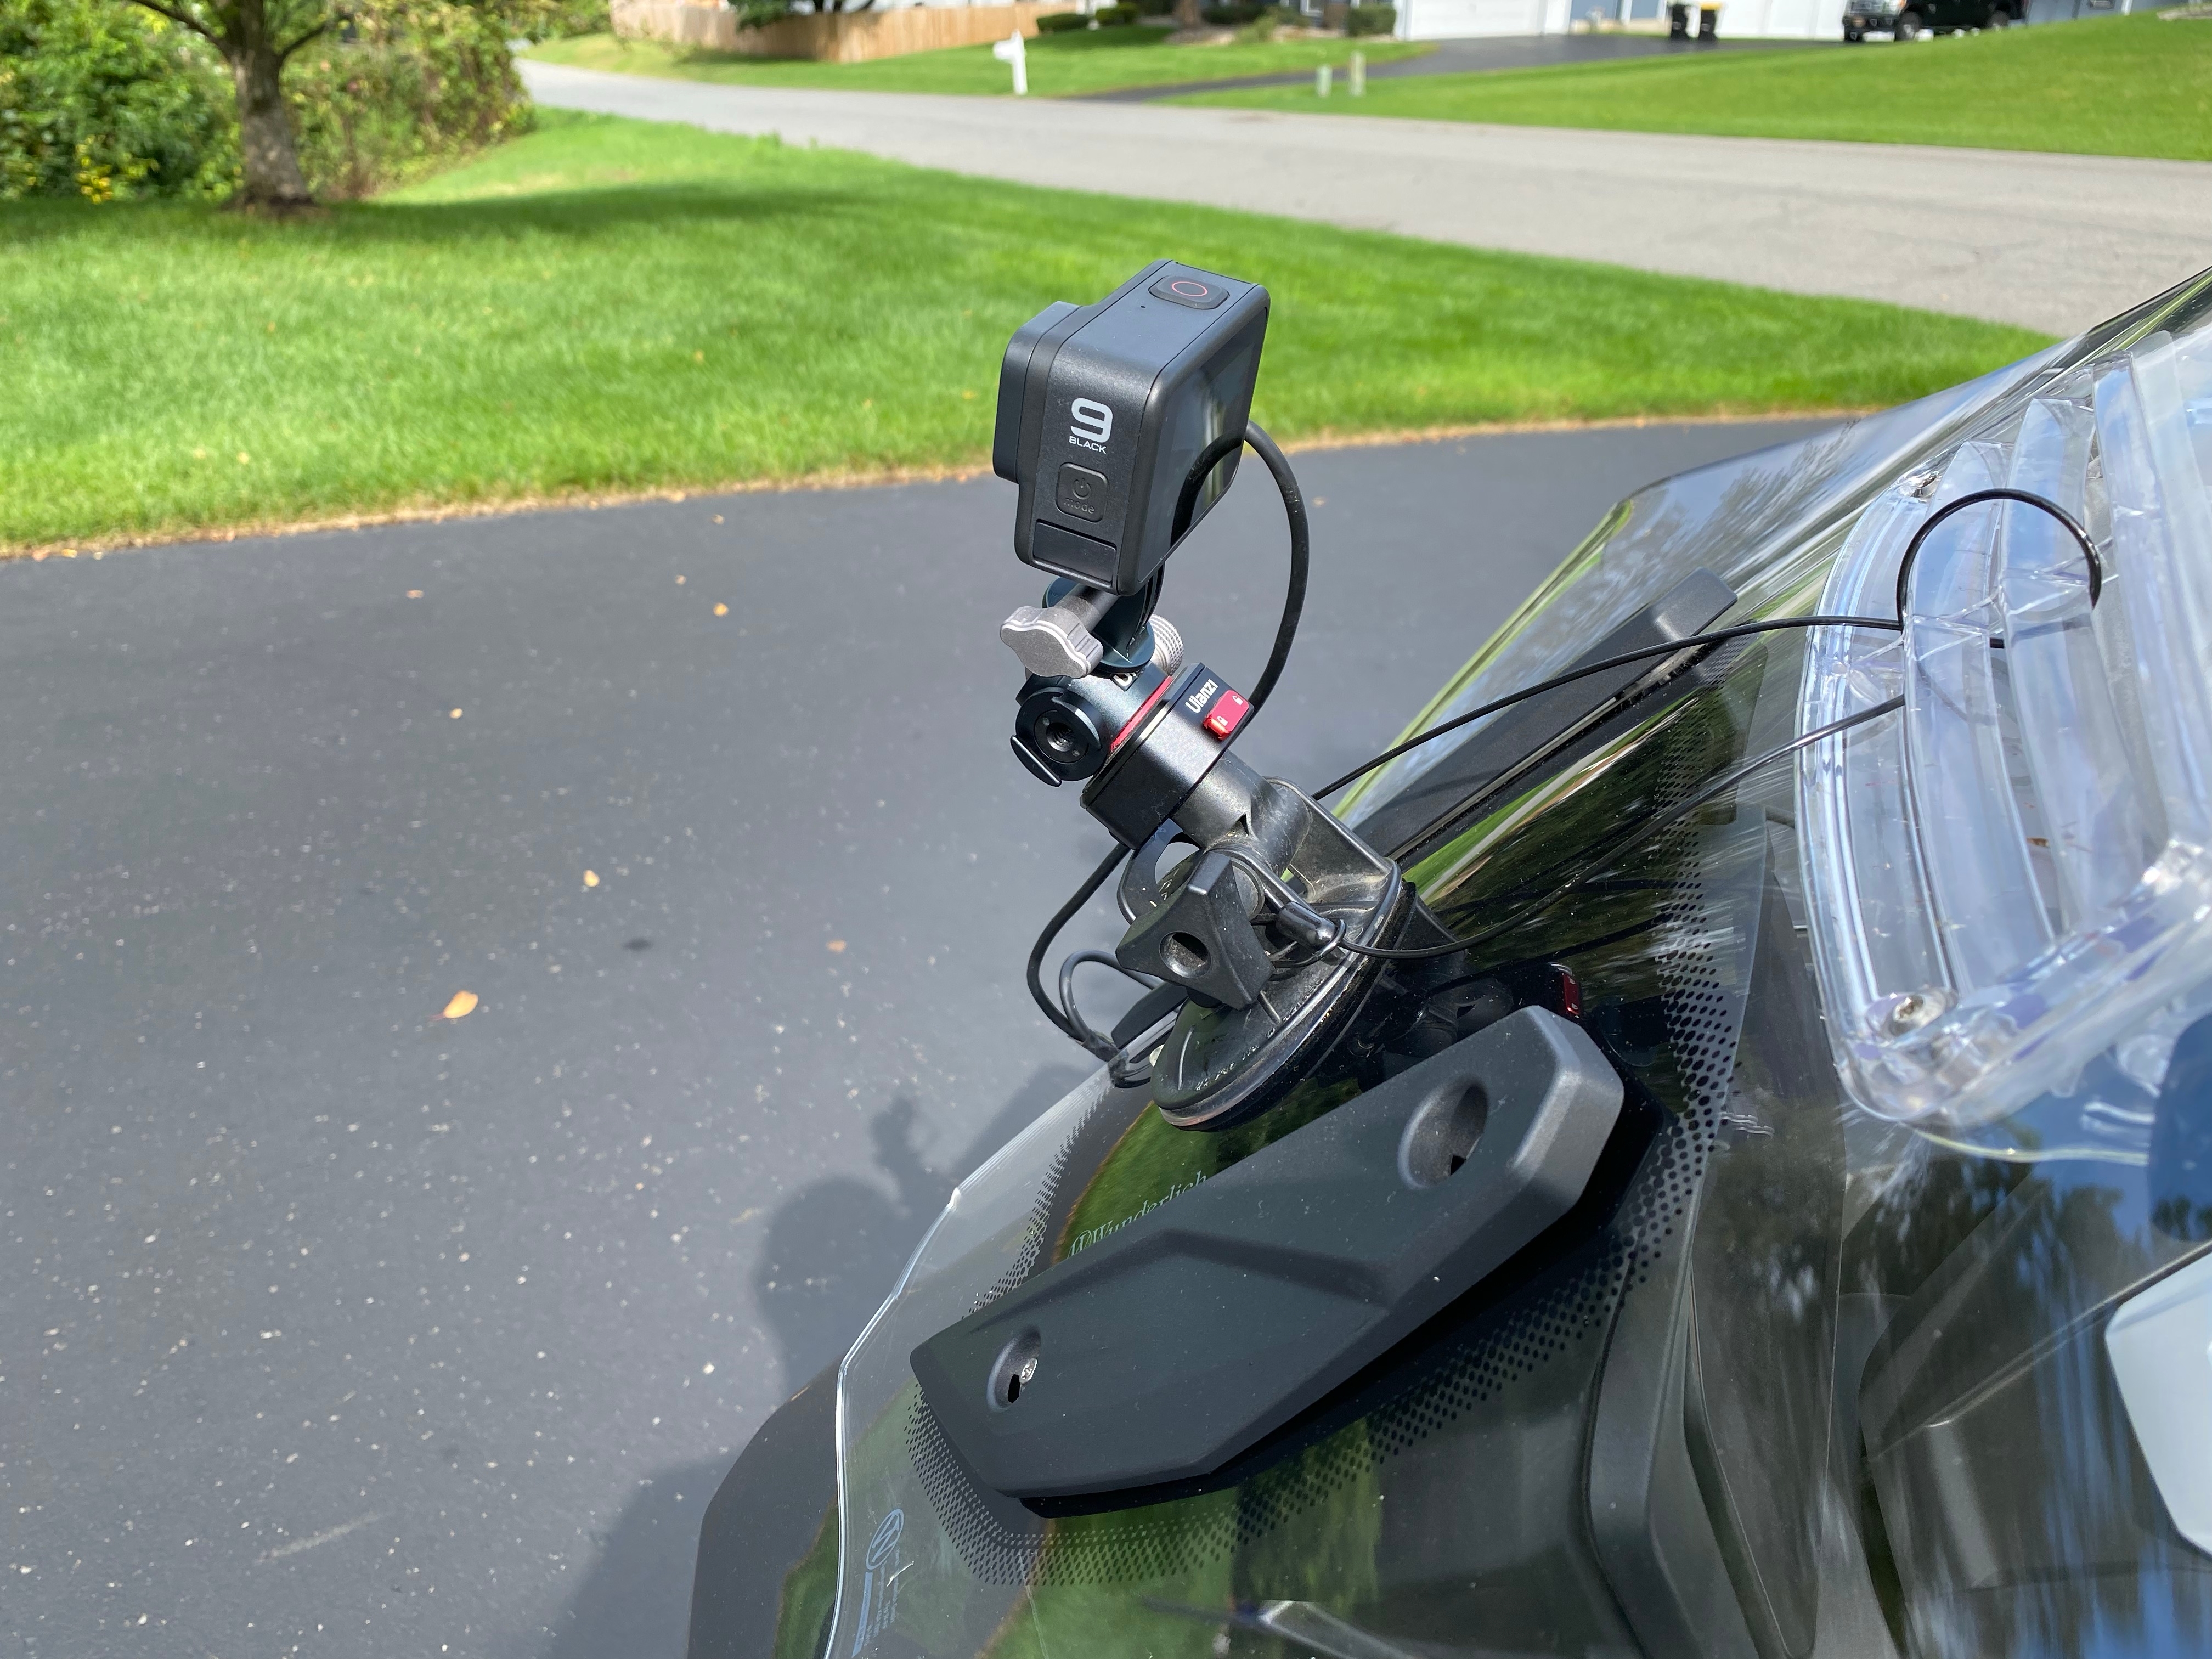
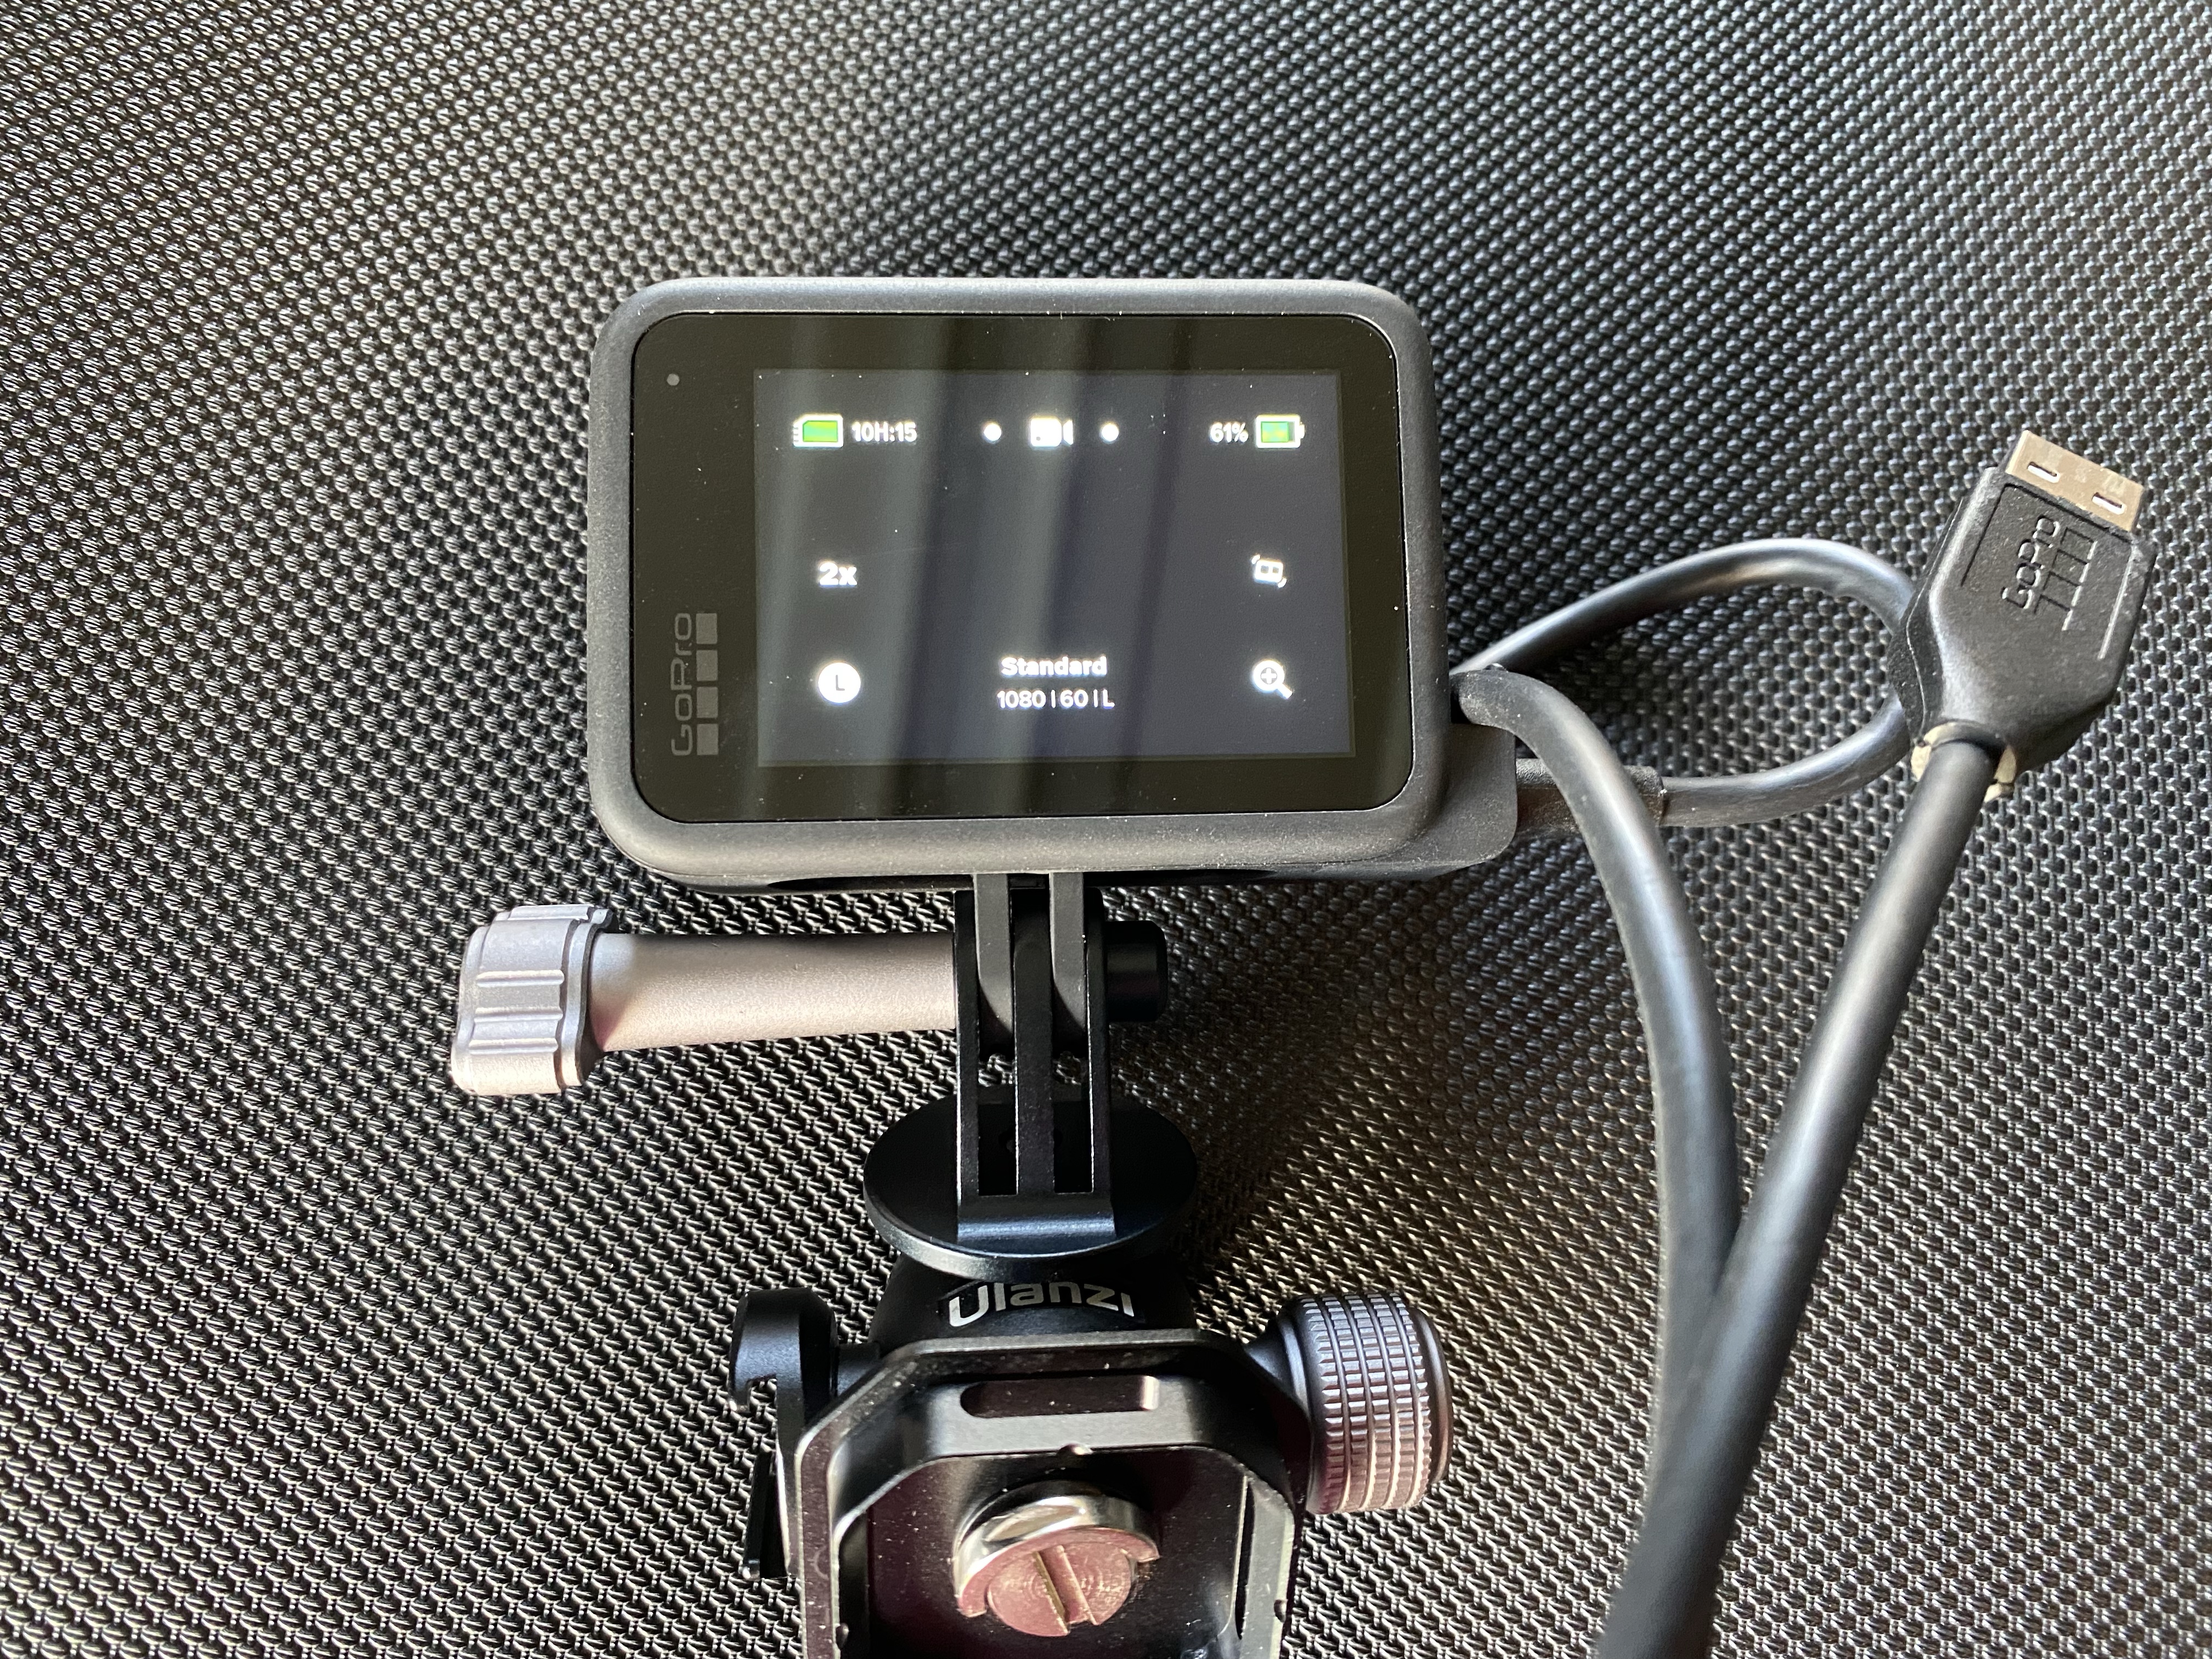
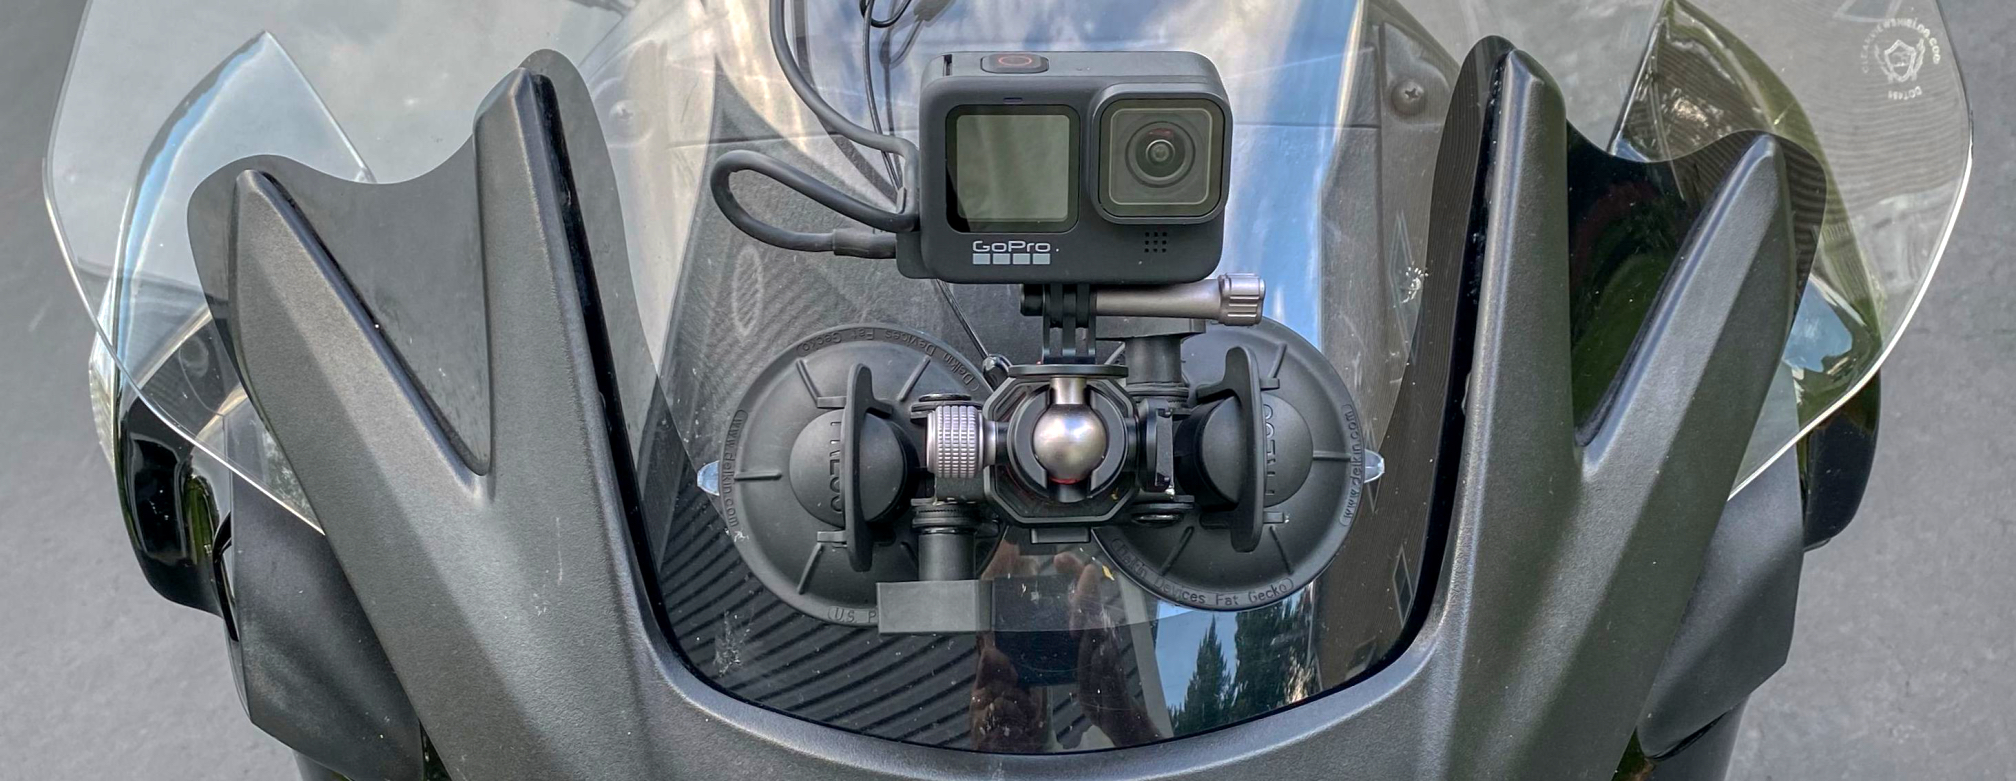
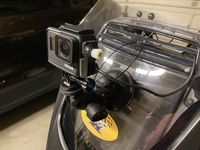
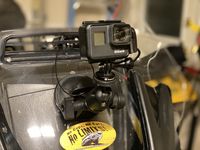
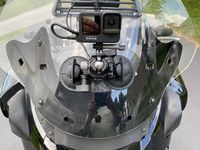
Here are head on, offset, and sideways views of my very latest mounting system:

Here are the components of this ultimate(?) mounting system. Starting next to the windshield, and moving outward, we now have:
-
Delkin Devices Fat Gecko Dual Suction Camera Mount (available at Amazon).
-
Ulanzi Claw Quick Release Set (Generation I), Claw Basic Set (Mounting Base + Plate) (also available at Amazon).
-
Ulanzi U-130 Universal Ballhead for Action Cameras (apparently available only directly from Ulanzi's site).
-
A GoPro camera, e.g., the GoPro Hero9 Black.
-
GoPro's rainproof USB adapter for the camera, i.e., the USB Pass-Through Door, Hero9 Black, with USB-C cable.
-
The bike-powered USB outlet, i.e., the 3BR Powersports PANEL TAPP remains in place.
-
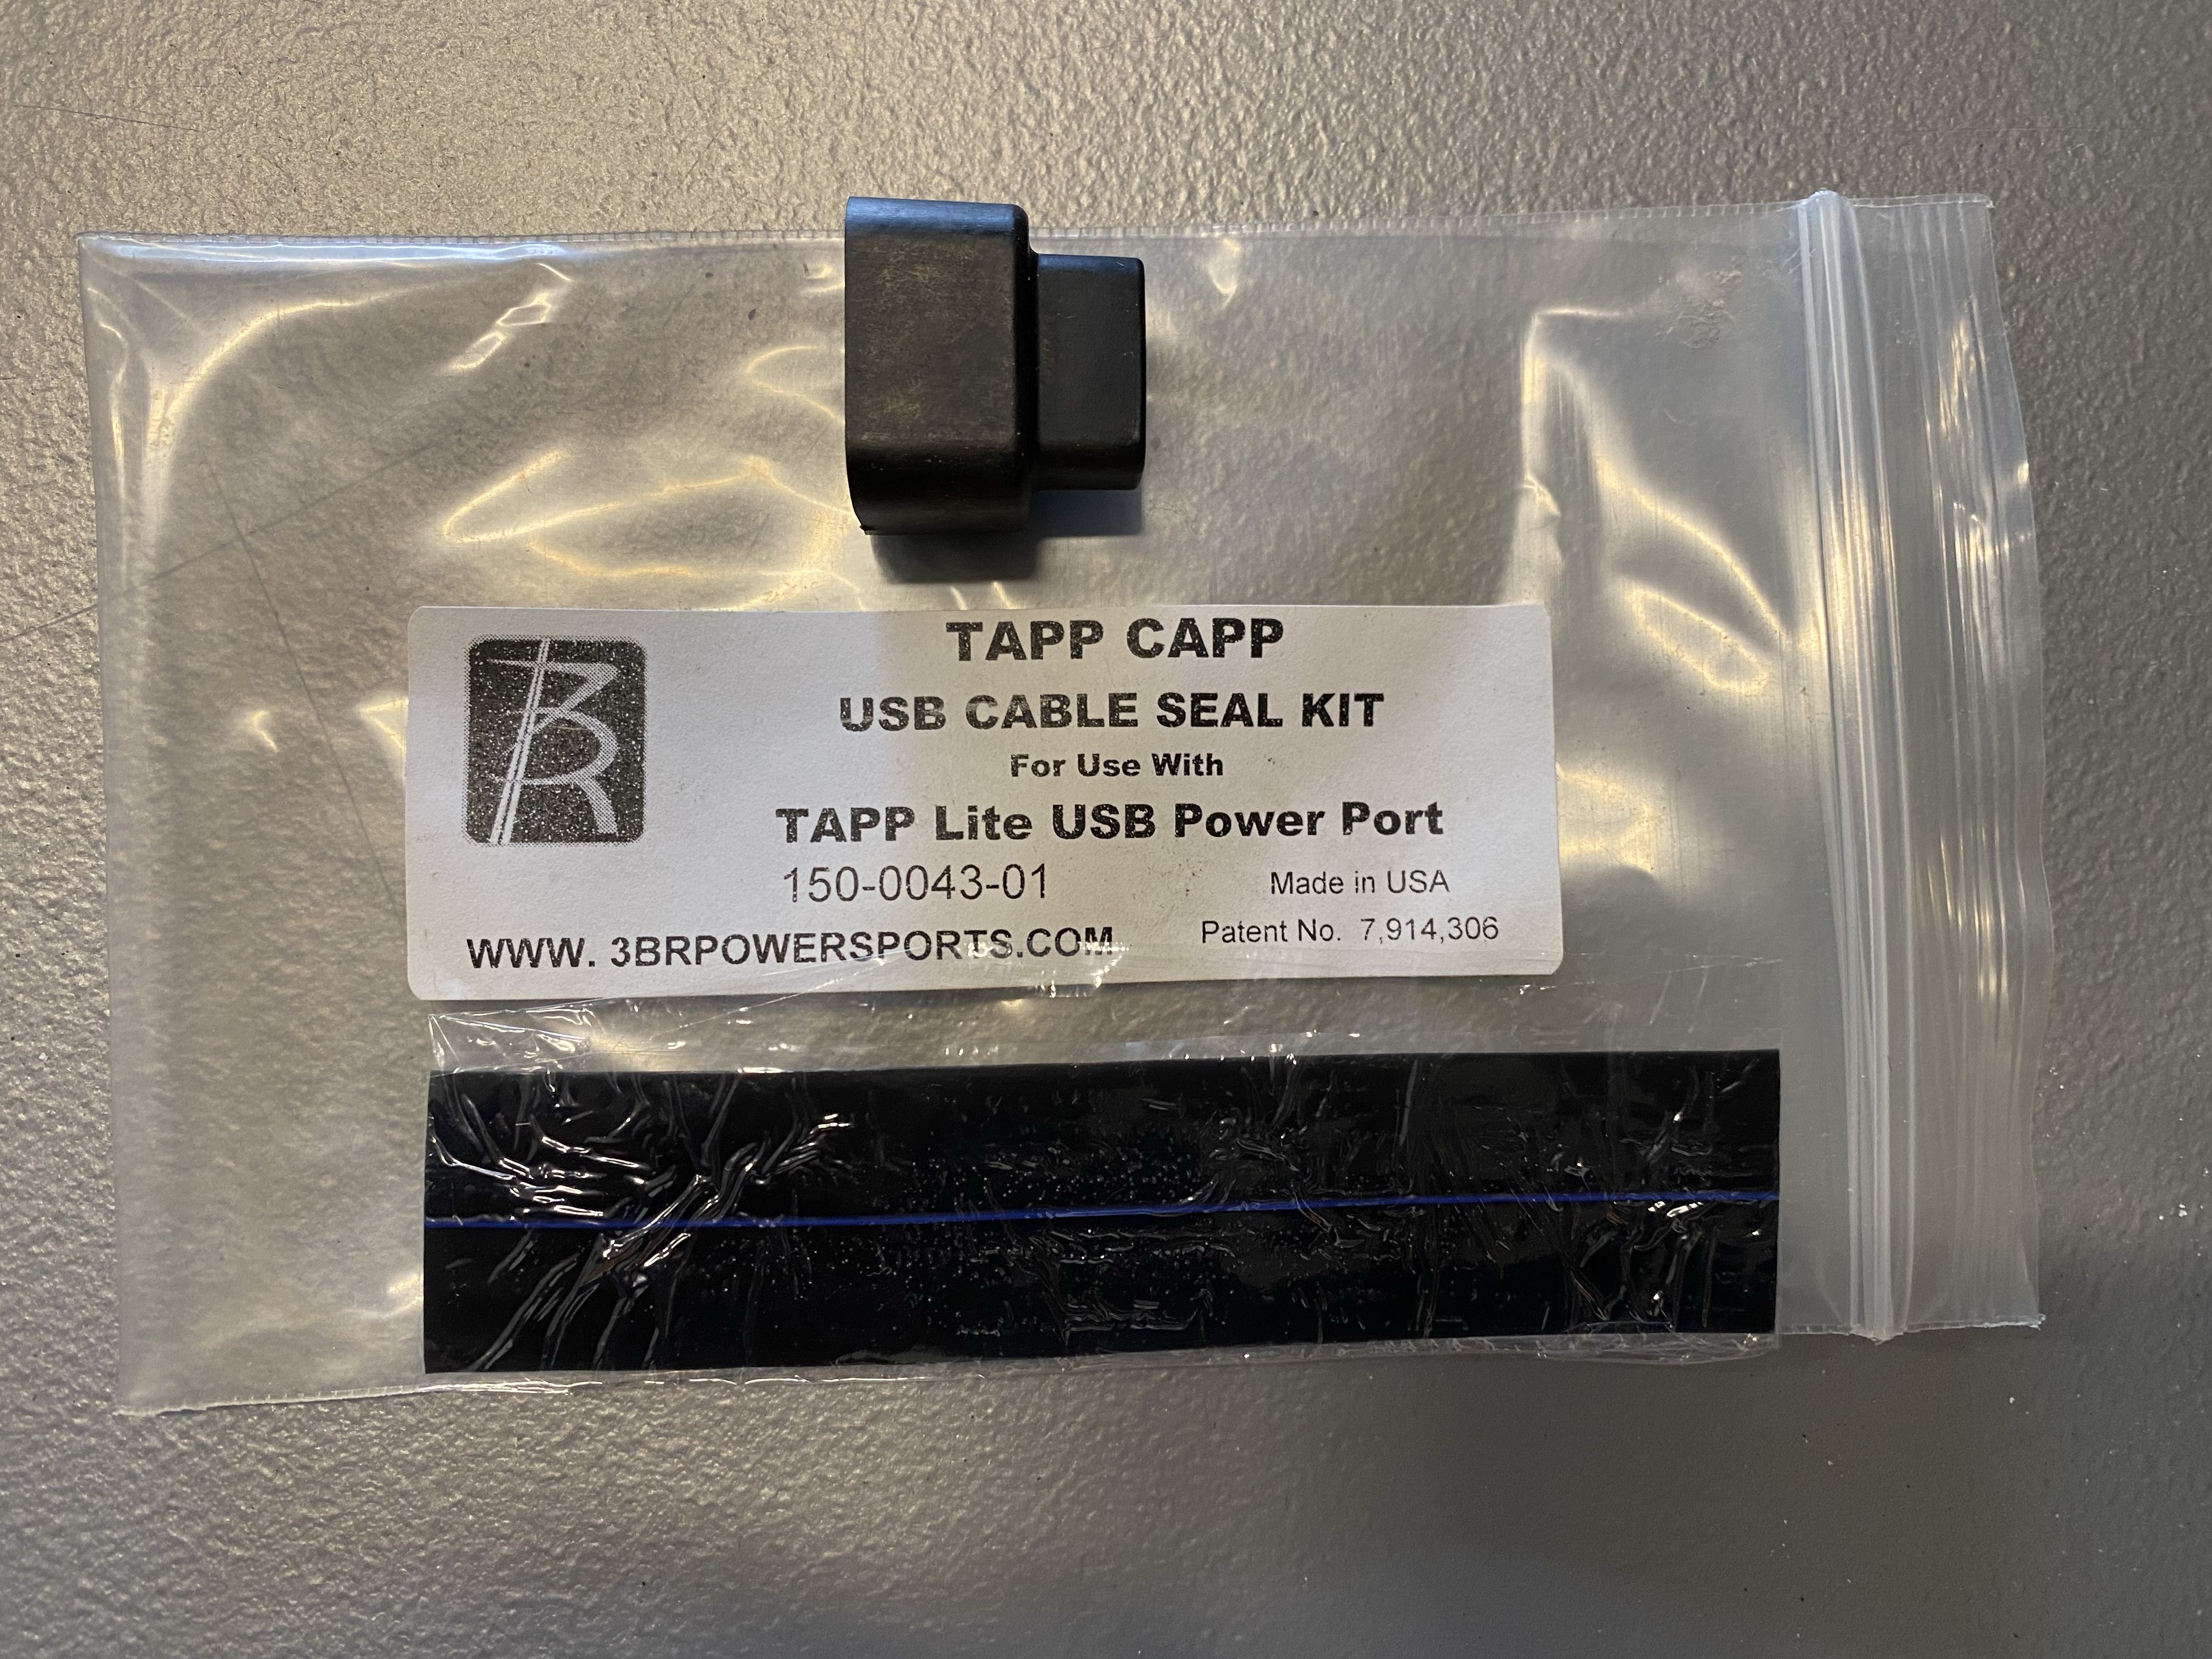
Update: a 3BR Powersports TAPP CAPP rainproofs the USB connection to the PANEL TAPP.
This setup checks all the boxes, even better than before:
-
The single suction cup of the PanaVise is replaced by dual suction cups of the Fat Gecko. In hindsight, I'm not positive if this was really necessary, but it couldn't hurt, and it's certainly an extremely strong mount now. Here's the background.
(Incidentally, owning both the PanaVise and now the Dual Fat Gecko, I believe that the suction cups and the pieces that come with them (air-expungement button, tripod locking ring, etc.) are identical. I don't know whether the companies, PanaVise and Delkin, are connected in some way, but it certainly seems that they use the same supplier.)
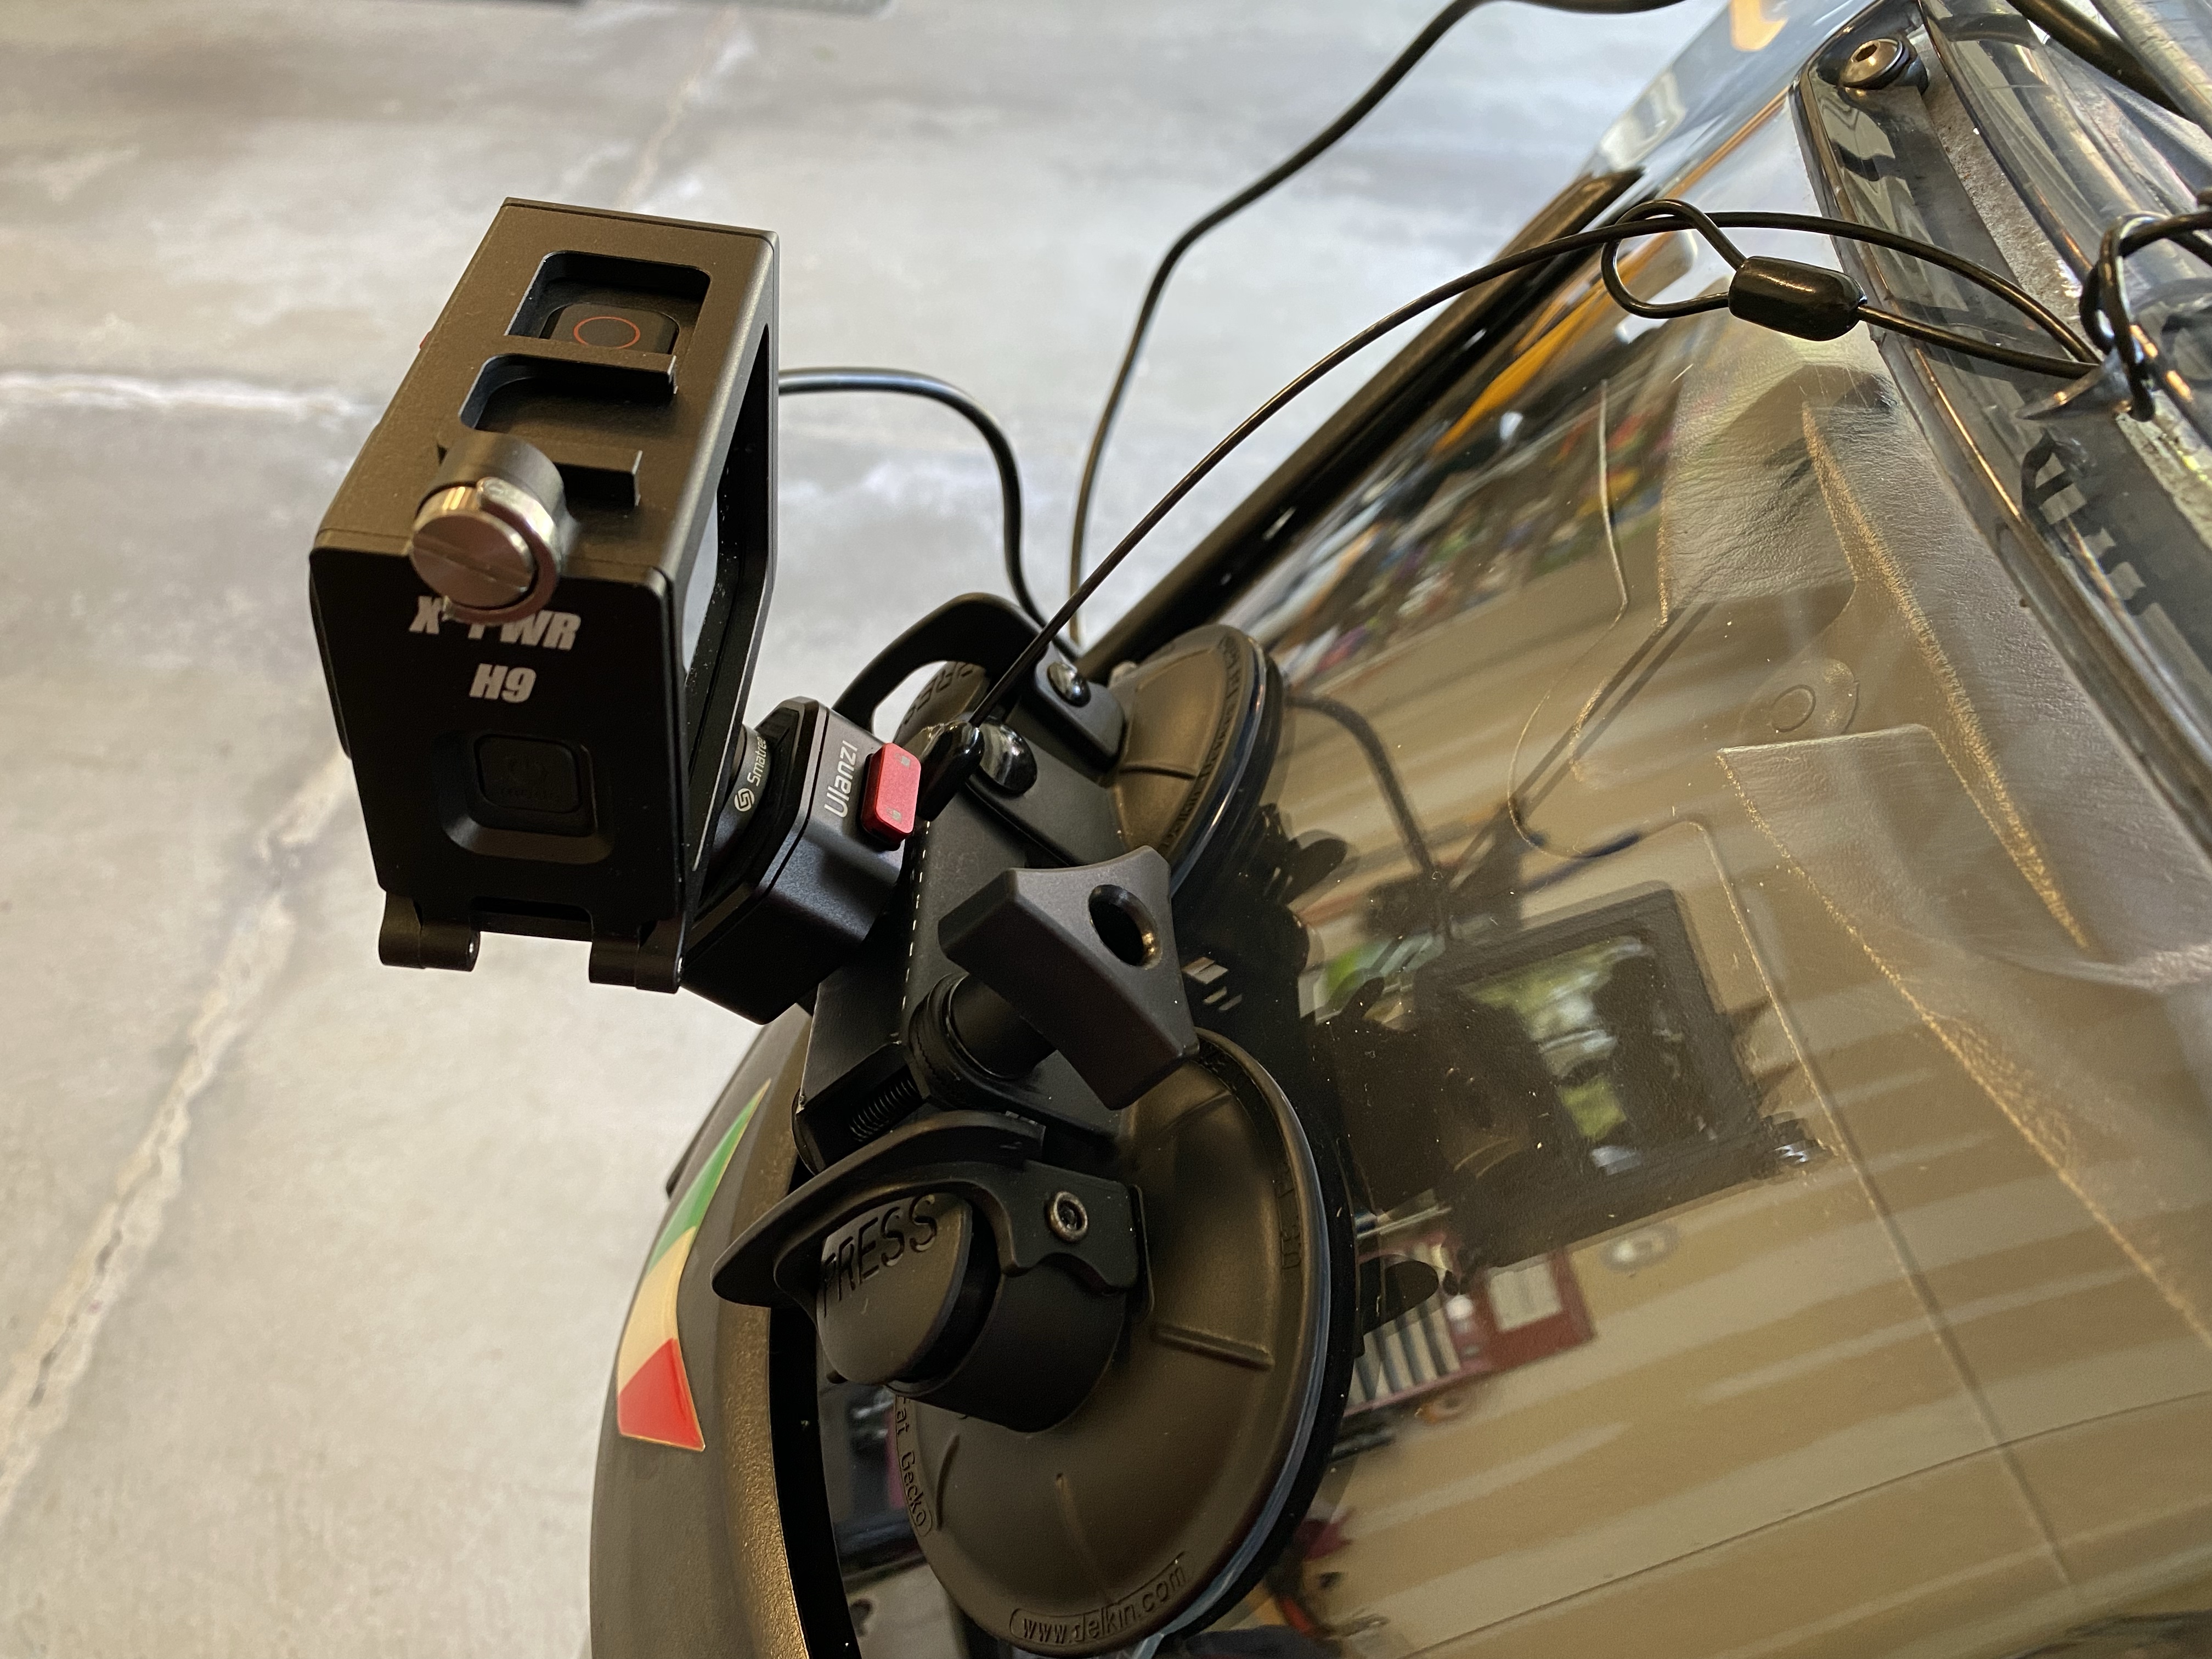
Shortly after buying the Hero9, I bought a 3BR Powersports X~PWR H9 All-weather, External Power kit With Aluminum housing for GoPro HERO9 Black. This is a full frame cage for the Hero9, and is 3BR's best effort yet to make a GoPro weatherproof while being charged.
That 3BR case is a very nice work of mechanical art, but has two shortcomings in certain situations. The first is that it is a heavier, if more clever, solution than their earlier X~PWR H5 (which was just an add-on covering to a special cable ending). That the Hero9 is also itself heavier than the Hero7 (and Hero4) is the reason I changed from one suction cup to two.
The other problem with the X~PWR H9, by the way, is that the aluminum frame is solid on top, over the lens of the Hero9. This is the area atop the GoPro's GPS receiver, which means that telemetry data — speed, location, etc. — is not part of the recordings. This may be irrelevant to some folks, but I like having that data.
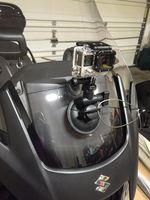
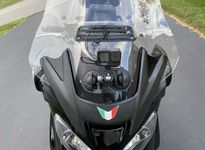
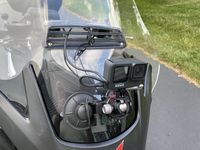
In case you're curious, here are a couple of pictures of the mounted X~PWR H9, before I discovered that it blocked the GPS receiver:


Back to the suction cups proper.
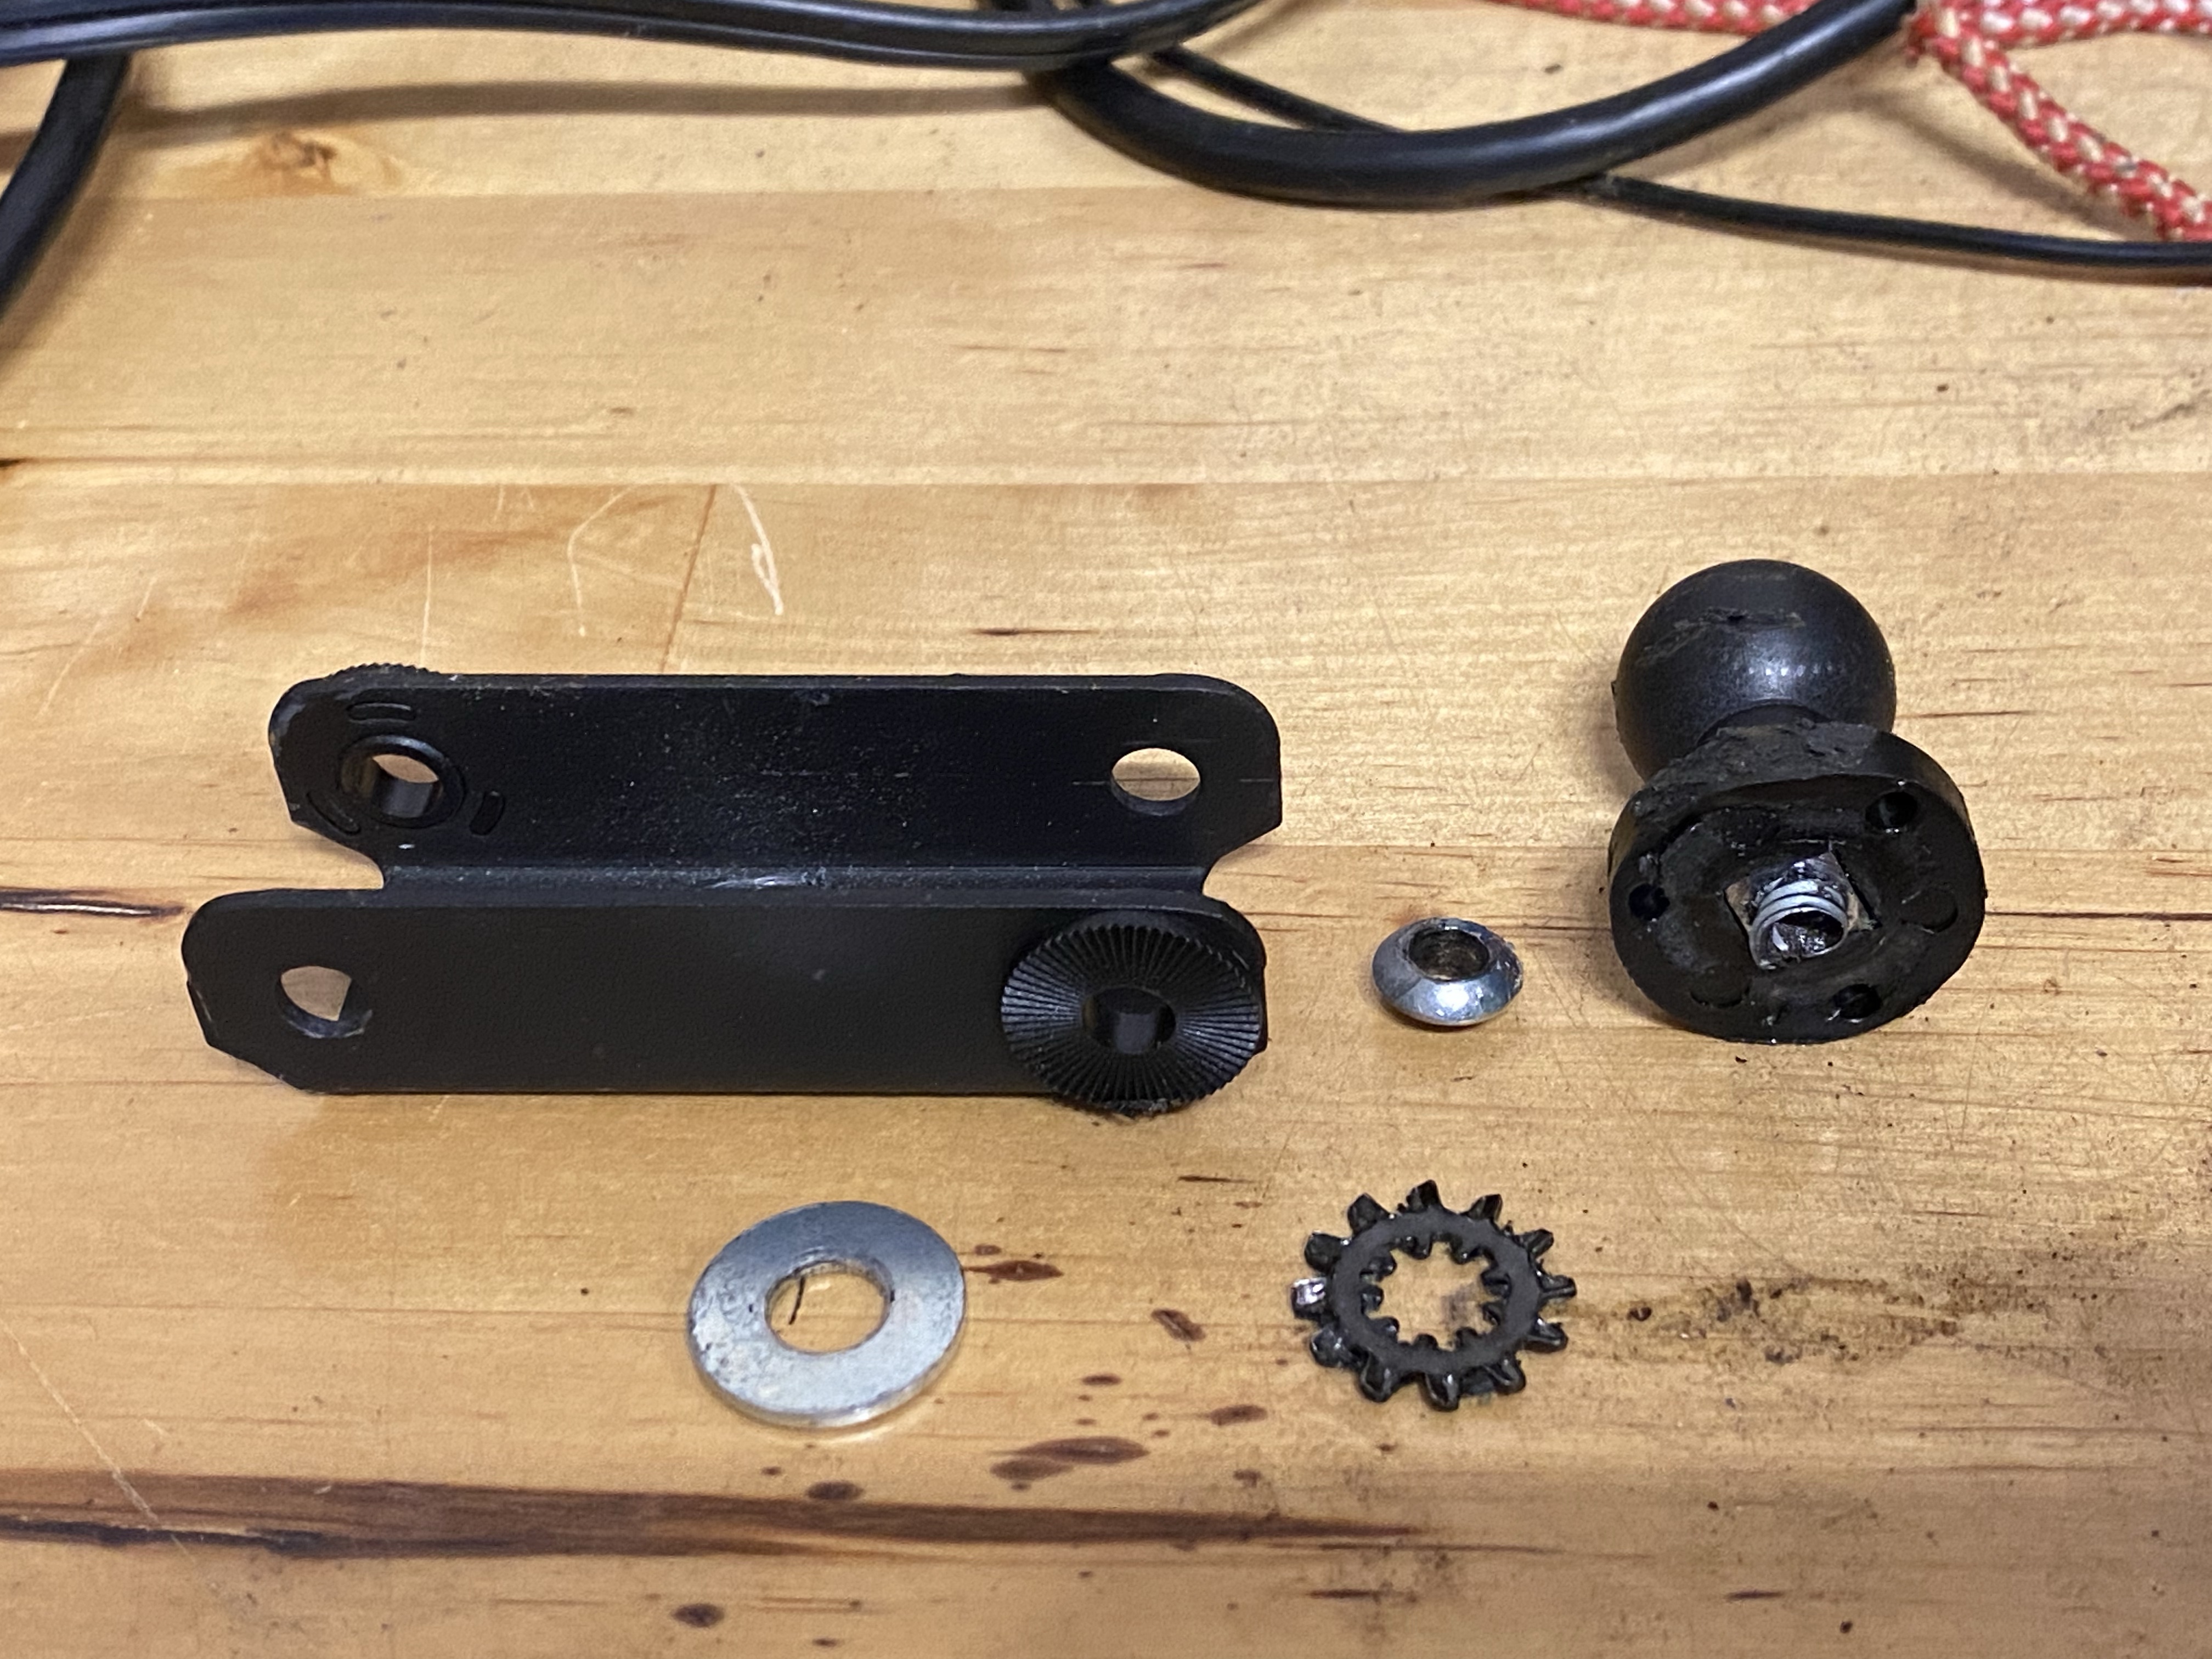
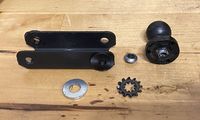
As you can see (particularly in the pictures on Amazon), the Fat Gecko Dual comes with a ball mount, and an extension arm, and another ball, with a tripod screw attached. I didn't want any of those pieces; while they might be useful in some situations, for my use they would just be a source of vibration and unnecessary torque on the suction cups and windshield. (I suggested in a post-purchase email to Delkin that they offer the Dual without those add-on pieces. As I write this, several months later, I am still awaiting their response.)
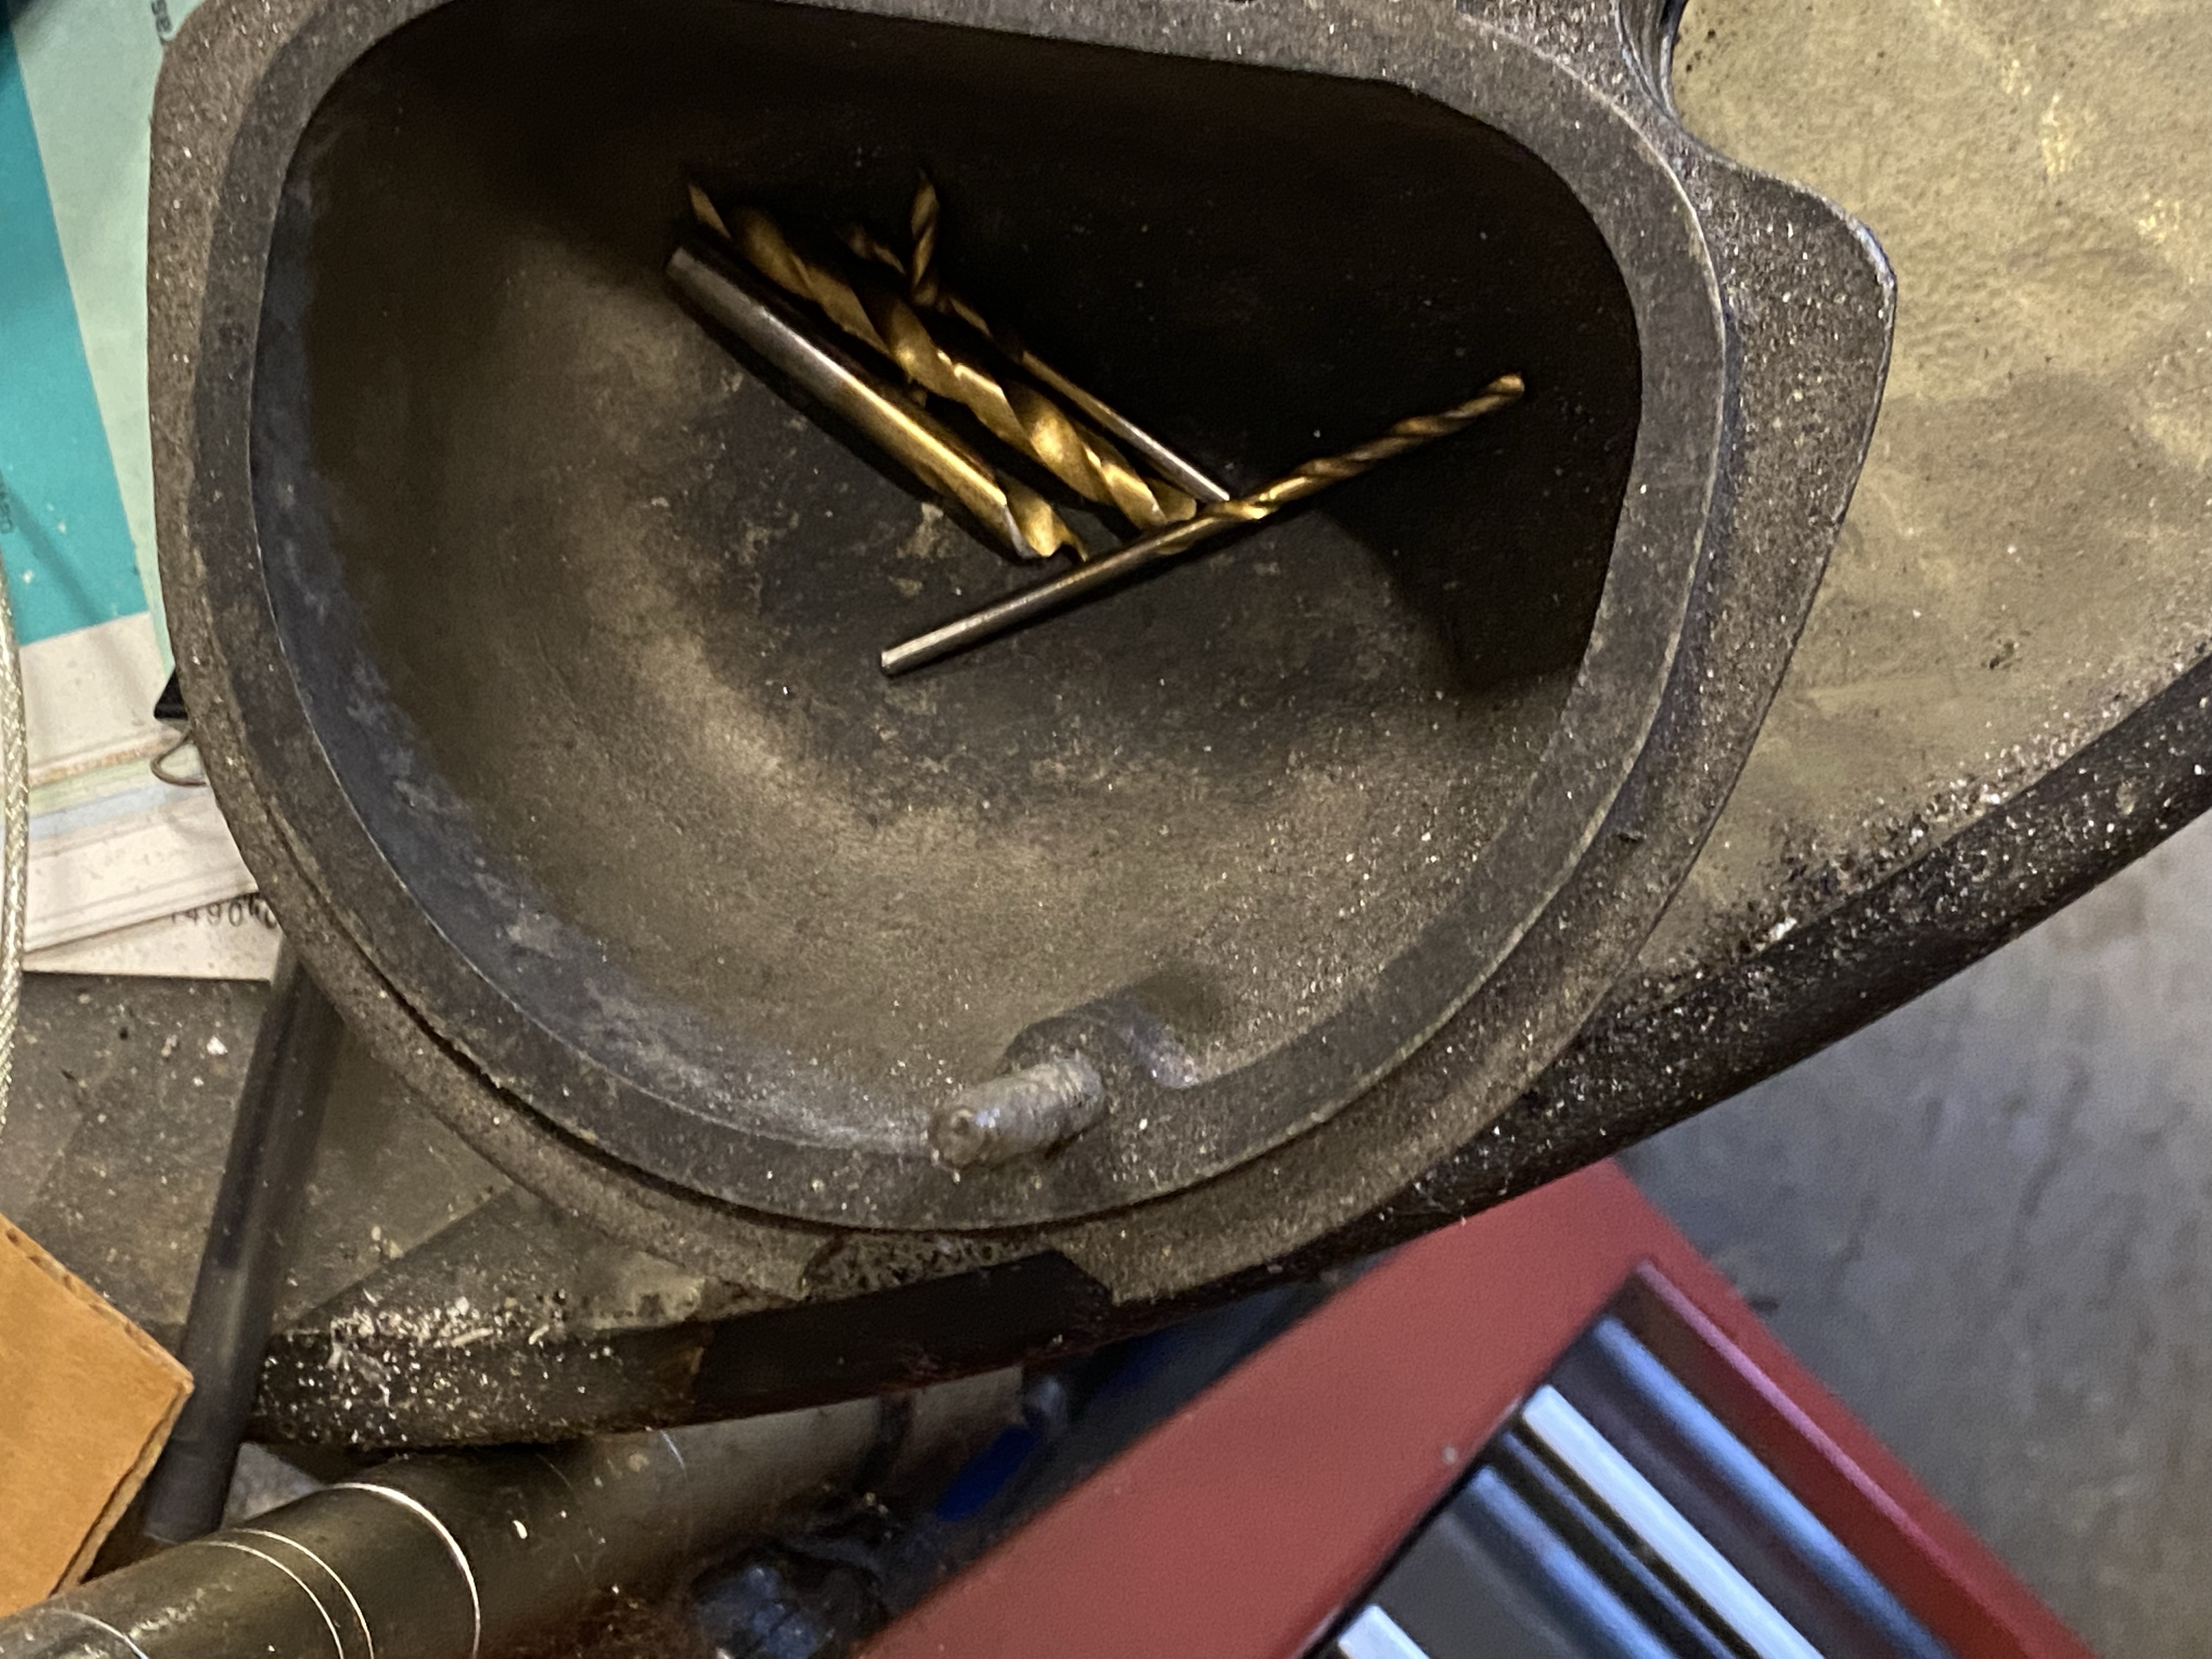
I attempted to remove the bolt that holds the ball on the crossbar, the one that connects the two suction cups. As I recall, a 4mm Allen wrench failed to budge it. So I used a succession of drill bits to remove it. Here is what I wound up with, i.e., a cross bar with nothing attached, and a collection of broken bits:
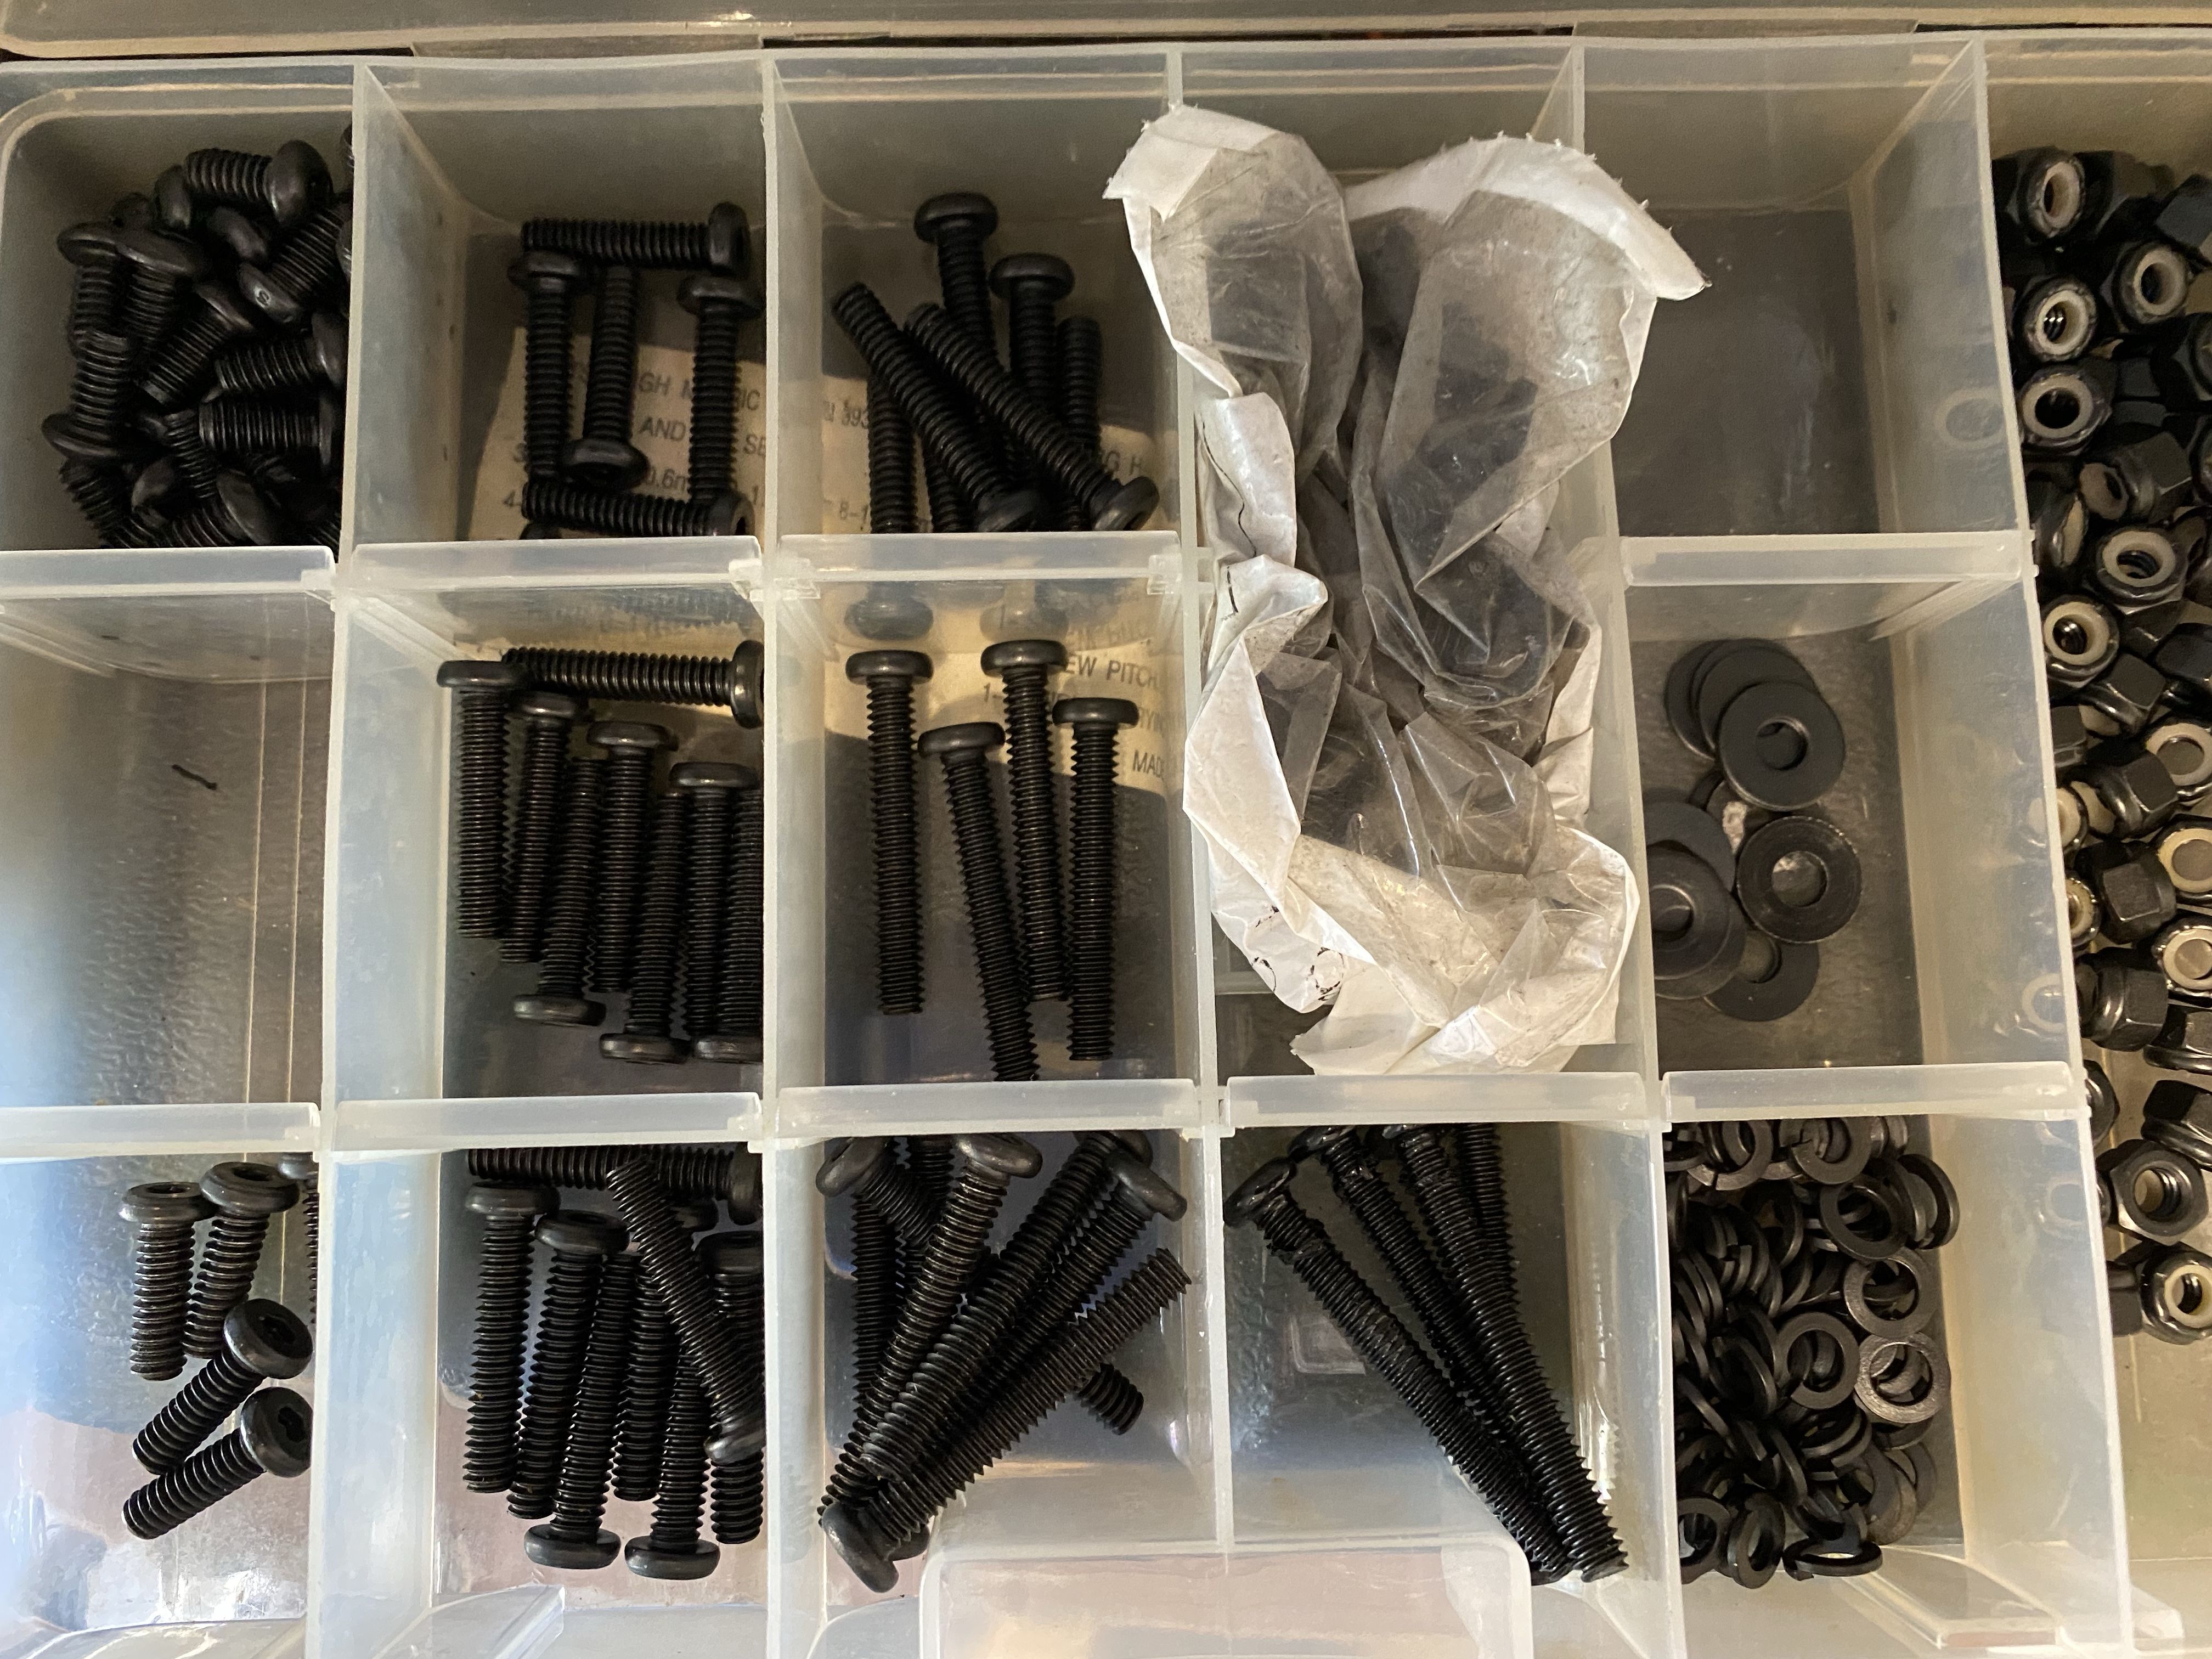
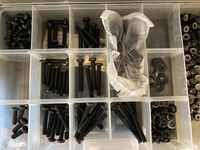
In the hole in the crossbar, I inserted a ¼"-20 bolt. I forget the length, but it was long enough for me to add a few split-ring lock washers, and then have some threads left for the Ulanzi Claw (see text below). Despite the increasingly ubiquitous use of metric fasteners, camera tripods and compatible devices still use the ¼"-20 size, and I have a collection of these:
I added the washers merely to make room for the loop of the safety tether I'm using. Here's a picture that shows that area, just above of the crossbar:

When attaching the Fat Gecko Dual, I simply loosened the knobs on each side of the crossbar, put the suction cups in place, and then tightened those knobs. Doing it this way, the connection between the suction cups and the crossbar does not affect the angular placement of the suction cups.
Let me add a few additional notes about suction cups, either the single PanaVise or the Fat Gecko Dual.
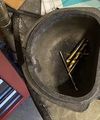
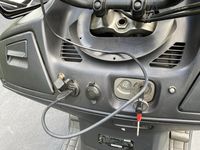
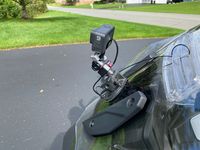
I recommend that you place the suction cup(s) on the most solid, least flexing, part of the windshield. On my Burgman 650 — and I think this is typical of most motorcycle windshields — this is midway between upper and lower pairs of well nuts (the expandable rubber washers with embedded screws). Here's that scooter, with a trim piece removed, so you can see those four well nuts that hold the windshield on:
Such placement should minimize physical camera flutter, as well as minimize the torque moment of the camera and mounting system on the windshield.
Be sure to thoroughly clean both the windshield and the bottom of the suction cup itself with alcohol (such as the 70% isopropyl alcohol commonly found in pharmacies) and a lint-free cloth, and then let dry, before attaching the suction cup(s). And do that according to the directions, i.e., push the locking lever to its unlock position, firmly push the button to expunge air, and, while still holding that button down, flip the locking lever to it lock position.
Update, two months later ... At a day-trip stop, I noticed that one of the Gecko's two cups had lost its suction, and was held in place by the other suction cup and the crossbar (and my tether, if it came to that). As the mating surfaces were still clean — that cup had barely moved from its initial position — I pushed it back down with the air-evacuation button, and flipped the locking lever while doing so. It's been a month or so since then, and both suction cups are still snug (I tug on them a bit, to check this periodically). So this is another advantage of having dual suction cups.
Update, another month or so after that ... Arriving home after another day-trip, I noticed that the other Gecko cup had lost its suction (and, as before, was held in place by the other suction cup and the crossbar, and had hardly moved). I re-suctioned it in place. I guess the moral here is to loosen each suction cup — flip the locking lever down, and pull up on the base tab — and then reapply the suction every couple of months.
-
I forget how I stumbled across Ulanzi products this year, but the Ulanzi Claw Quick Release Set was a welcome find.
Previously, you'll recall, at lunch stops, I could leave all connections intact, except that I had to unscrew the Smatree GoPro tripod base from the tripod screw in the Manfrotto ball head. This took a minute or two to accomplish, and the attached (rainproof) USB cable had to be held up, to keep from twisting around the camera, while doing so. When putting the camera back on, the tripod base had to be snugged down just so, not too tight, not too loose, in order to reestablish the camera's position.
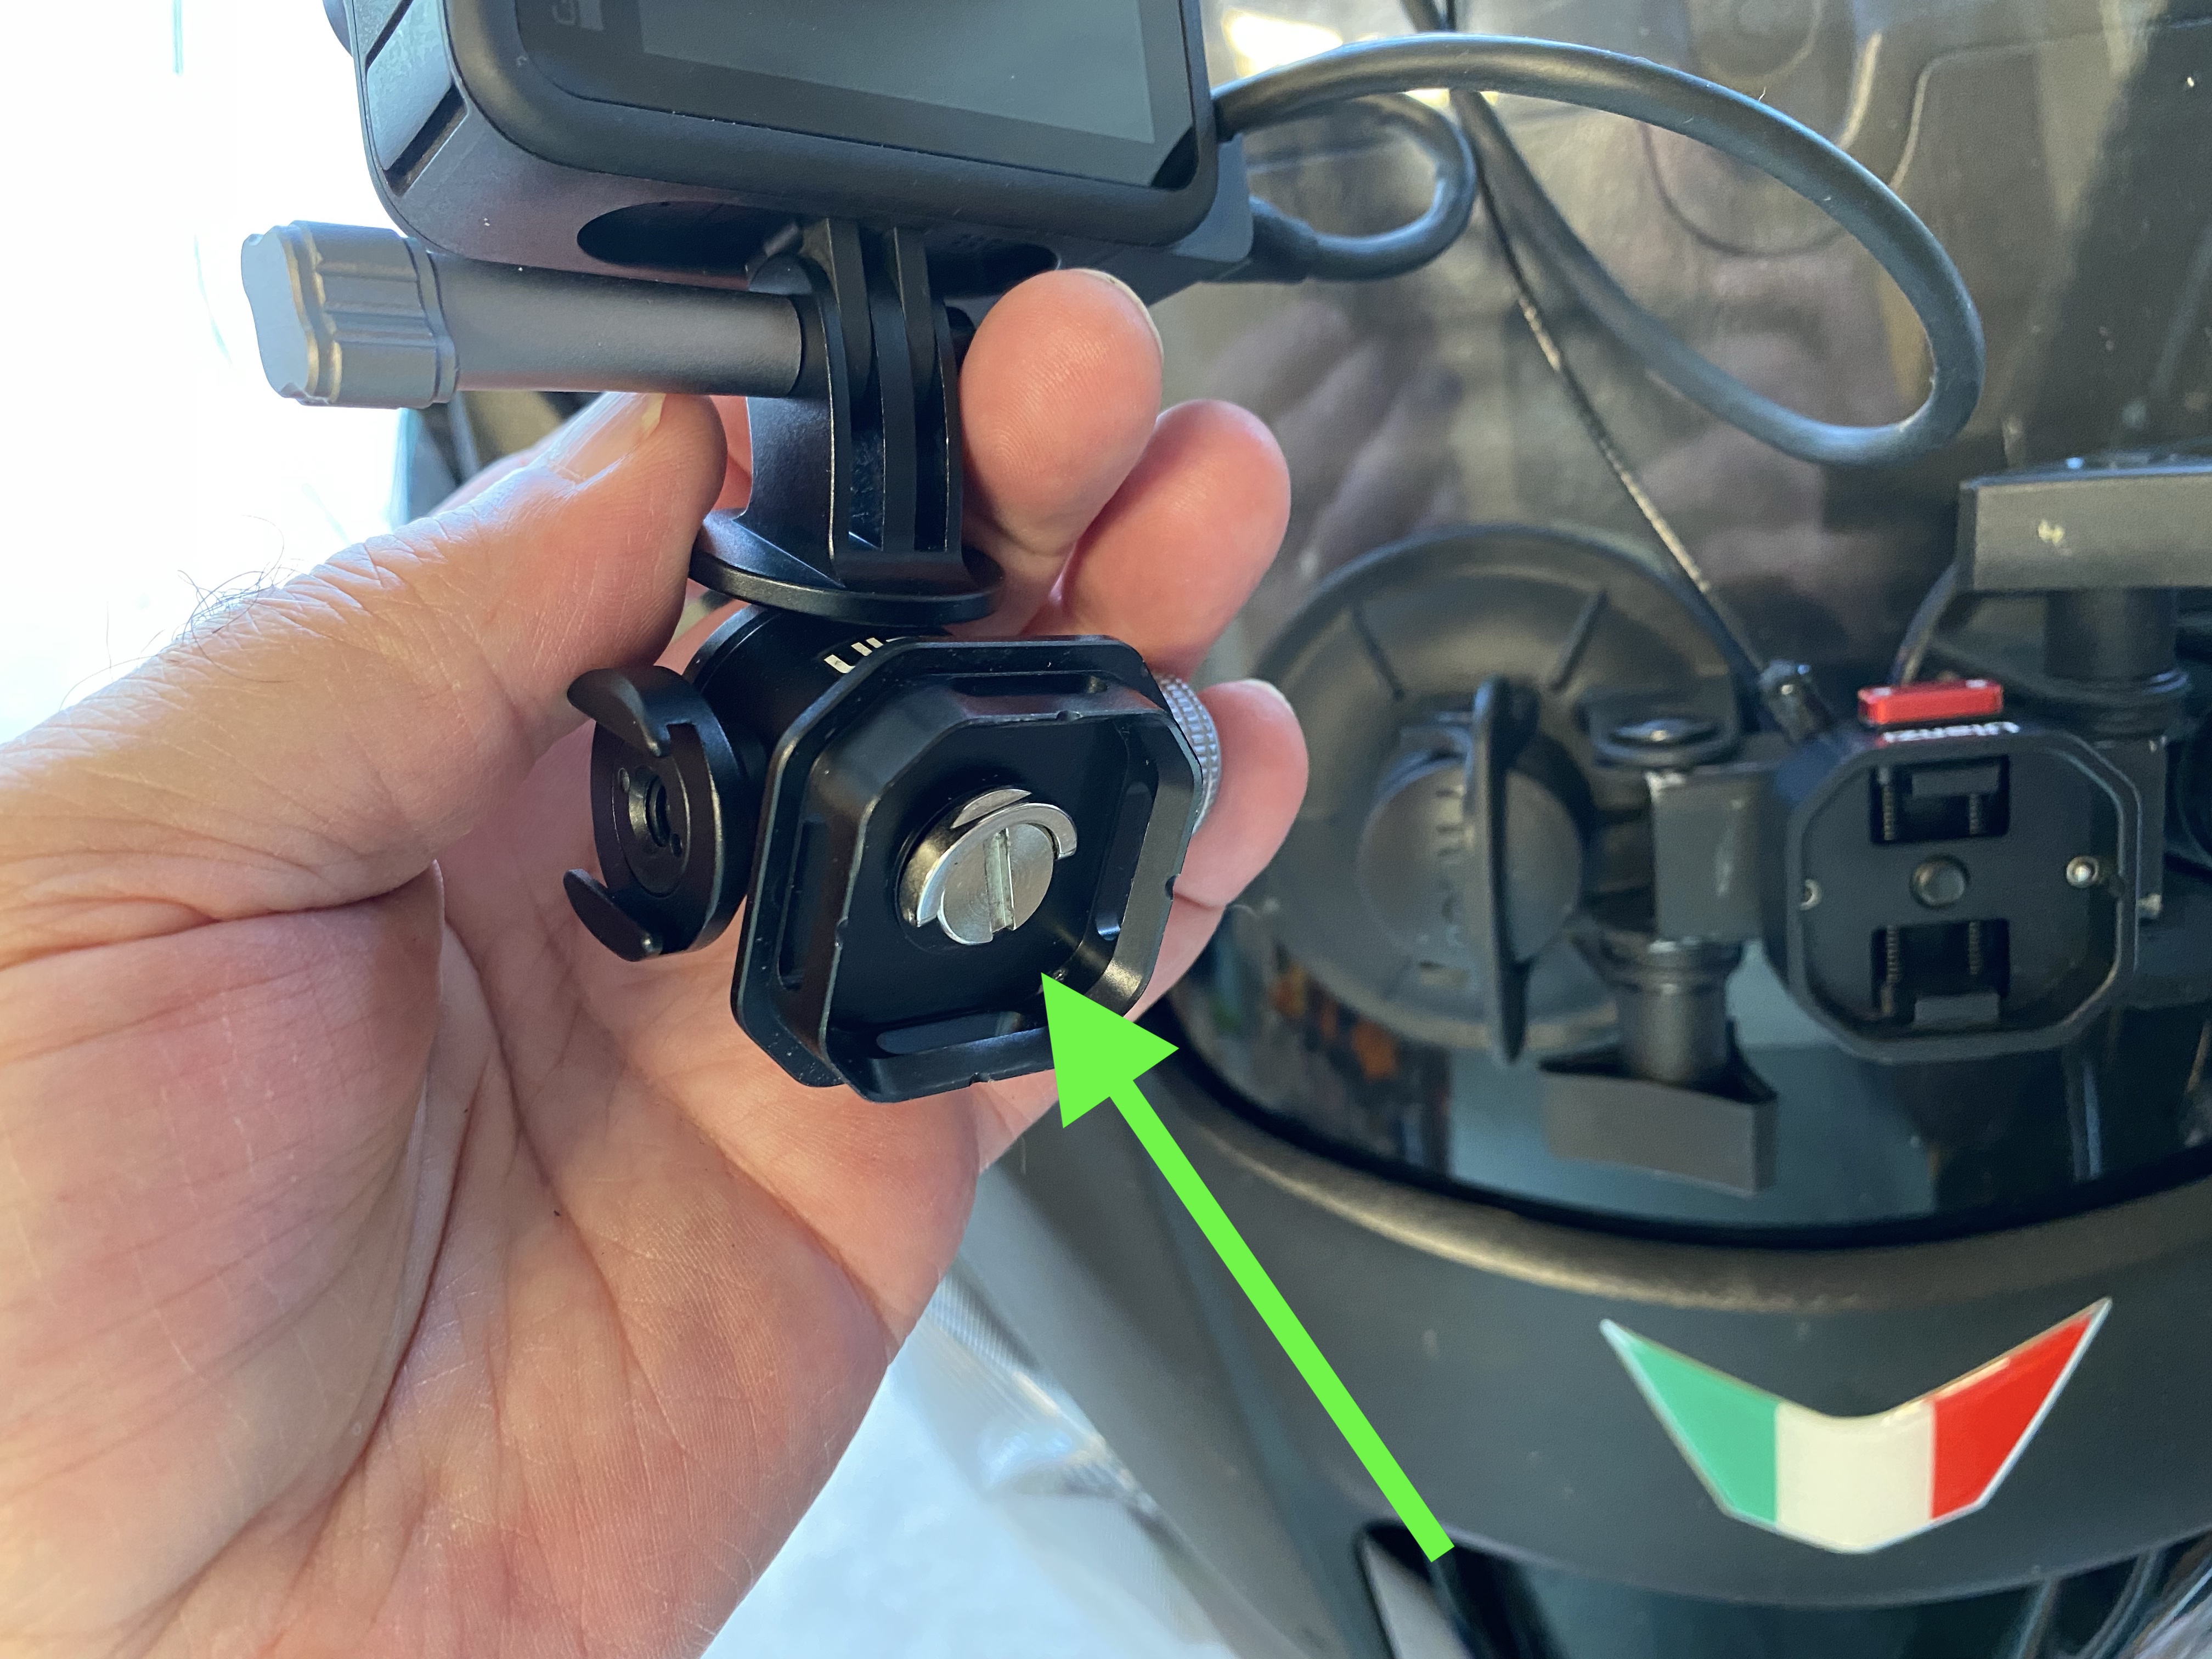
The Claw Quick Release eliminates this hassle. All it takes is a couple of seconds: slide one button to unlock the device, followed by holding in the two spring-loaded buttons with one hand, and lifting the camera out with the other:

Besides being remarkably quick and simple, it is quite rugged. While I haven't (yet) dropped a bike with this setup, I did ride — several times, as I have a relative who owns a camp in the area — over a mile-long stretch of rock-strewn, hard-packed, dirt that connects two paved roads. The rough riding starts at about the three-minute mark, and ends about the five-minute mark, and remember that the Hero9's superb image stabilization is doing its thing here — the jolts are much worse than they appear:
(If you were just reading about the Telemetry Overlay software, below, you can return to it by clicking here.)
I will add one very minor caveat, for completeness: it is possible to slide the outer half of this device such that it is not completely in place, but may appear to be fastened. I discovered this in my initial (in-garage) experimentation. The answer is simply to not be completely nonchalant when sliding this part back into place, i.e., make sure its edges are flush all around. And then slide the locking button to lock. I haven't had any problem since noticing that this was possible, is all.
So the Ulanzi Claw Quick Release Set works as intended, is nicely priced, and is the perfect device for lunch stops.
-
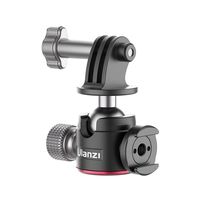
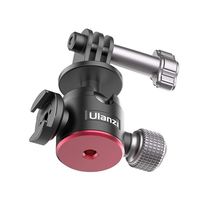
The U-130 Universal Ballhead for Action Cameras is another useful product from Ulanzi.
The product connects to the GoPro appendages on one end, the other end has a hole for a tripod screw, and there is an adjustable positioning ball in between. While you can get a glimpse of the Ulanzi U-130 in the pictures of my final setup, above, here are a couple of images from Ulanzi's site, so you can see what I'm talking about:
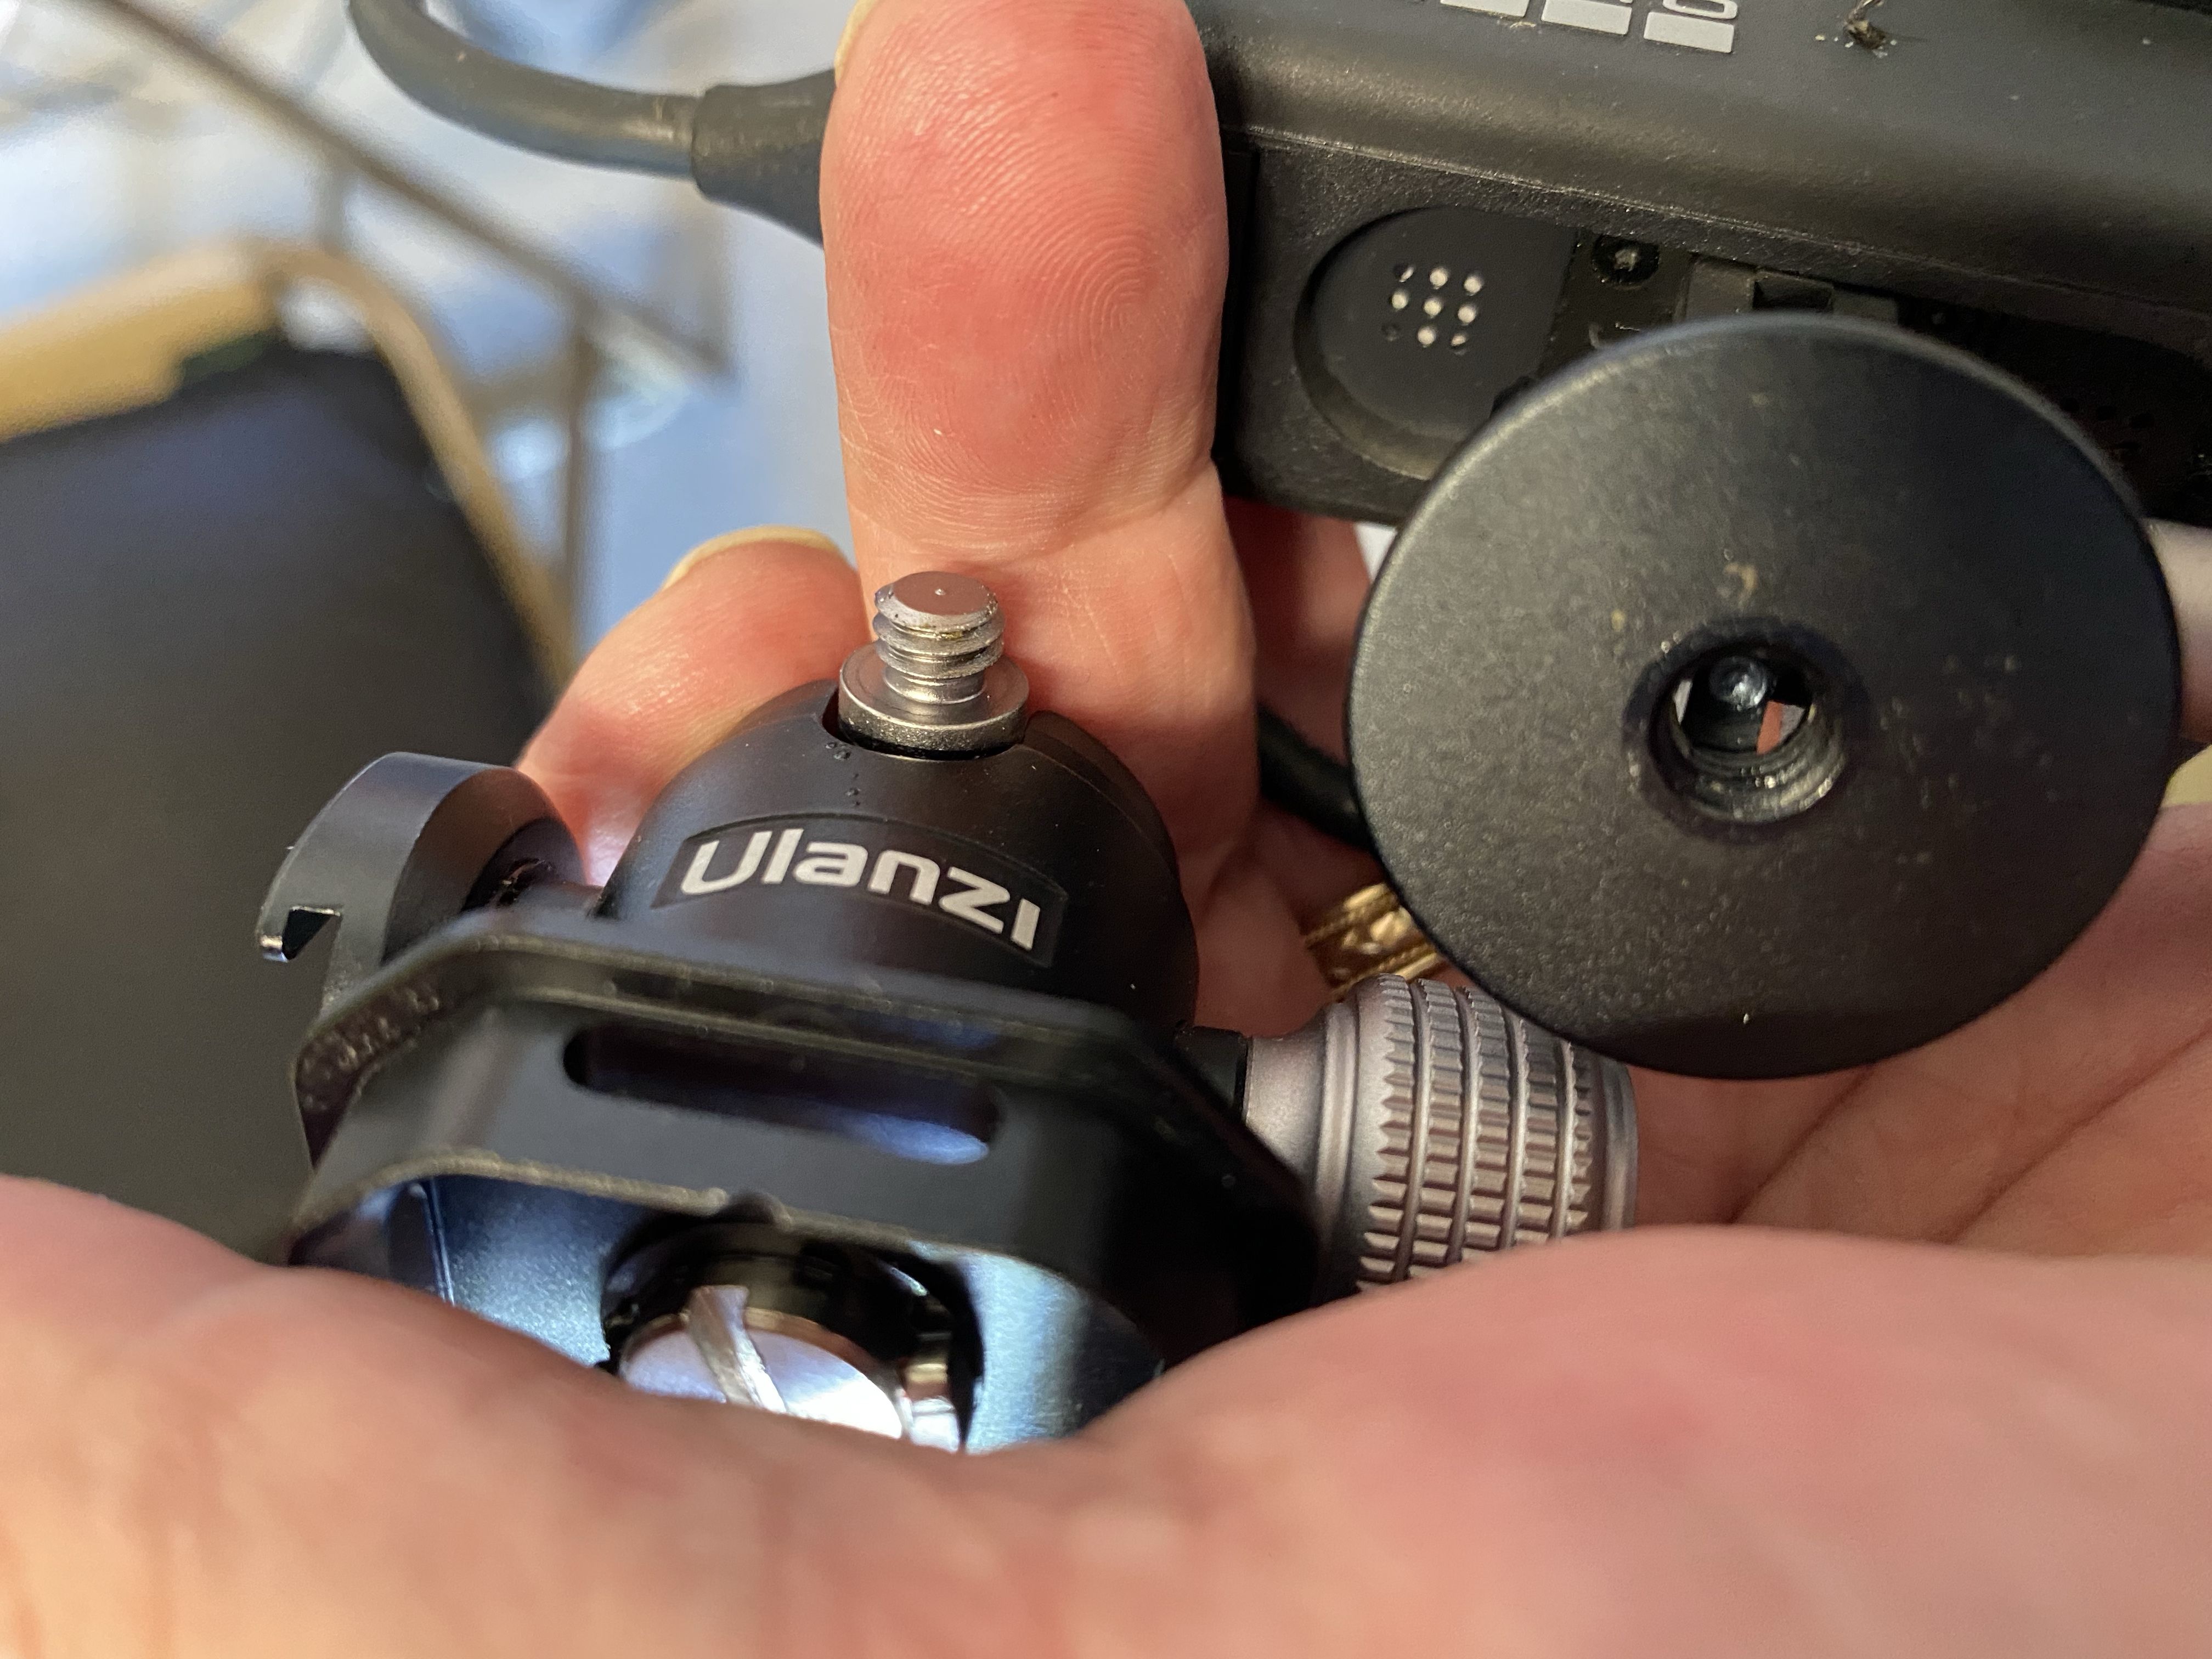
The top half of the Ulanzi Claw Quick Release Set (discussed in the prior bullet) has a captive tripod screw, and this connects to the bottom of the Ulanzi U-130 ballhead (and this is the only place that I used a tool — a screwdriver — to tighten):

Update, three months later ... That screw, on the top half of the Ulanzi Claw, worked its way loose a bit, allowing the attached ballhead to rotate slightly. I backed out the screw, added red, i.e., "permanent," liquid threadlocker, and tightened it again. I expect this fix to take care of that issue.
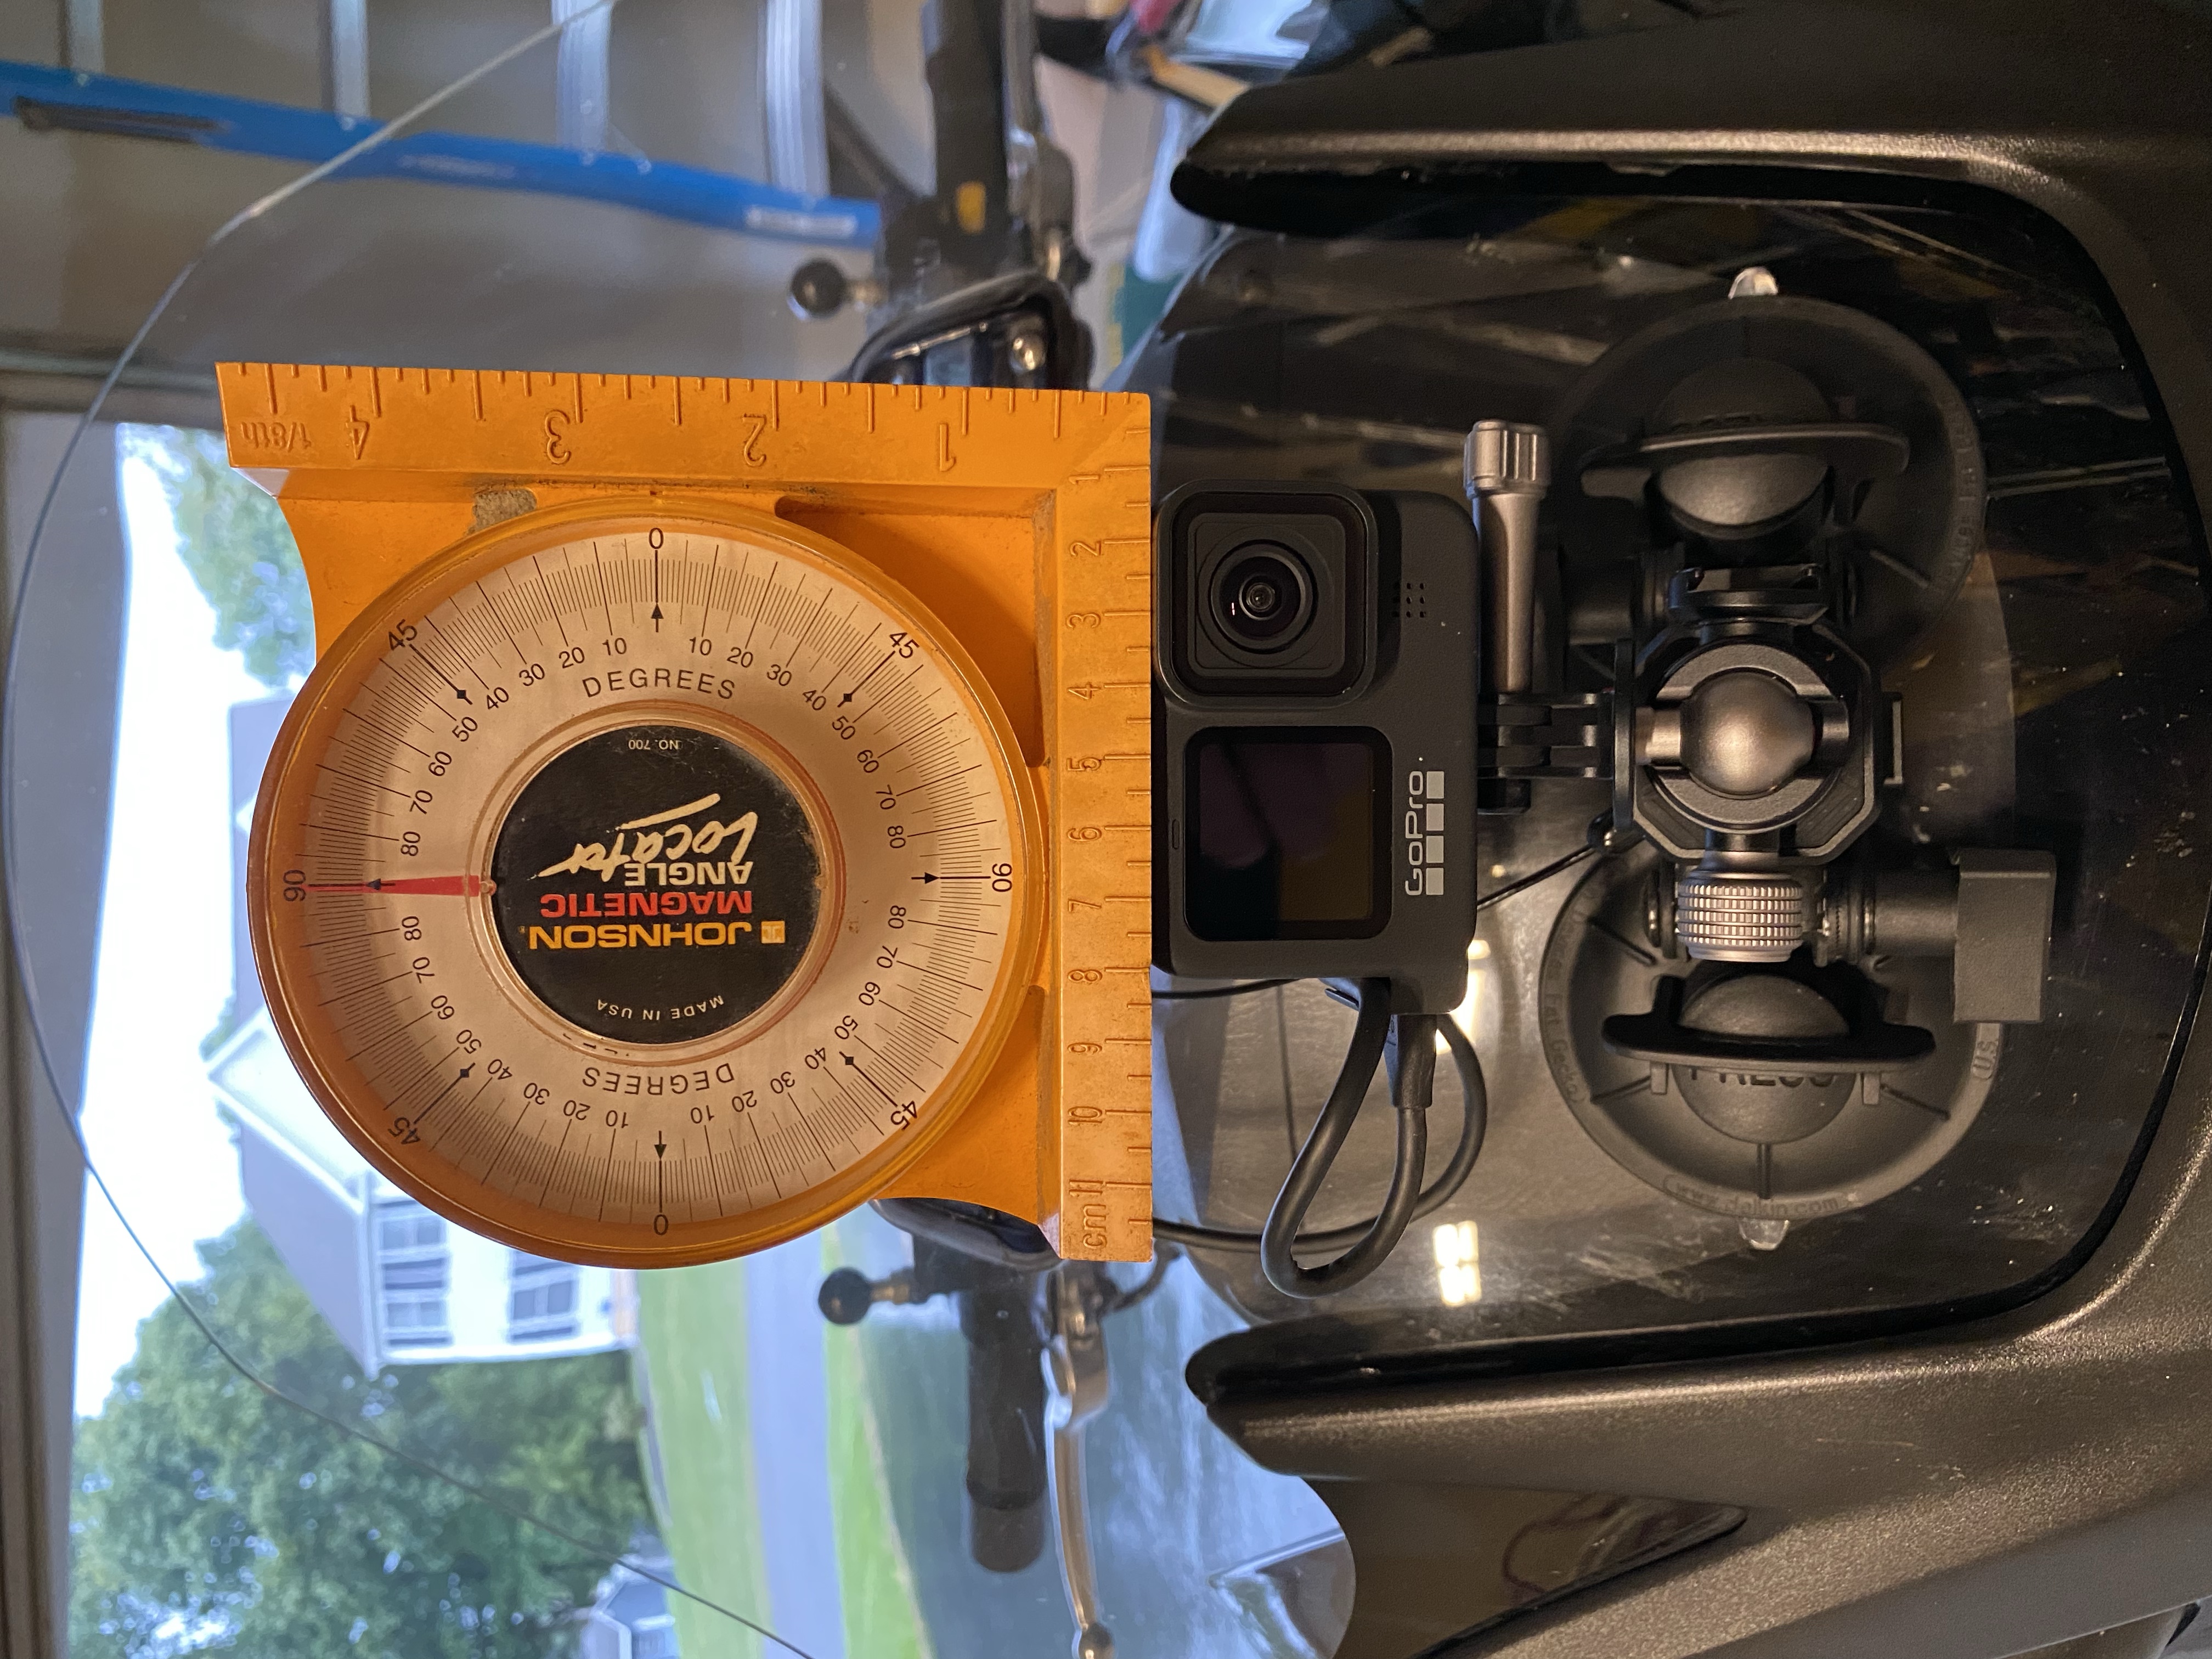
Back to the ballhead. Its purpose is, obviously, to afford you flexibility in positioning the camera. Regarding that, one item that you may not have thought about is the vertical aiming of the camera. If you have the lens pointed more or less straight ahead, i.e., parallel to the road, you'll get too much of the road surface in the video (at least in my opinion, that very first video on this page notwithstanding).
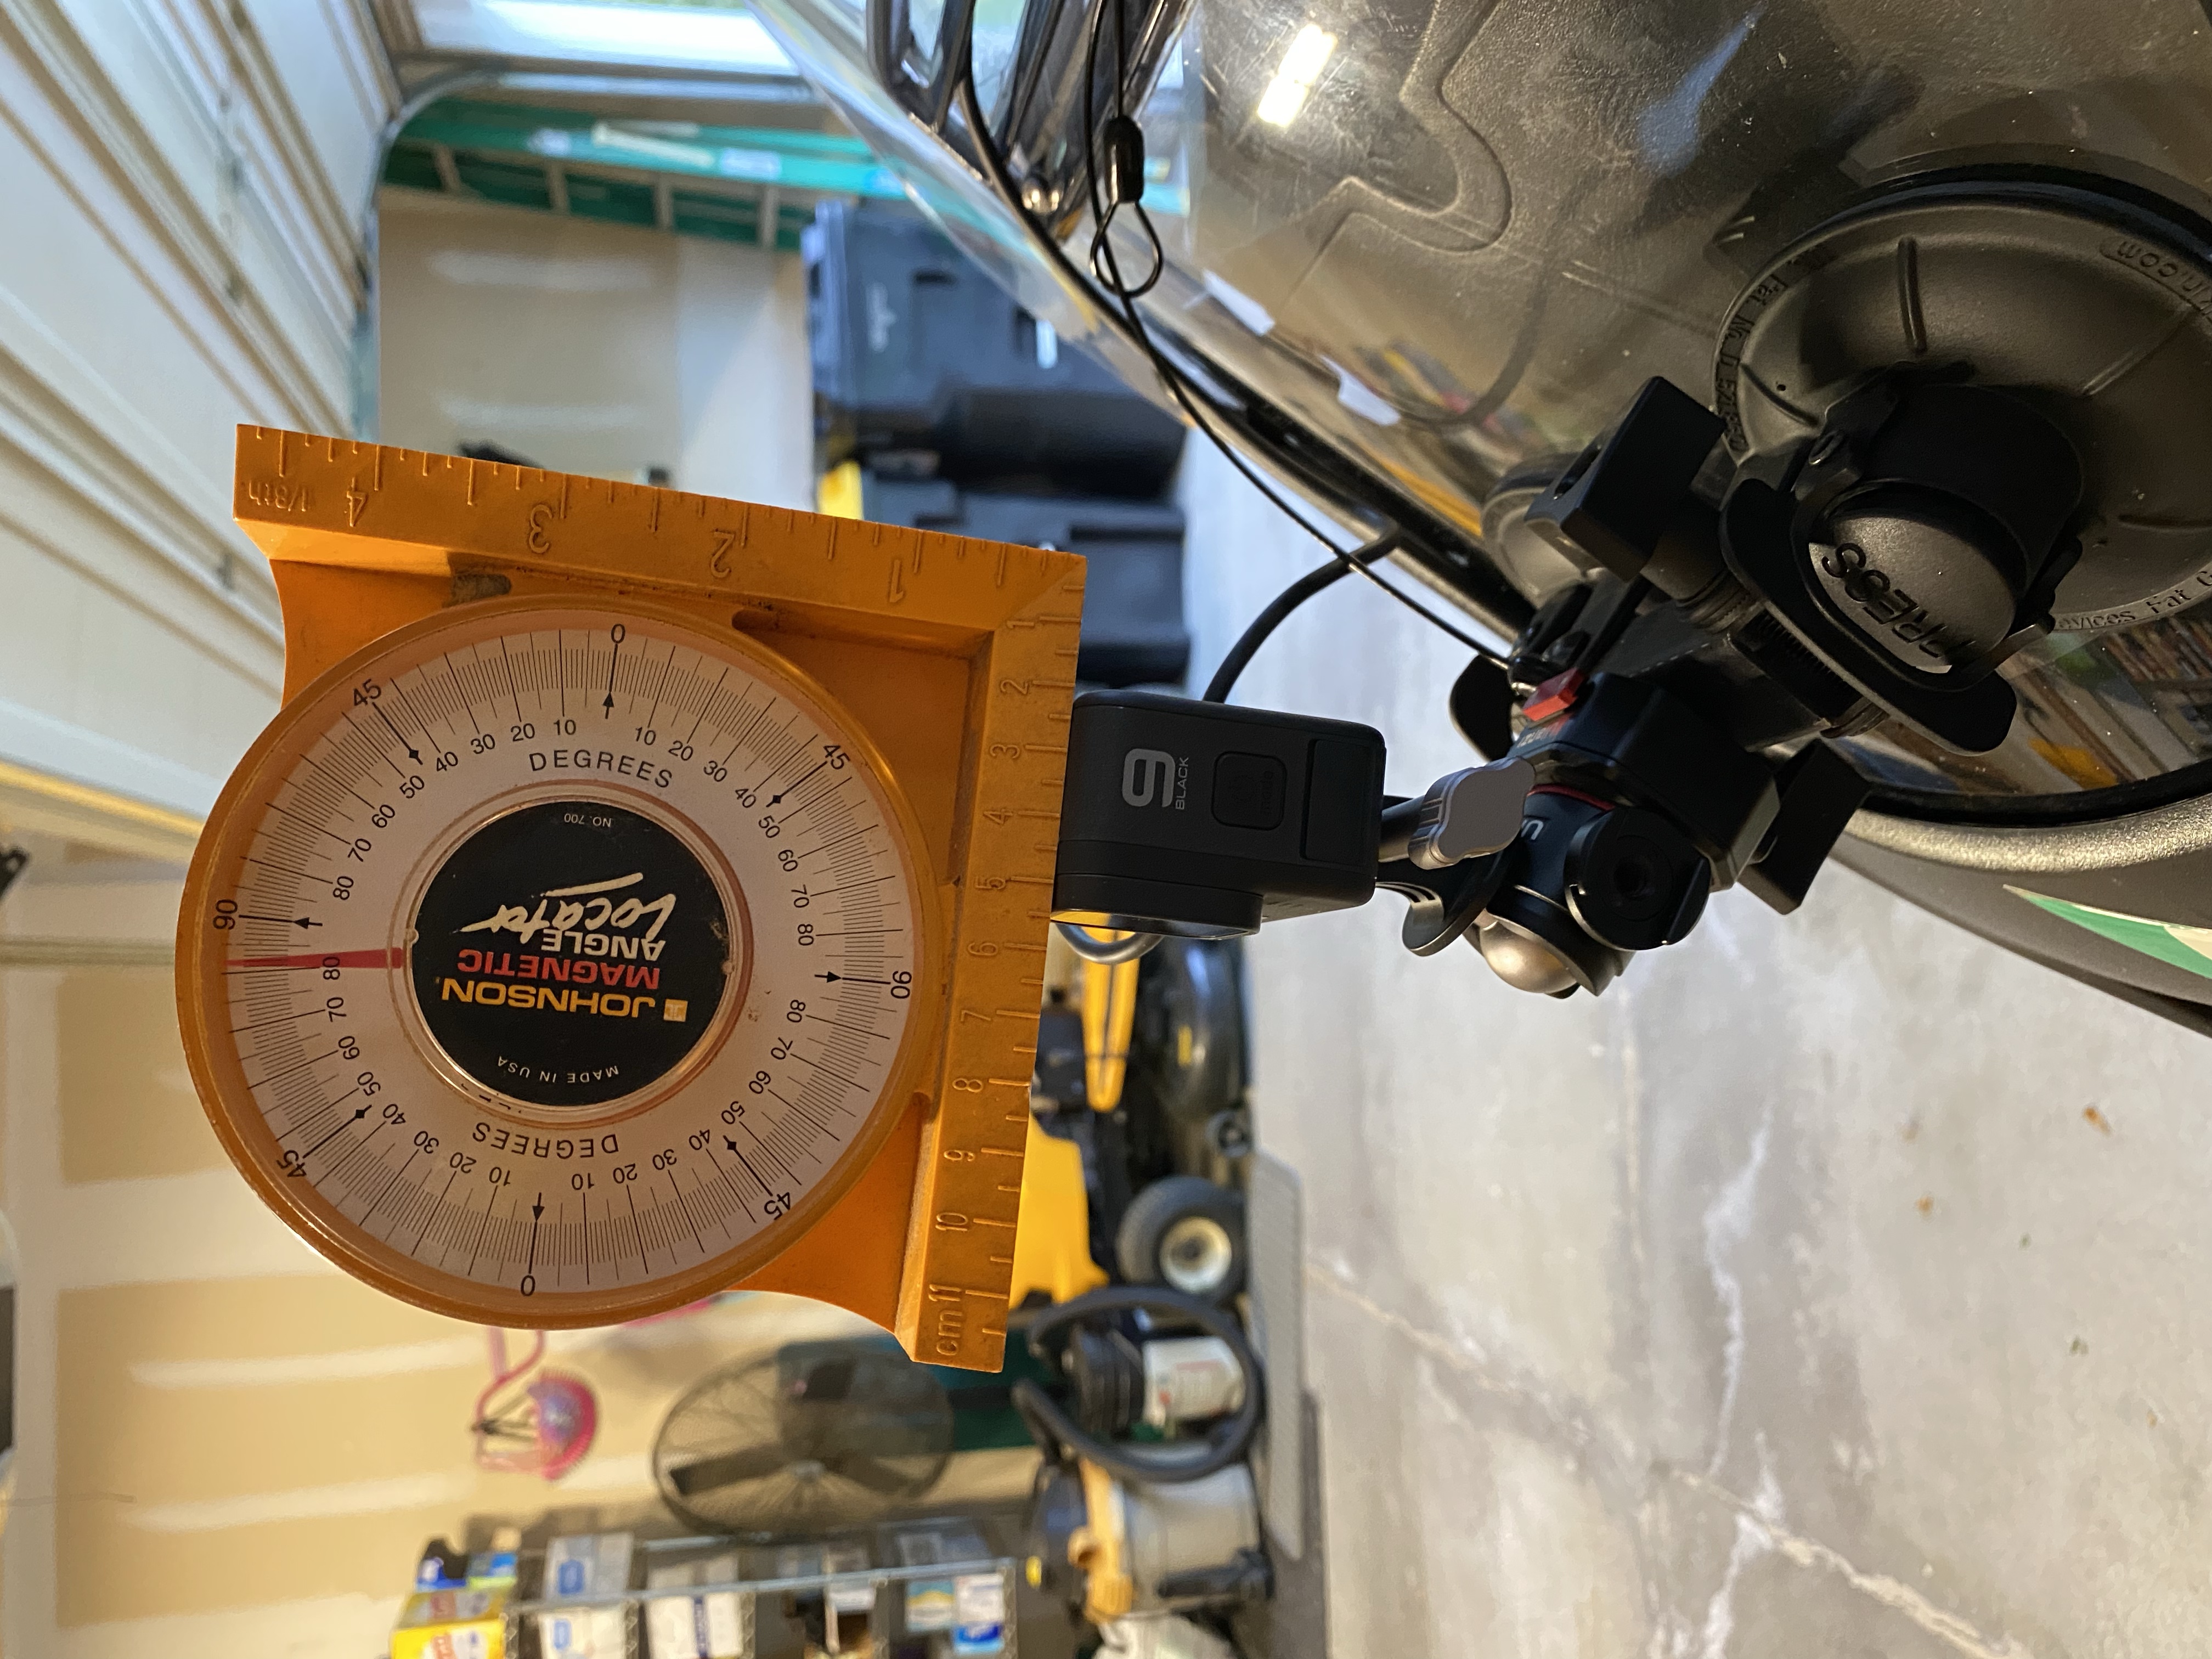
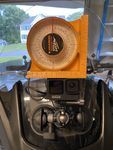
My suggestion is to aim the camera upwards about 10°. You'll still get plenty of the road surface in your video, as you saw of that dirt track in the video above, but you'll minimize its being excessive. Here's how I generally aim the GoPro:
(Note that the actual upward pointing is a little greater than depicted in that photo, because the bike is on its center stand, i.e., the rear wheel is off the ground a bit. On the other hand, my garage floor is sloped downward about 1°. In any case, during a ride the camera will be pointing up a little more than that inclinometer indicates. As I say, I think an actual upward angle of about 10° is a good starting point for experimentation.)
The only possible downside is that if you're riding in a relatively dark area — say, a tree-lined road — but the sky is very bright, the dark area might be a little underexposed (because the camera's sensor is reading a lot of that sky).
On the other hand, if you're spending a week riding in the Alps, this up-above-level aiming is critical, or you may chop off some of the glorious mountain scenery. Here is perhaps my favorite video chunk of the week I spent doing this, in 2019, as a customer of Edelweiss' Touring Center Alps tour (and, no, you won't hurt my feelings if you don't invest the half-hour to watch this):
(If you were just reading about the Telemetry Overlay software, below, you can return to it by clicking here.)
By the way, I had originally added overlays to that video using RaceRender, but later generated them using Telemetry Overlay. I'll discuss that change later on.
Okay, remember what we were talking about in this section, regarding the hardware setup? Right, the Ulanzi ballhead.
To summarize, the Ulanzi ballhead combines the functionality of the Manfrotto 494 ballhead and the Smatree GoPro-to-tripod adaptor. To my knowledge, this is the only ballhead that incorporates a standard GoPro thumbscrew receptacle (which is also used by some other brands of actions cameras) at the outer end (as opposed to, say, a tripod screw or threads).
Update, three months later ... I thought perhaps the GoPro receptacle was somehow permanently attached (welded?) to the ballhead in the Ulanzi U-130. It turns out that these are separate parts, just as with the Manfrotto 494 ballhead and the Smatree adaptor:

I discovered this when the connection became loose, at which point I unscrewed the two parts, added some red, i.e., "permanent," liquid threadlocker, and put it back together. Nevertheless, I still recommend the U-130, as it's lighter than the Manfrotto 494 and seems sufficiently robust. Having hand-tightened, very snugly, the two thumbwheels, I have not had to adjust these all season.
Update, April 2022:
It appears that the "U-130 Universal Ballhead for Action Cameras" is no longer produced. I sent an email to Ulanzi when I failed to find the U-130 on a recent visit to the company's web site, and was told in a reply that "the product is not available and stops [sic] production."
I did discover another ballhead with a GoPro holder, the "Kupo GoPro Tripod Mount with Ball Head Adapter (KG015011)," at Amazon. This looks similar to the Ulanzi product, but I have no experience with it, can't vouch for its robustness, etc.
-
Next in the mounting system is the camera itself, the GoPro Hero9 Black.
While the Hero9 has many new or improved features, for my routine, and fairly simplistic, purposes, the Hero9 is only a modest improvement over the Hero7. But life is short, and I availed myself of an introductory offer that GoPro was having when the Hero9 was introduced.
-
Next up is GoPro's USB Pass-Through Door:
As I mentioned earlier, when discussing 3BR Powersports' X~PWR H5 for the Hero7, hitherto GoPro did not offer a way to charge a camera while in use, while keeping it at least rainproof (although, reasonably enough, not submersible). Now, with little fanfare (I'm on their mailing list) and for the Hero9 (and now also the Hero10) only, GoPro offers a replacement side door with a weather-tight seal and a cable clip, and an included USB cable.
-
The bike-powered USB outlet, i.e., the 3BR Powersports PANEL TAPP remains in place:
-
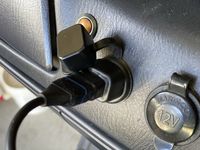
Update: I had noted in an earlier version of this document that the USB mating connection, at the bike, was very slightly exposed to the elements. What I had forgotten is that, years ago, I had ordered an extra 3BR Powersports TAPP CAPP (as one had also been included on a USB cable that I bought from 3BR).
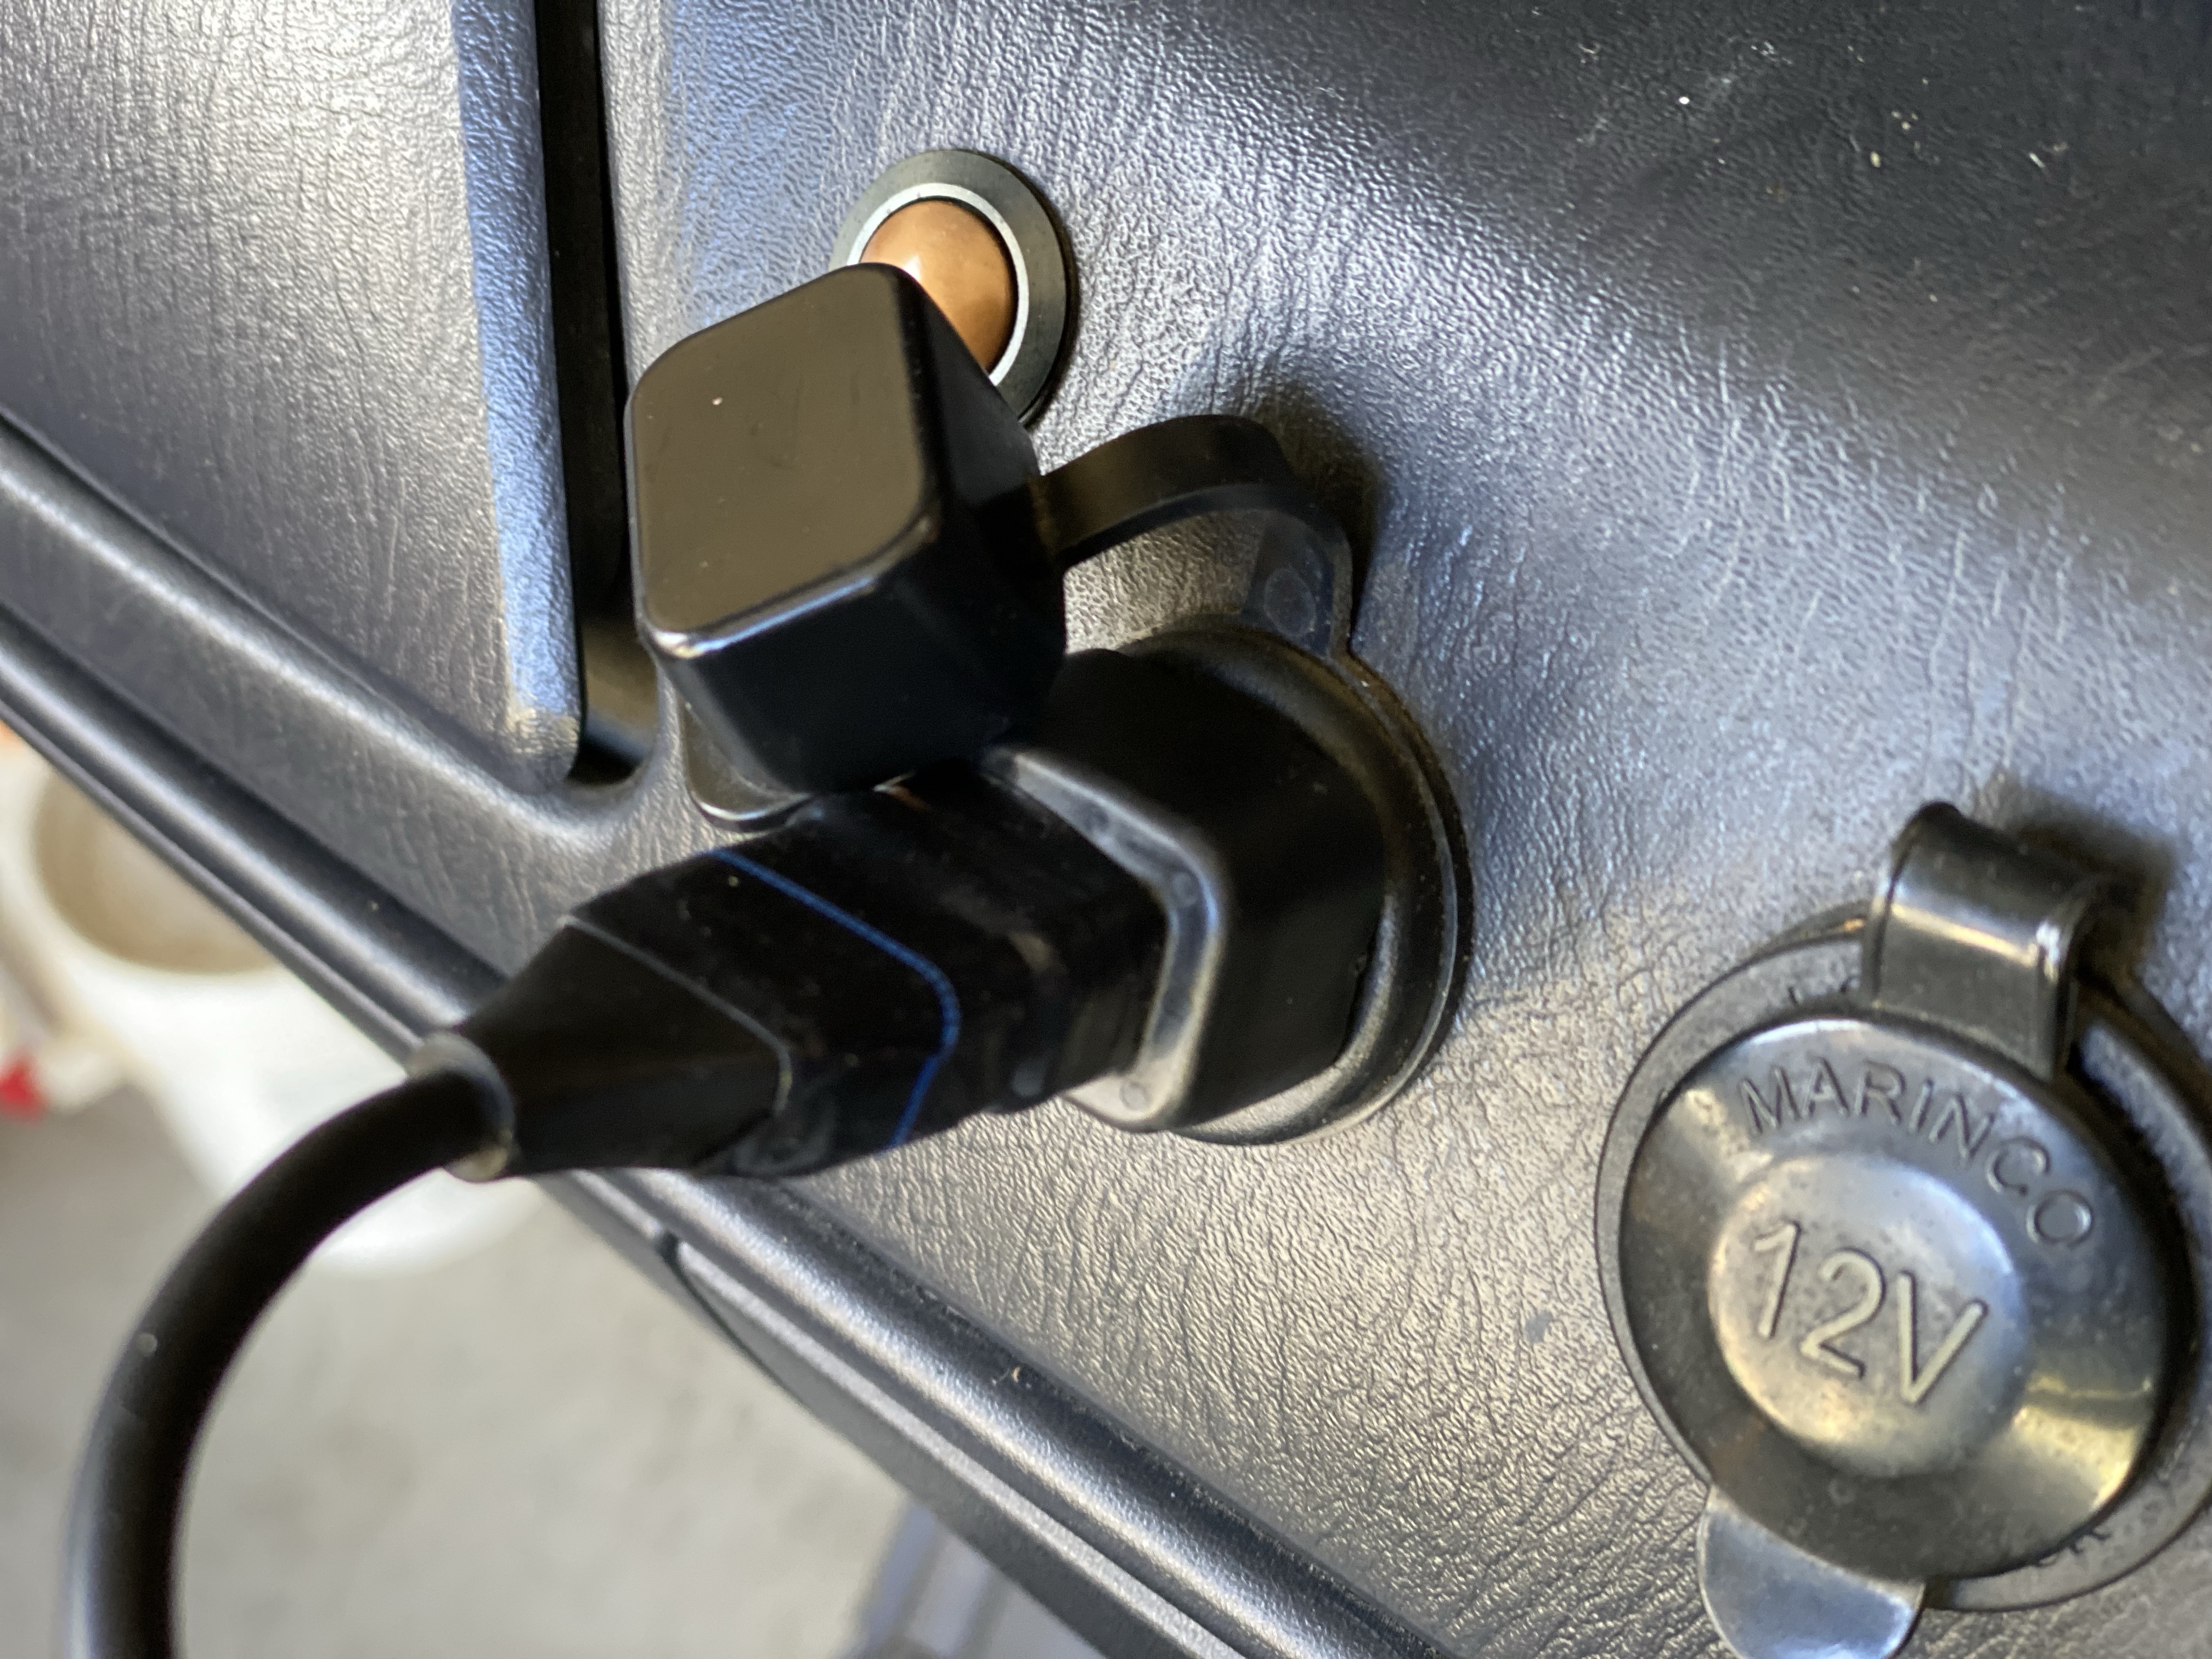
The TAPP CAPP solves the rain issue, at the point where the GoPro cable (the one included with GoPro's USB Pass-Through Door) meets the USB connector in 3BR's PANEL TAPP. It is a stepped rubbery shroud, with one tier that fits over the end portion of the USB cable, amd the other around the outside of the PANEL TAPP; some self-healing tape is included, to seal the area where the TAPP CAPP meets the molded portion of the cable:

Reasonably enough, 3BR's TAPP CAPP is designed to work only with its PANEL TAPP; it will likely not fit around, say, a USB converter that plugs into a cigarette-lighter style of socket. It will, however, allow you to plug in a USB extension cable — one that's hooked up to your computer, for instance — in order to let you upload the videos from the camera with no interference.
Thus, I have the TAPP CAPP installed on the cable that came with GoPro's USB Pass-Through Door, which is, therefore, rainproof on both ends now. Note that when using that USB Pass-Through Door, you have to use a cable of a particular outside diameter, in order for it to stay put in the cable-clip in that door (which is probably why GoPro includes that cable, in addition to its having a suitable connection to the camera's power port). So that's a sort of dedicated cable, anyway; for other, non-riding, purposes, you should use other cables from GoPro that come with their cameras.
And while we're on the subject of bike-mounted USB outlets, whatever kind you use, make sure you wire it such that it's powered only when the bike is. That is, powered USB outlets consume electricity even when nothing's plugged into them (because of the transformer in them), and so would drain a bike's battery if they were hot all the time, i.e., even when the bike's not running.
VI. EPILOGUE: A YEAR LATER, A NEW BIKE, AND BACK TO ONE SUCTION CUP:
Fast forward, and here we are, October 2022, a year and a few months after I began this tutorial.
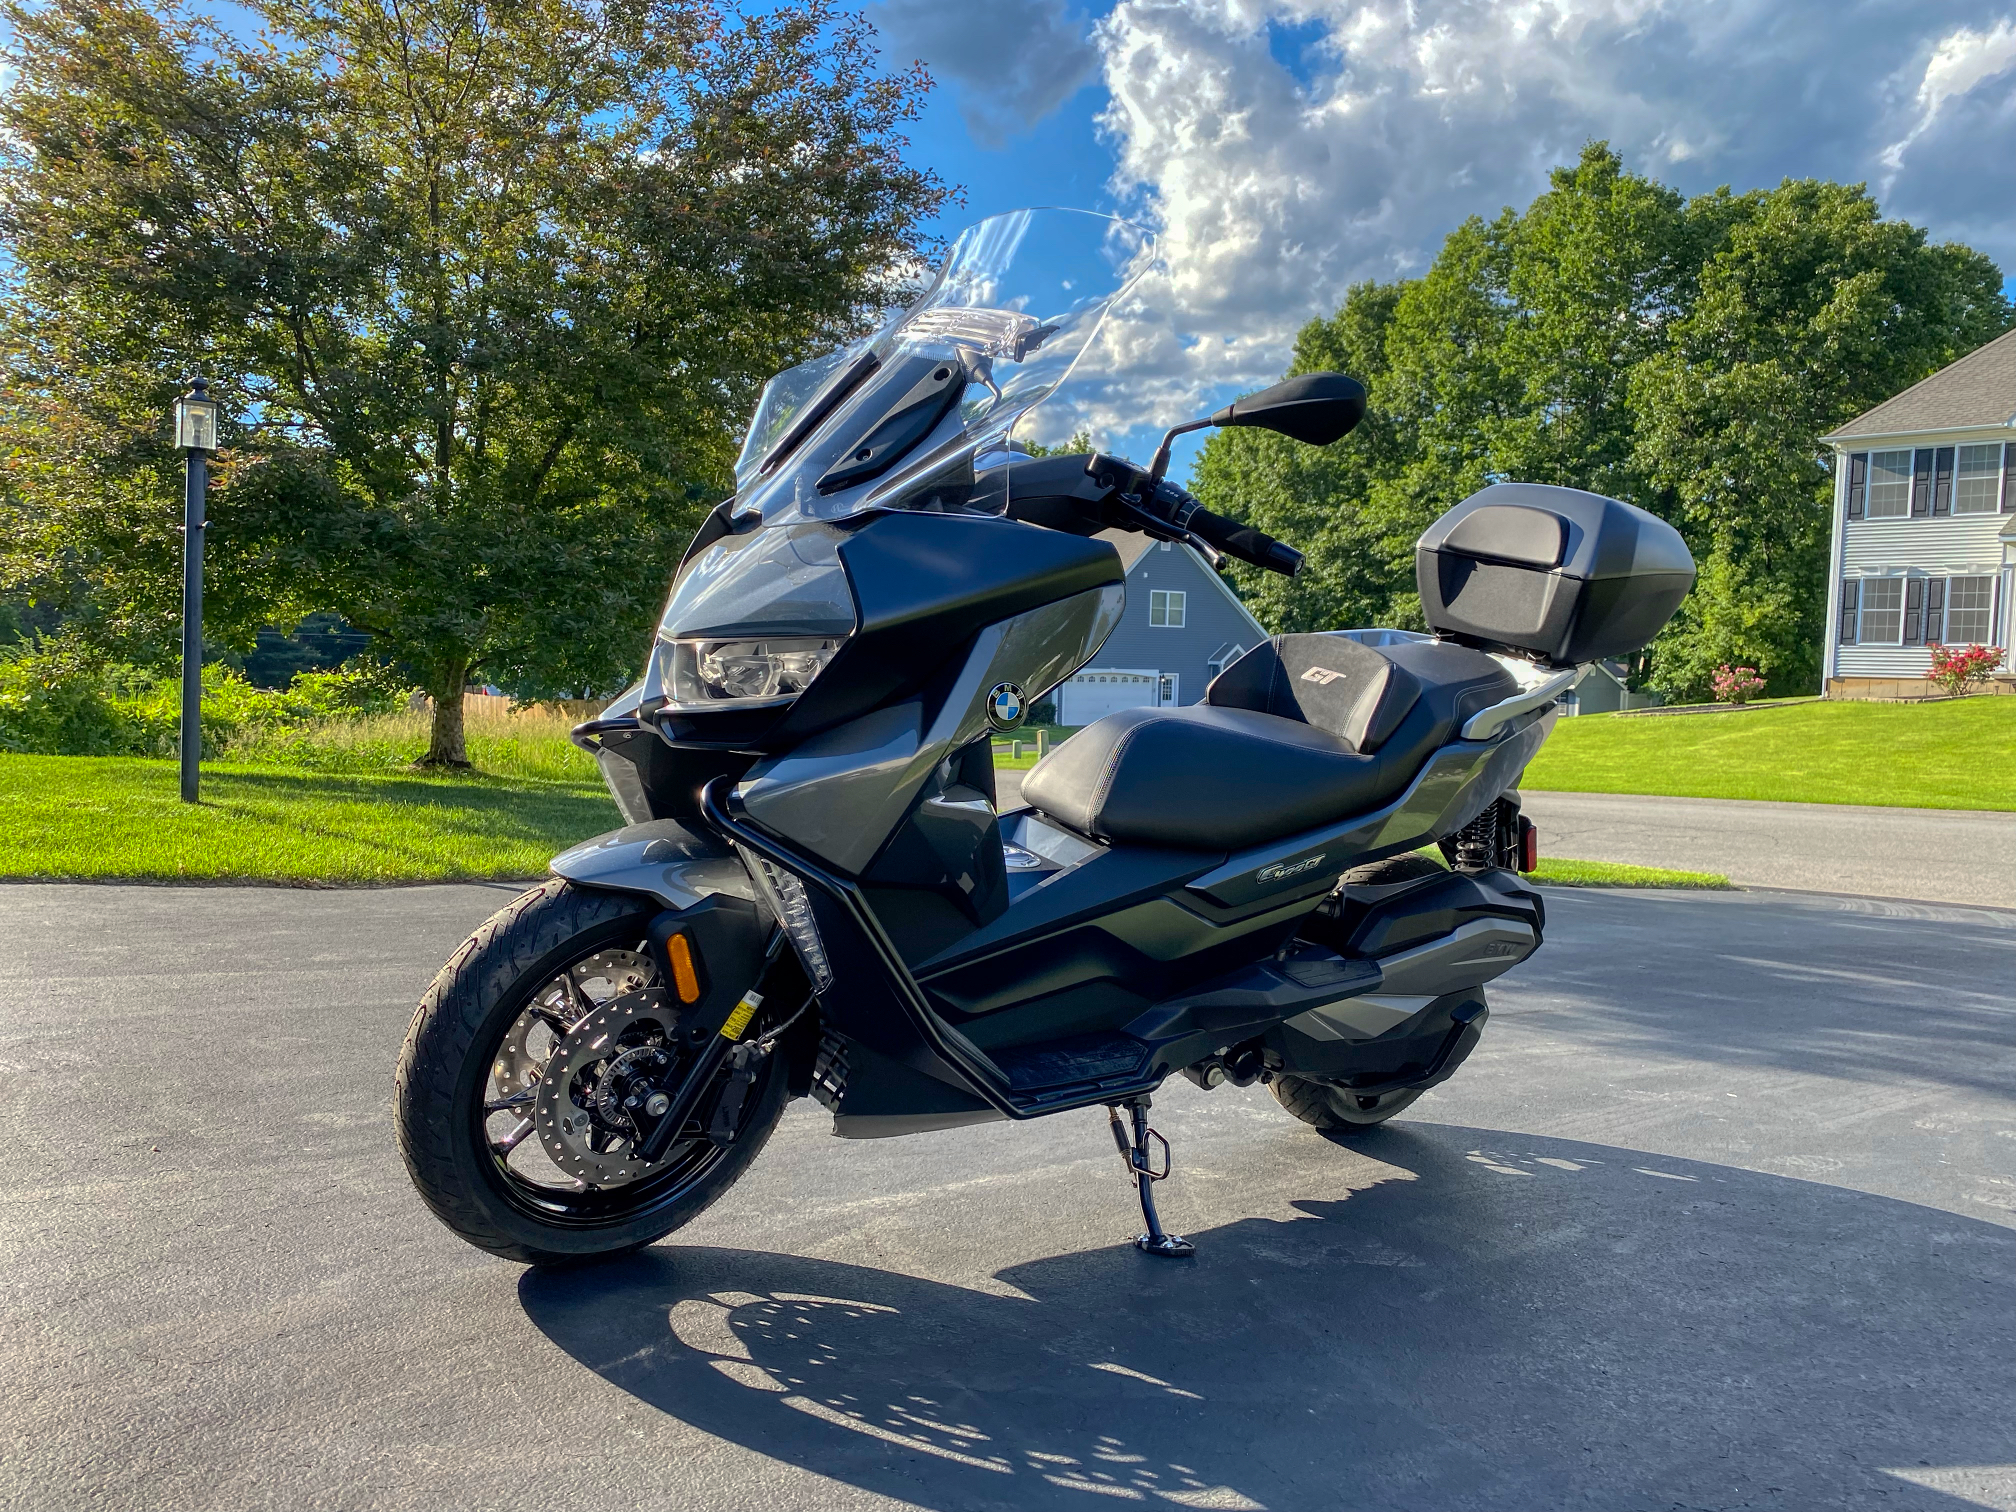
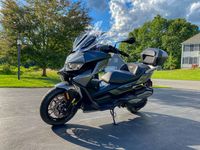
In May 2022, my wife and I participated in two Edelweiss scooter tours in Europe. We both liked the rental bike we were on, a BMW C 400 X scooter, so much that when we got home I ordered a C 400 GT (the upscale version, which is the sole variant sold in North America). I took delivery of the new scooter (with a few aftermarket additions) in June (and sold the Burgman the next month):
The flat area of the C 400 GT windshield is much smaller than the corresponding space on the Burgman. While I could have mounted my modified (see above) Delkin Fat Gecko Dual Suction Mount vertically, instead of horizontally, between its windshield support brackets, I decided that the single-suction-cup PanaVise (see earlier discussion) was sufficient, and also that its lighter weight would be better tolerated by the new windshield.
Also, note that by this time, I had used the PanaVise to mount a GoPro for a week's tour in the Alps (which included two no-speed tipovers!), and, most recently, to mount a GoPro for two weeks during our scooter tours. And there had been no issues: no maintenance, no adjustments, no coming loose, during either week. The one alteration I've made to the PanaVise over the years is that, some time back, I removed its ¼"-20 tripod bolt, put some red, i.e., "permanent," threadlocker on it, and put the bolt back in.
As with the dual suction cups of the Fat Gecko, let me reiterate that getting a suction cup securely mounted requires that you thoroughly clean both the windshield and the bottom of the suction cup itself with alcohol and a lint-free cloth, and then let dry, before the initial attachment. And then, typically (read the directions), push the locking lever to its unlock position, firmly push the button to expunge air, and, while still holding that button down, flip the locking lever to it lock position. From my experience with one or the other suction cups of the Fat Gecko coming loose over time, with the PanaVise I spend just a few seconds every week or two performing that re-tightening routine: flip to unlock position, push the button down, flip to lock (and no need whatsoever to even lift up on the removal tab on the base of the suction cup).
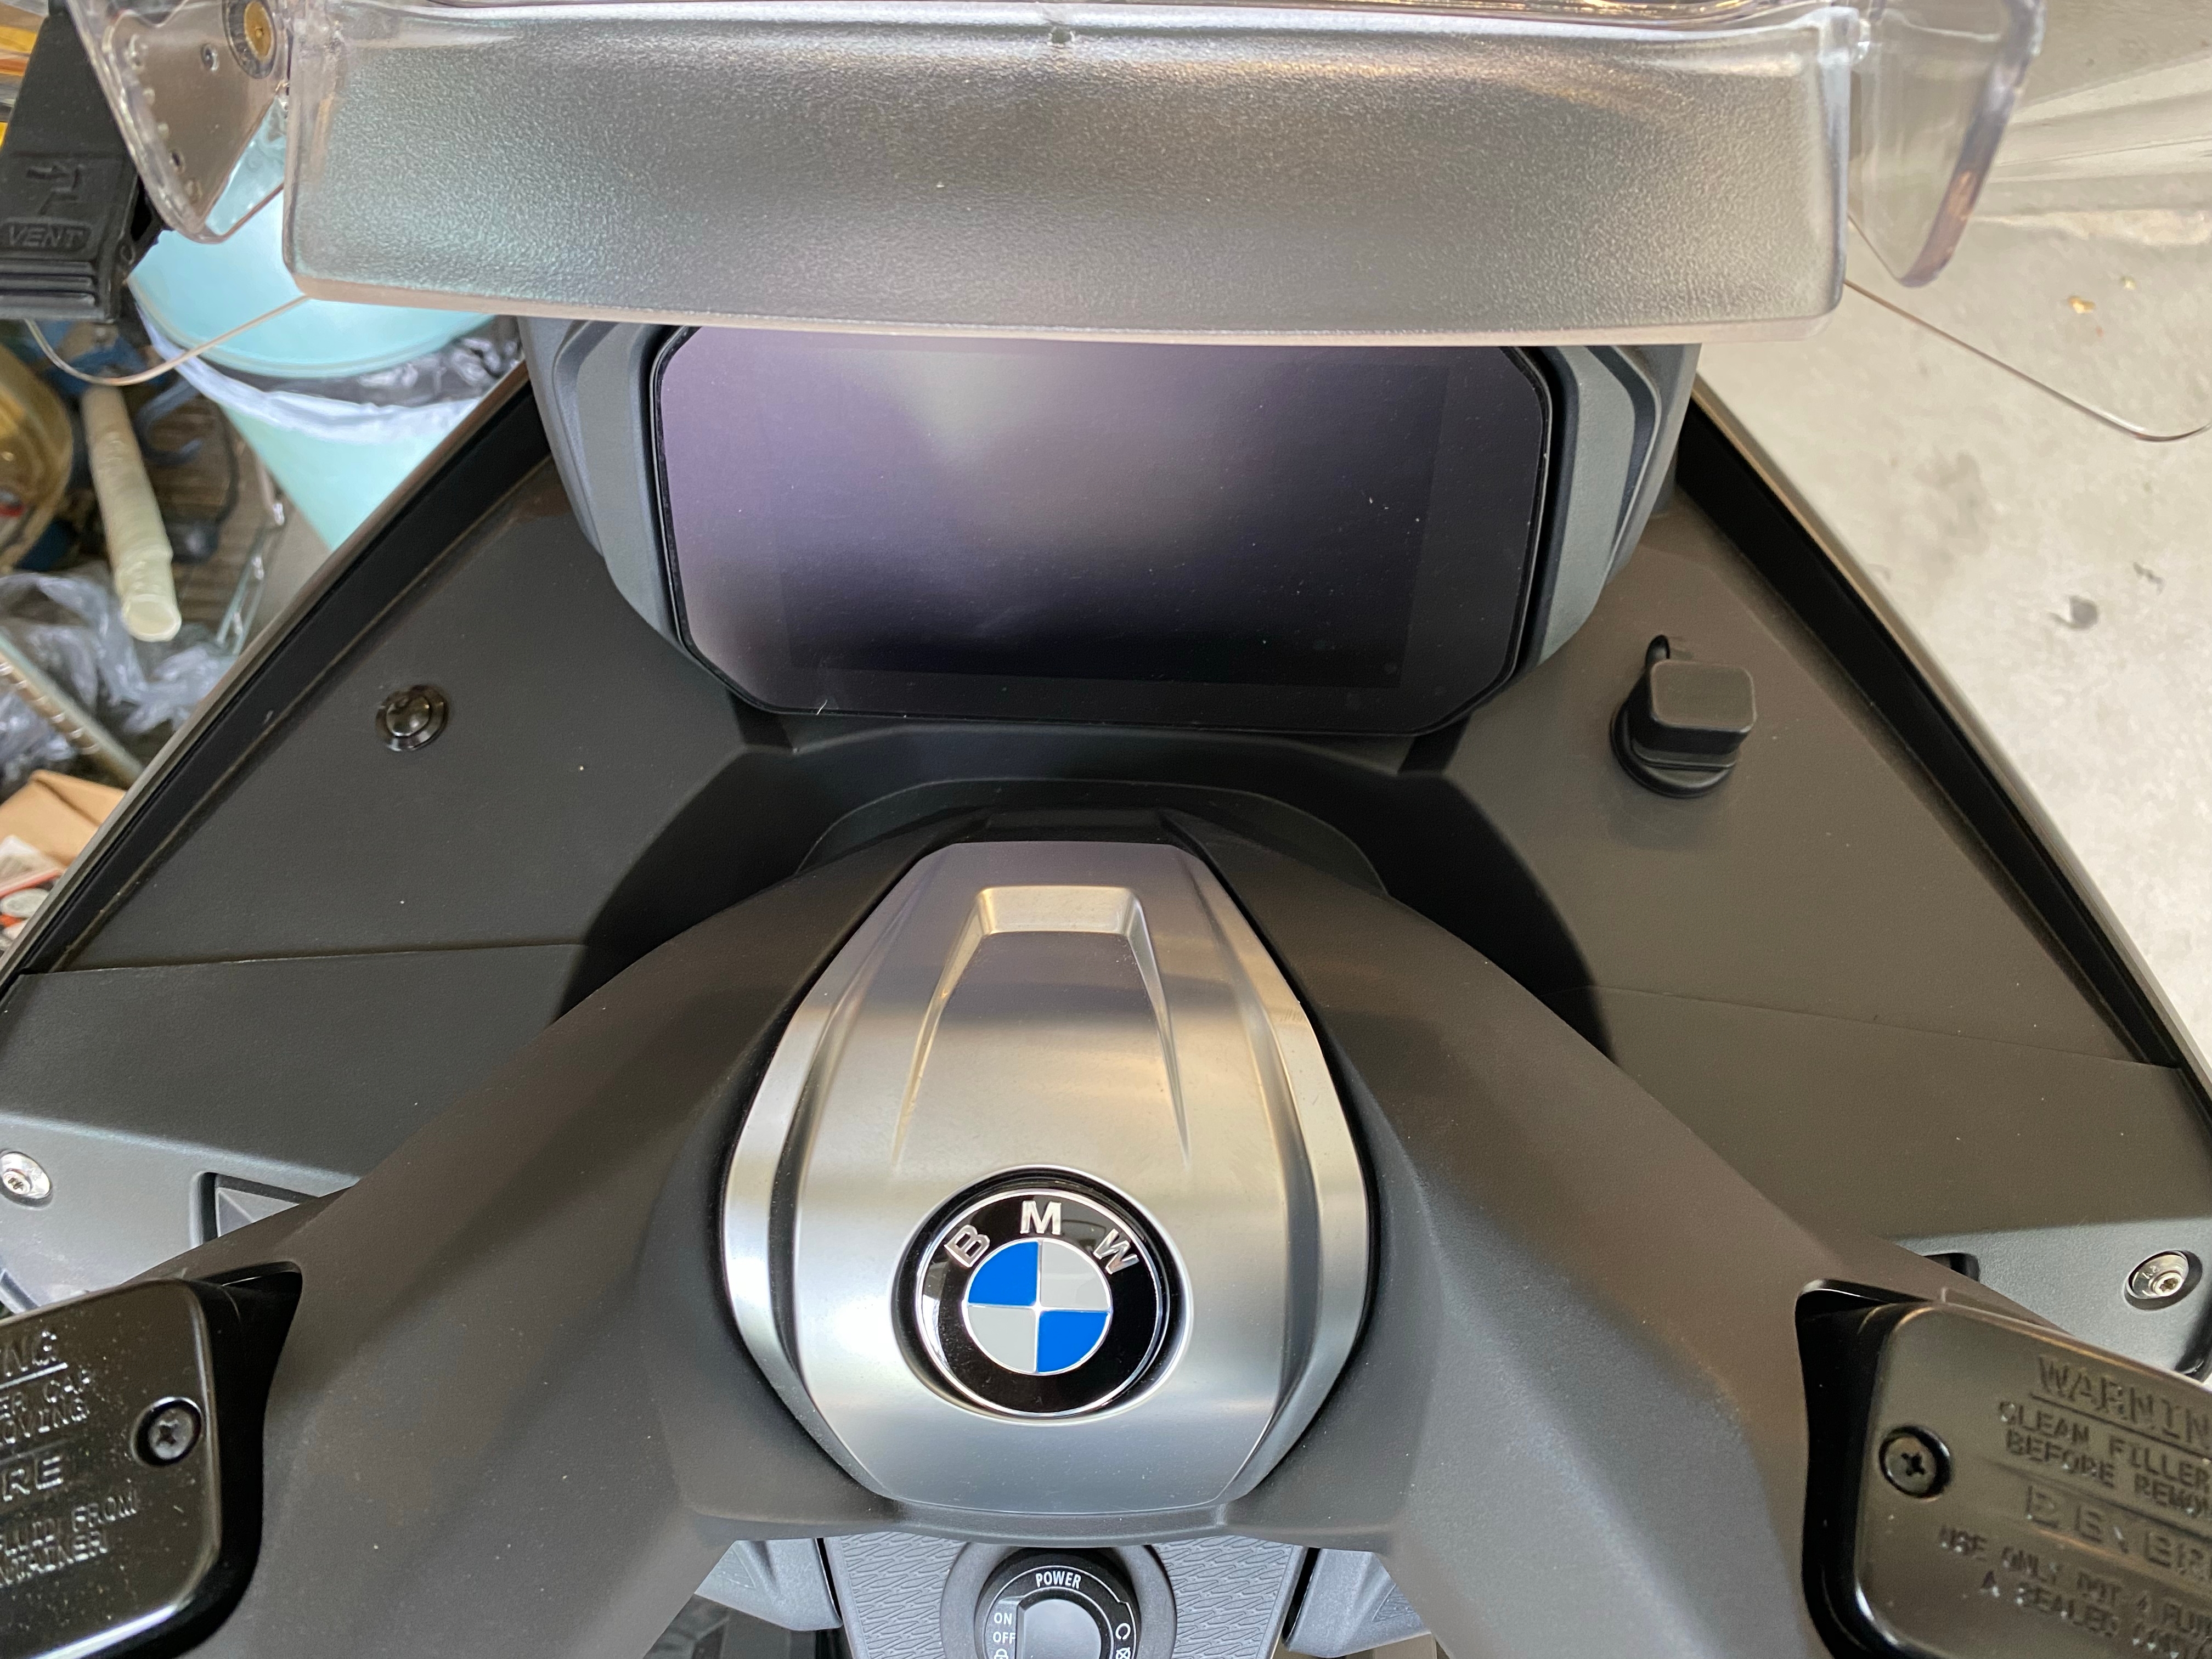
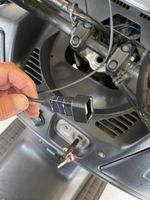
As on the Burgman, I did some plastic drilling and some wiring, and installed another 3BR PANEL TAPP rainproof USB outlet (look over on the right, on the dash):

Thus, my 2022 system is the same as before, with the substitution of a one-suction-cup mount for a two-suction-cup mount:
-
PanaVise 13101 ActionGrip Shorty Suction Cup Camera Mount (available at Amazon).
-
Ulanzi Claw Quick Release Set (Generation I), Claw Basic Set (Mounting Base + Plate) (also available at Amazon).
-
Ulanzi U-130 Universal Ballhead for Action Cameras (which, as I've mentioned, appears to be no longer available, but see my discussion earlier of the the "Kupo GoPro Tripod Mount with Ball Head Adapter (KG015011)," at Amazon.).
-
GoPro Hero9 Black.
-
GoPro's USB Pass-Through Door with included USB-C cable (for rainproofing the camera side of the cable).
-
The bike-powered USB outlet, i.e., the 3BR Powersports PANEL TAPP (which comes with the 3BR Powersports TAPP CAPP, for wrapping around — and hence rainproofing — the bike side of the cable that comes with GoPro's Pass-Through Door).
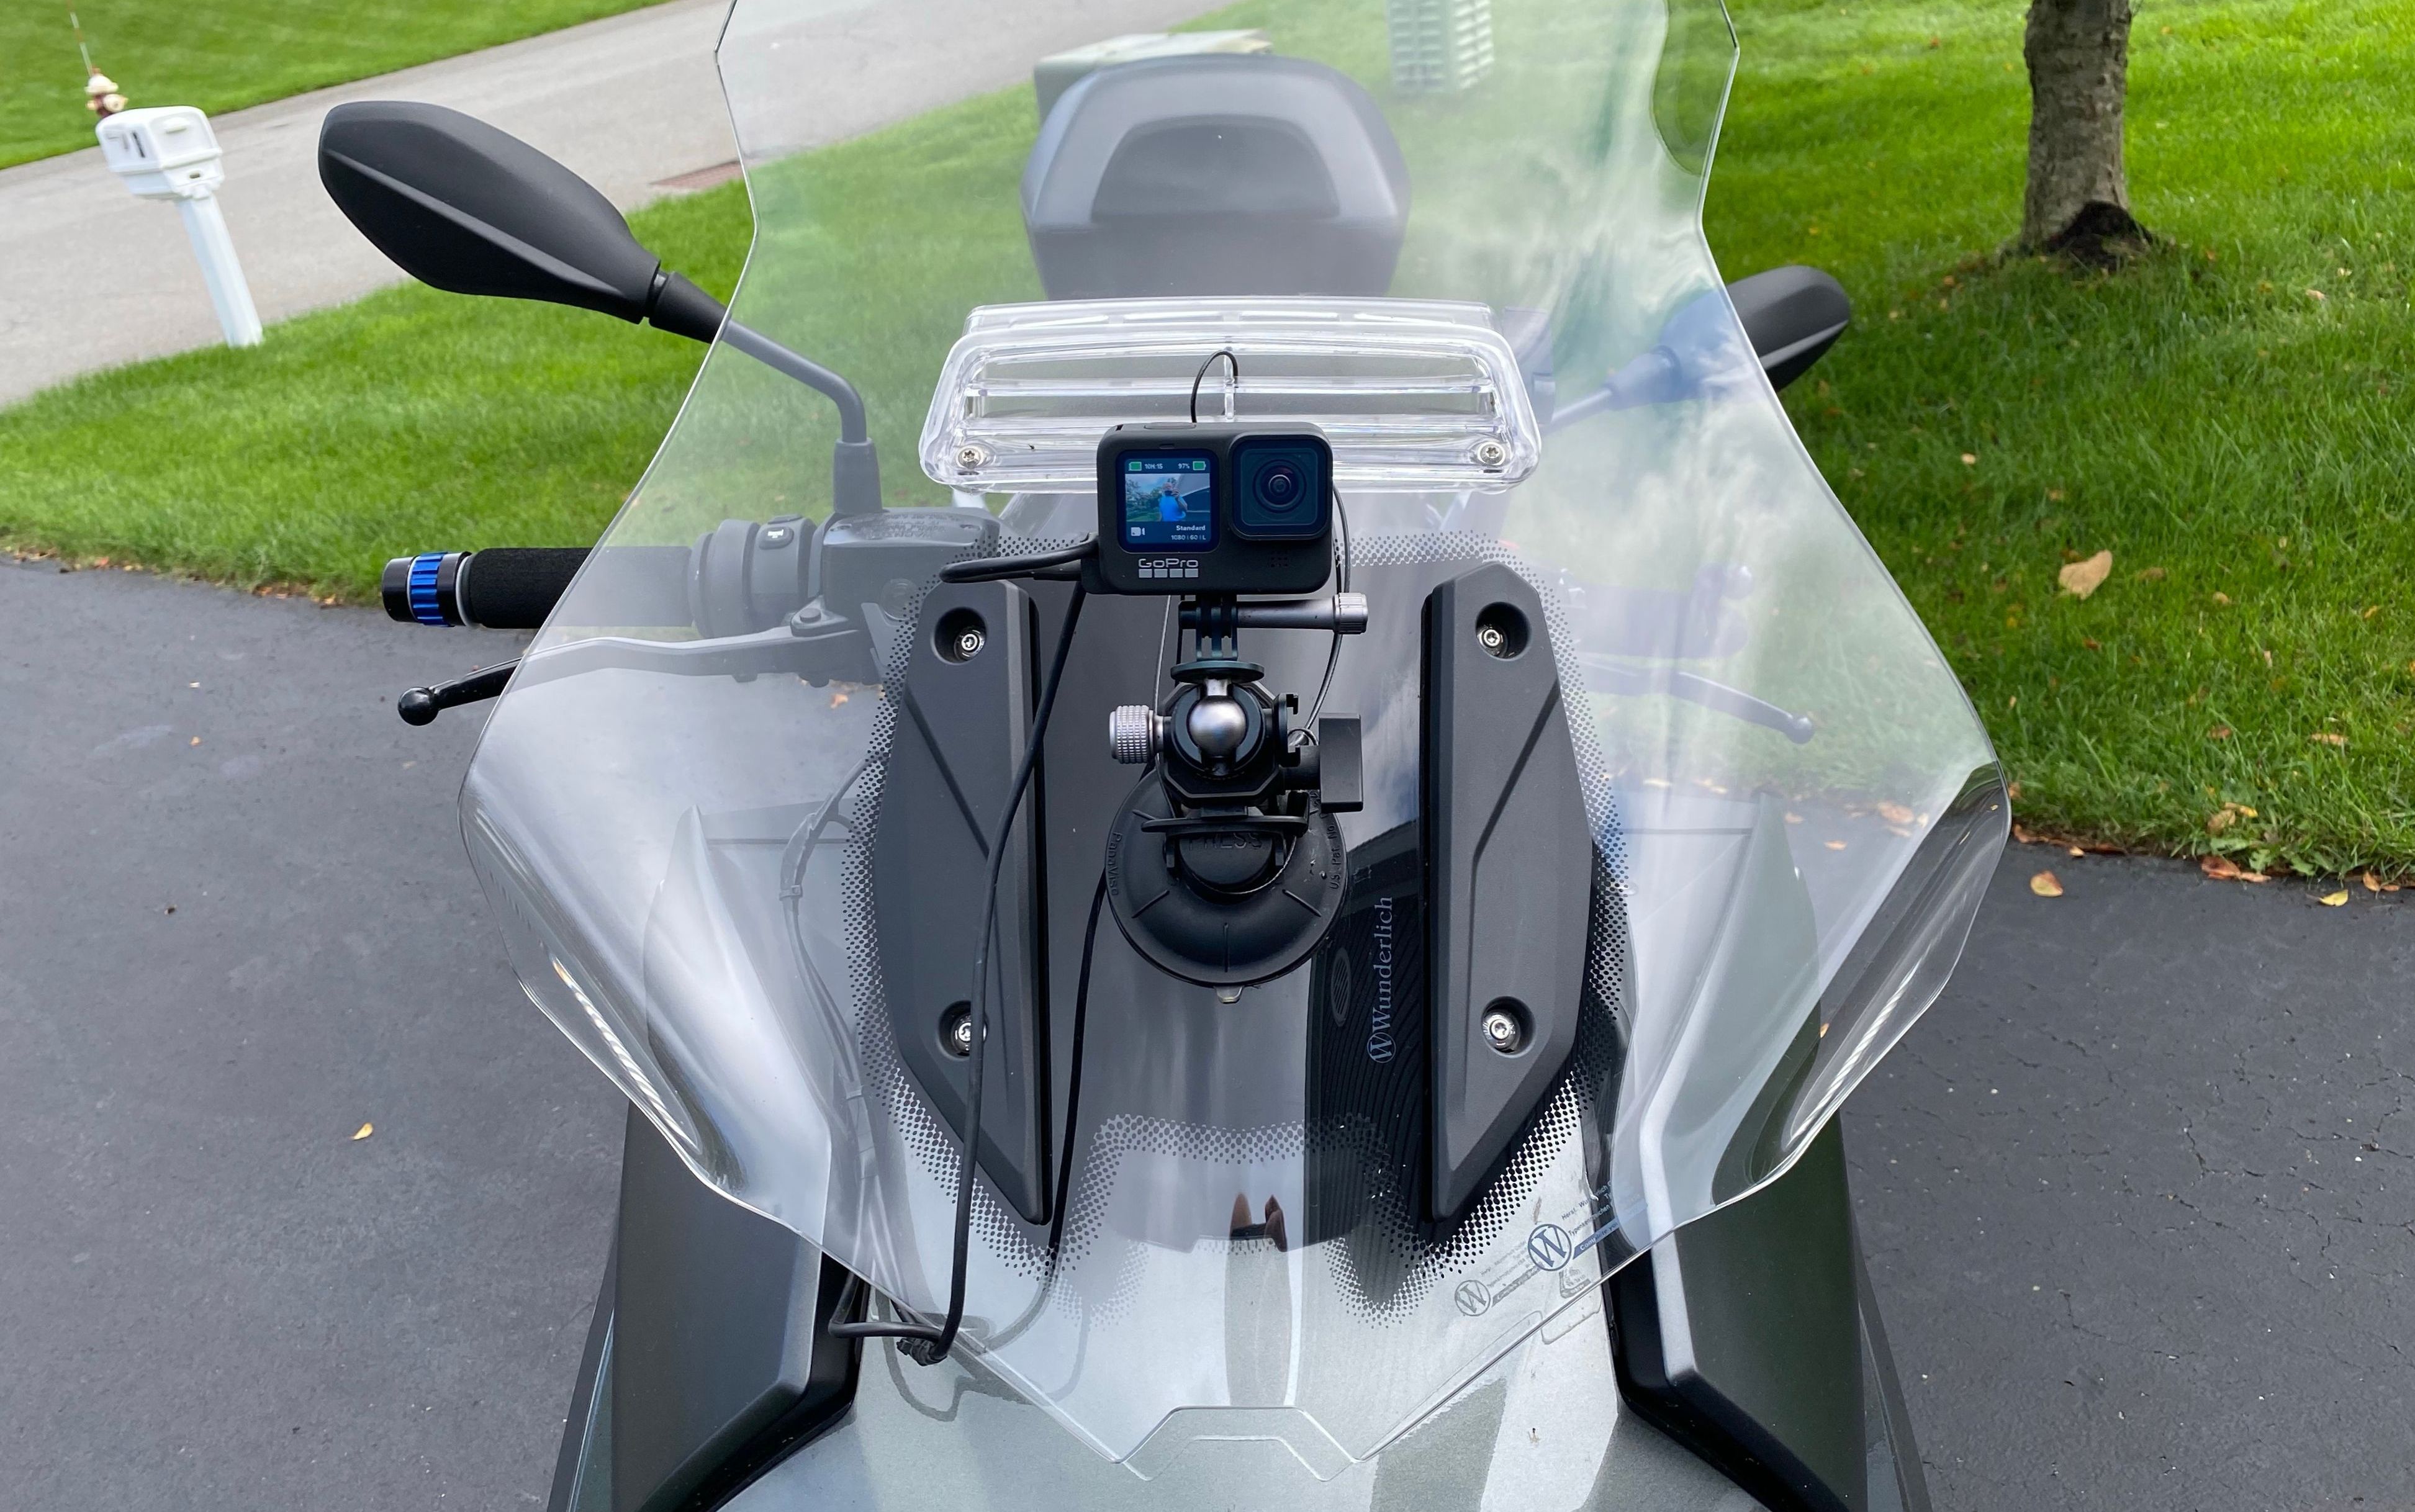
Here's a view from the side, with all these components:
So is this, um, ahem, the new Ultimate Motorcycle Windshield Mounting Setup For A GoPro Camera?
VII. OK, LET'S TALK ABOUT SOFTWARE:
If you're interested, I'll note the software I've used in the last half dozen years or so, in order to create finished versions of the videos that the various GoPro models have captured. If you're not interested in this topic, I guess we're done here.
The reasons you might want to use some software after recording a day's ride include:
-
You want to select just a portion of the ride for uploading (to Vimeo or YouTube, for example), and that portion does not match a single video file recorded by the camera, and also may include parts of successive files.
That is, a GoPro generally records in 4 GB chunks, seamlessly starting a new file when the prior file has reached that size. Your desired output — a track-day session, a given stretch of a twisty road, 15 minutes of especially nice scenery — will likely cross those file boundaries. So once you've downloaded the camera's files to your computer, you have to combine portions of, say, two successive files.
-
You want to remove boring bits, such as when stopped at a traffic light.
-
You want to add transition effects, to show that you've deleted some sections, or perhaps to ease the viewer into the video at the beginning, and out of it at the end.
-
Perhaps you want to add a title at the beginning, or overlay some text during the video.
-
And, of course, you might want to include telemetry data, e.g., the speed, altitude, path of travel, and so forth, as I've done in most of my post-Hero4 videos.
VIII. THE EARLY DAYS — A COLLECTION OF DEVICES AND CONCOMITANT SOFTWARE:
When I started recording rides, it was with the Liquid Image Ego 727 (as I noted at the very top of this page). The "processing" of video taken with that camera consisting solely of transferring it from the camera to a desktop computer, perhaps truncating the beginning and end of the file, and then uploading it to the web.
But shortly after that, I got a Hero4 Silver, the last of the GoPro models that did not have a built-in GPS receiver. And to generate video with telemetry, I employed the following:
-
The Hero4, to record the video.
-
An iPhone6, to capture the telemetry.
-
GoPro's phone app.
-
The app TrackAddict, to perform live synchronization of those two files.
-
RaceRender software, to merge those files, and then generate an output video that overlayed the telemetry.
Since the Hero4 didn't have a GPS, but the iPhone did, if you ran these two at the same time you could, in essence, combine these two physical devices. TrackAddict by HP Tuners is a phone app, and can be configured such that when you fire it up, two things happen: it tells the GoPro app to tell the GoPro camera (via Bluetooth) to start recording video, and; it starts a data-recording session of its own, using the phone's built-in GPS.
Back home, after having finished your particular series of recordings, you download to your PC or (in my case) a Mac the data stored on the phone by TrackAddict, and download the video taken by the GoPro.
Next, on your desktop you run RaceRender by HP Tuners. This merges the GPS and video data, and has assorted customization options for displaying various types of gauges. It can also combine multiple sets of files, and allows you to set start and stop points. When you're all done setting things up, it will generate an output video, with the gauges, path of travel, that sort of thing, as overlays.
Simple, huh?
Well, it's obviously a bit of a hassle.
But what's worse is that you had to have two devices — a phone and a camera — mounted on your bike, and running at the same time. And you had to concern yourself with providing power to both, or recharging or swapping batteries, as appropriate, when needed.
Well, it was possible, but not what you'd call a fun setup. Here's a video I made in 2016 on a Burgman 650, during a "Non-Sportbike Track Day" at Palmer Motorsports Park in Massachusetts (under the aegis of Tony's Track Days at the time, but since taken over by Riding in the Zone — that's me, on a Victory Cross Country Tour, in one of the pictures on that page). This video was created using all of the hardware and software just described, along with the PanaVise single-suction-cup mount discussed earlier:
Besides being somewhat complicated, you may also notice in this setup that a phone's GPS receiver is not all that sophisticated. That is, it updates itself at 1 Hz, i.e., once a second. Hence, there's a certain lag, for instance, in the speedometer display when accelerating briskly.
IX. THE NEXT ITERATION — LESS HARDWARE, LESS SOFTWARE:
With the purchase of a Hero7 Black (back in March 2019, as part of a trade-up program by GoPro), the next setup was much simpler:
-
The Hero7, to record the video.
-
RaceRender software, to generate an output video that overlayed the telemetry.
-
Movavi Video Editor (discussed later on).
Because the Hero7 has a built-in GPS receiver, no phone was needed; eliminating an entire device was nice, because it cut the mounting and power issues in half. Nor was the TrackAddict app necessary, as GoPro combines its GPS data within the video file that you are recording (assuming you have the GPS option turned on).
Incidentally, speaking about GPS, remember when I noted the iPhone6's sampling rate of 1 Hz? The Hero7 (and subsequent GoPro cameras) has a sampling rate of 18 Hz, eliminating the lagging speedometer display of the TrackAddict data collection days.
So, in this more modern setup, all you do is transfer the GoPro's video files to your PC or Mac. Then, you input one or more of them to RaceRender, add your gauges (and you can save configurations and collections of these, for ease of use next time), select beginning and end points, and generate an output file with those overlays.
Note that GoPro has provided, over the last few years, software to accomplish the same sort of thing that RaceRender does. At some point, I believe GoPro purchased DashWare, which is software that enables overlaying telemetry data. A version of that seems to be incorporated in GoPro's latest free desktop software, GoPro Quik (for use with GoPro-recorded files only); don't get me started on how non-intuitive Quik is.
Regardless, I preferred the flexibility and greater functionality of RaceRender, which is not that expensive ($40 – $60). Here's a video using this configuration, i.e., the PanaVise suction cup, the Hero7 (and the ride was much bumpier than it appears, as a result of its software-based stabilization), and RaceRender, and was part of a regional day trip:
So far, so good?
X. FINISHING UP WITH TELEMETRY OVERLAYING, WITH TELEMETRY OVERLAY:
I mentioned earlier that I've been using RaceRender by HP Tuners for about five years now, since my earliest setup with a Hero4. This had been my post-processing software for adding telemetry overlays.
RaceRender is a good product, but not without flaws. For one thing, when working with two, and occasionally three, 4 GB GoPro files, I had to make sure that I closed all other apps on my Mac, lest RaceRender would lock up the computer. As the old saying goes, "You can never be too rich, or have too much internal memory, or ... " — okay, that's not really how it goes, but you get the idea. Even with 16 GB of RAM, this was a problem.
Further, sometimes the telemetry data embedded in the GoPro video files was — not to put too fine a point on it — flaky. In tunnels, for instance, you may lose some or all of the satellite connections. And on rare occasions, in perfectly clear and open skies, the GoPro's GPS hardware or software just hiccups for a fraction of a second. I mention this because RaceRender does not handle this well: your actual convoluted path of travel may turn into a straight line, or the speed display may increase by several hundred miles per hour, that sort of thing.
(If you want to read a fairly technical discussion of a path-of-travel quirk, I wrote an explanation of the problem and a manual workaround in this RaceRender user-forum post back in 2019.)
Next, concerning RaceRender's shortcomings, working with gauges — altering their appearance and placement — is a bit more convoluted than it should be.
And one other aspect that annoyed me has to do with your selecting start and end points in RaceRender. When you do so, the final generated video properly uses those points, but the other data is not adjusted correspondingly (at least in any setting that I could figure out). For instance, your path of travel still consists of the entire route of the originally input GoPro videos, i.e., it is not adjusted to correlate with your designated video output chunk.
One last thing: RaceRender no longer seems to be updated very often, if at all. HP Tuners seems to be more interested in selling data acquisition hardware than in fixing bugs or adding enhancements to RaceRender.
Happily, a new product, which I learned about from a post in GoPro's user forum, was released early this (2021) year: Telemetry Overlay by App Prototyping Barcelona.
Telemetry Overlay (the software, not the concept) solves all the problems I just mentioned:
-
It works fine with the available RAM on my Mac. Sure, it's resource-intensive, but I no longer have to close down other apps, in fear of lockups.
-
By default, it takes flaky data in stride. I don't know any details of its interpolation algorithms, but they work. Additionally, you can easily set an upper limit on some data, such as speed.
-
Moving gauges around the layout is a trivial drag-and-drop process. And there are additional, easily accessible, gauge customization tools.
-
When setting start and stop points within the input video, those settings carry over, in the generated video, for displays such as path of travel. That is, the rest of the data is automatically adjusted accordingly.
-
You can easily set a video-wide adjustment, for such displays as altitude. (This is a surprisingly complicated topic. See, for instance, the article Elevation for Beginners: What to know about GPS receiver elevation.) Such fudge factors are possible in RaceRender only with a boatload of manual intervention, data manipulation, time, and arcane commands.
-
The program has a few other tricks, such as being able to display lean angles for motorcycles.
The only quirk I've discovered while using Telemetry Overlay for a few months now is that the output videos it generates are about three times the size of the input videos, e.g., a 4 GB GoPro video will become, after gauges are added, larger than 11 GB. This is not an issue for me — really — because of two factors.
First, I use external USB-connected hard drives for video storage. You can get a Western Digital Elements 5 TB USB 3.0 drive for $100 these days. That will last you awhile. (And, in any case, there's no need to save these interim files, once you've used them as input to a final video editor.)
Second, and more importantly, once I submit the video generated by Telemetry Overlay to my Movavi editor (discussed below), the file shrinks back to its c. 4 GB size. All this is when working with 1920 x 1080, 60 fps, files, with all software set to maintain the original resolution. Go figure (although Telemetry Overlay does maintain the 60 fps of a file).
Just in case you weren't paying strict attention, I've already included some videos that were processed using Telemetry Overlay. If you want to go back to take another look, you can note the overlays — speed, lean angle, distance traveled, and elevation across the bottom, and path of travel in the upper right — in
that rough dirt-road video or in my favorite scenic Alps video.
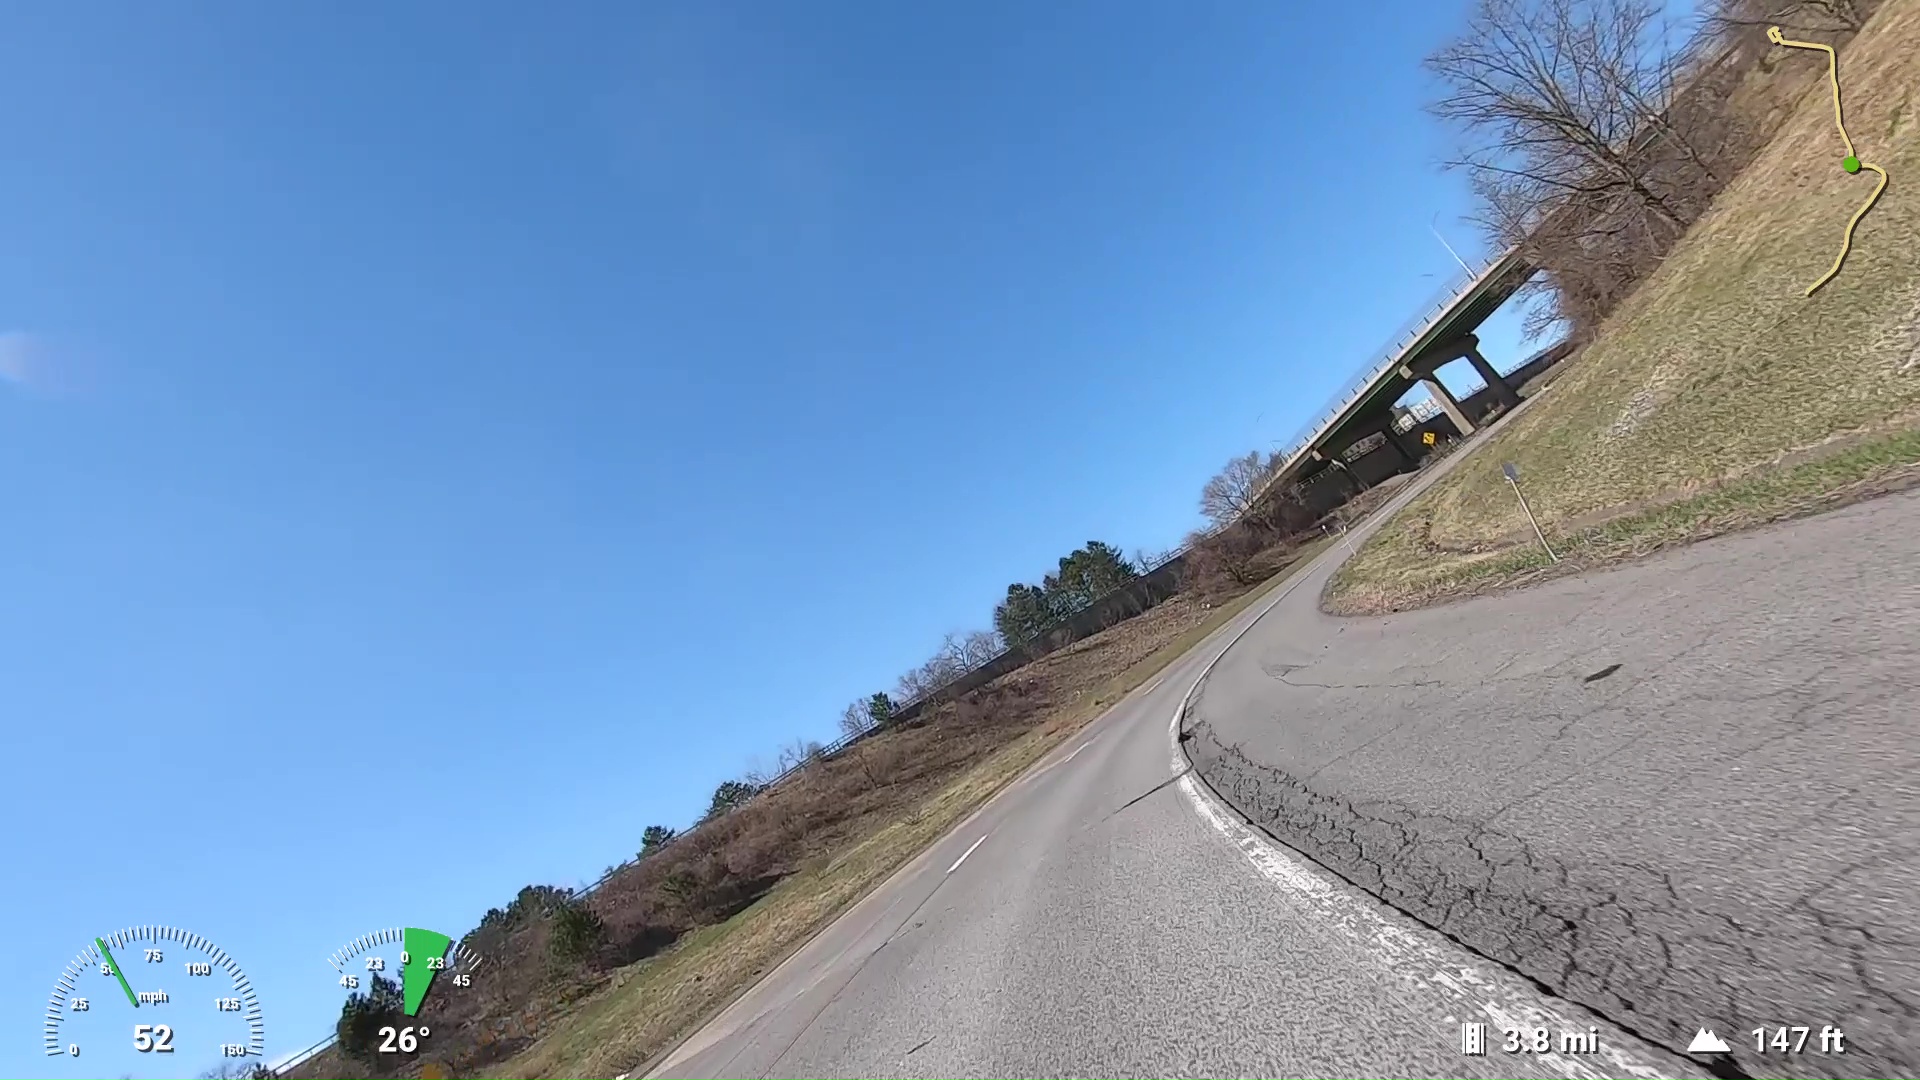
Or let me just present another video right here. This is a short one, but is a reasonable demonstration of the magic "Lean Angle (2 wheel)" gauge in Telemetry Overlay:
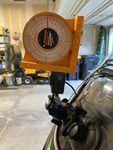
At about the 4:05 mark (in case you blinked), we have the following frame:
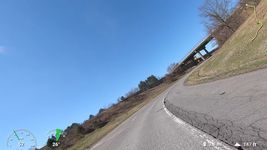
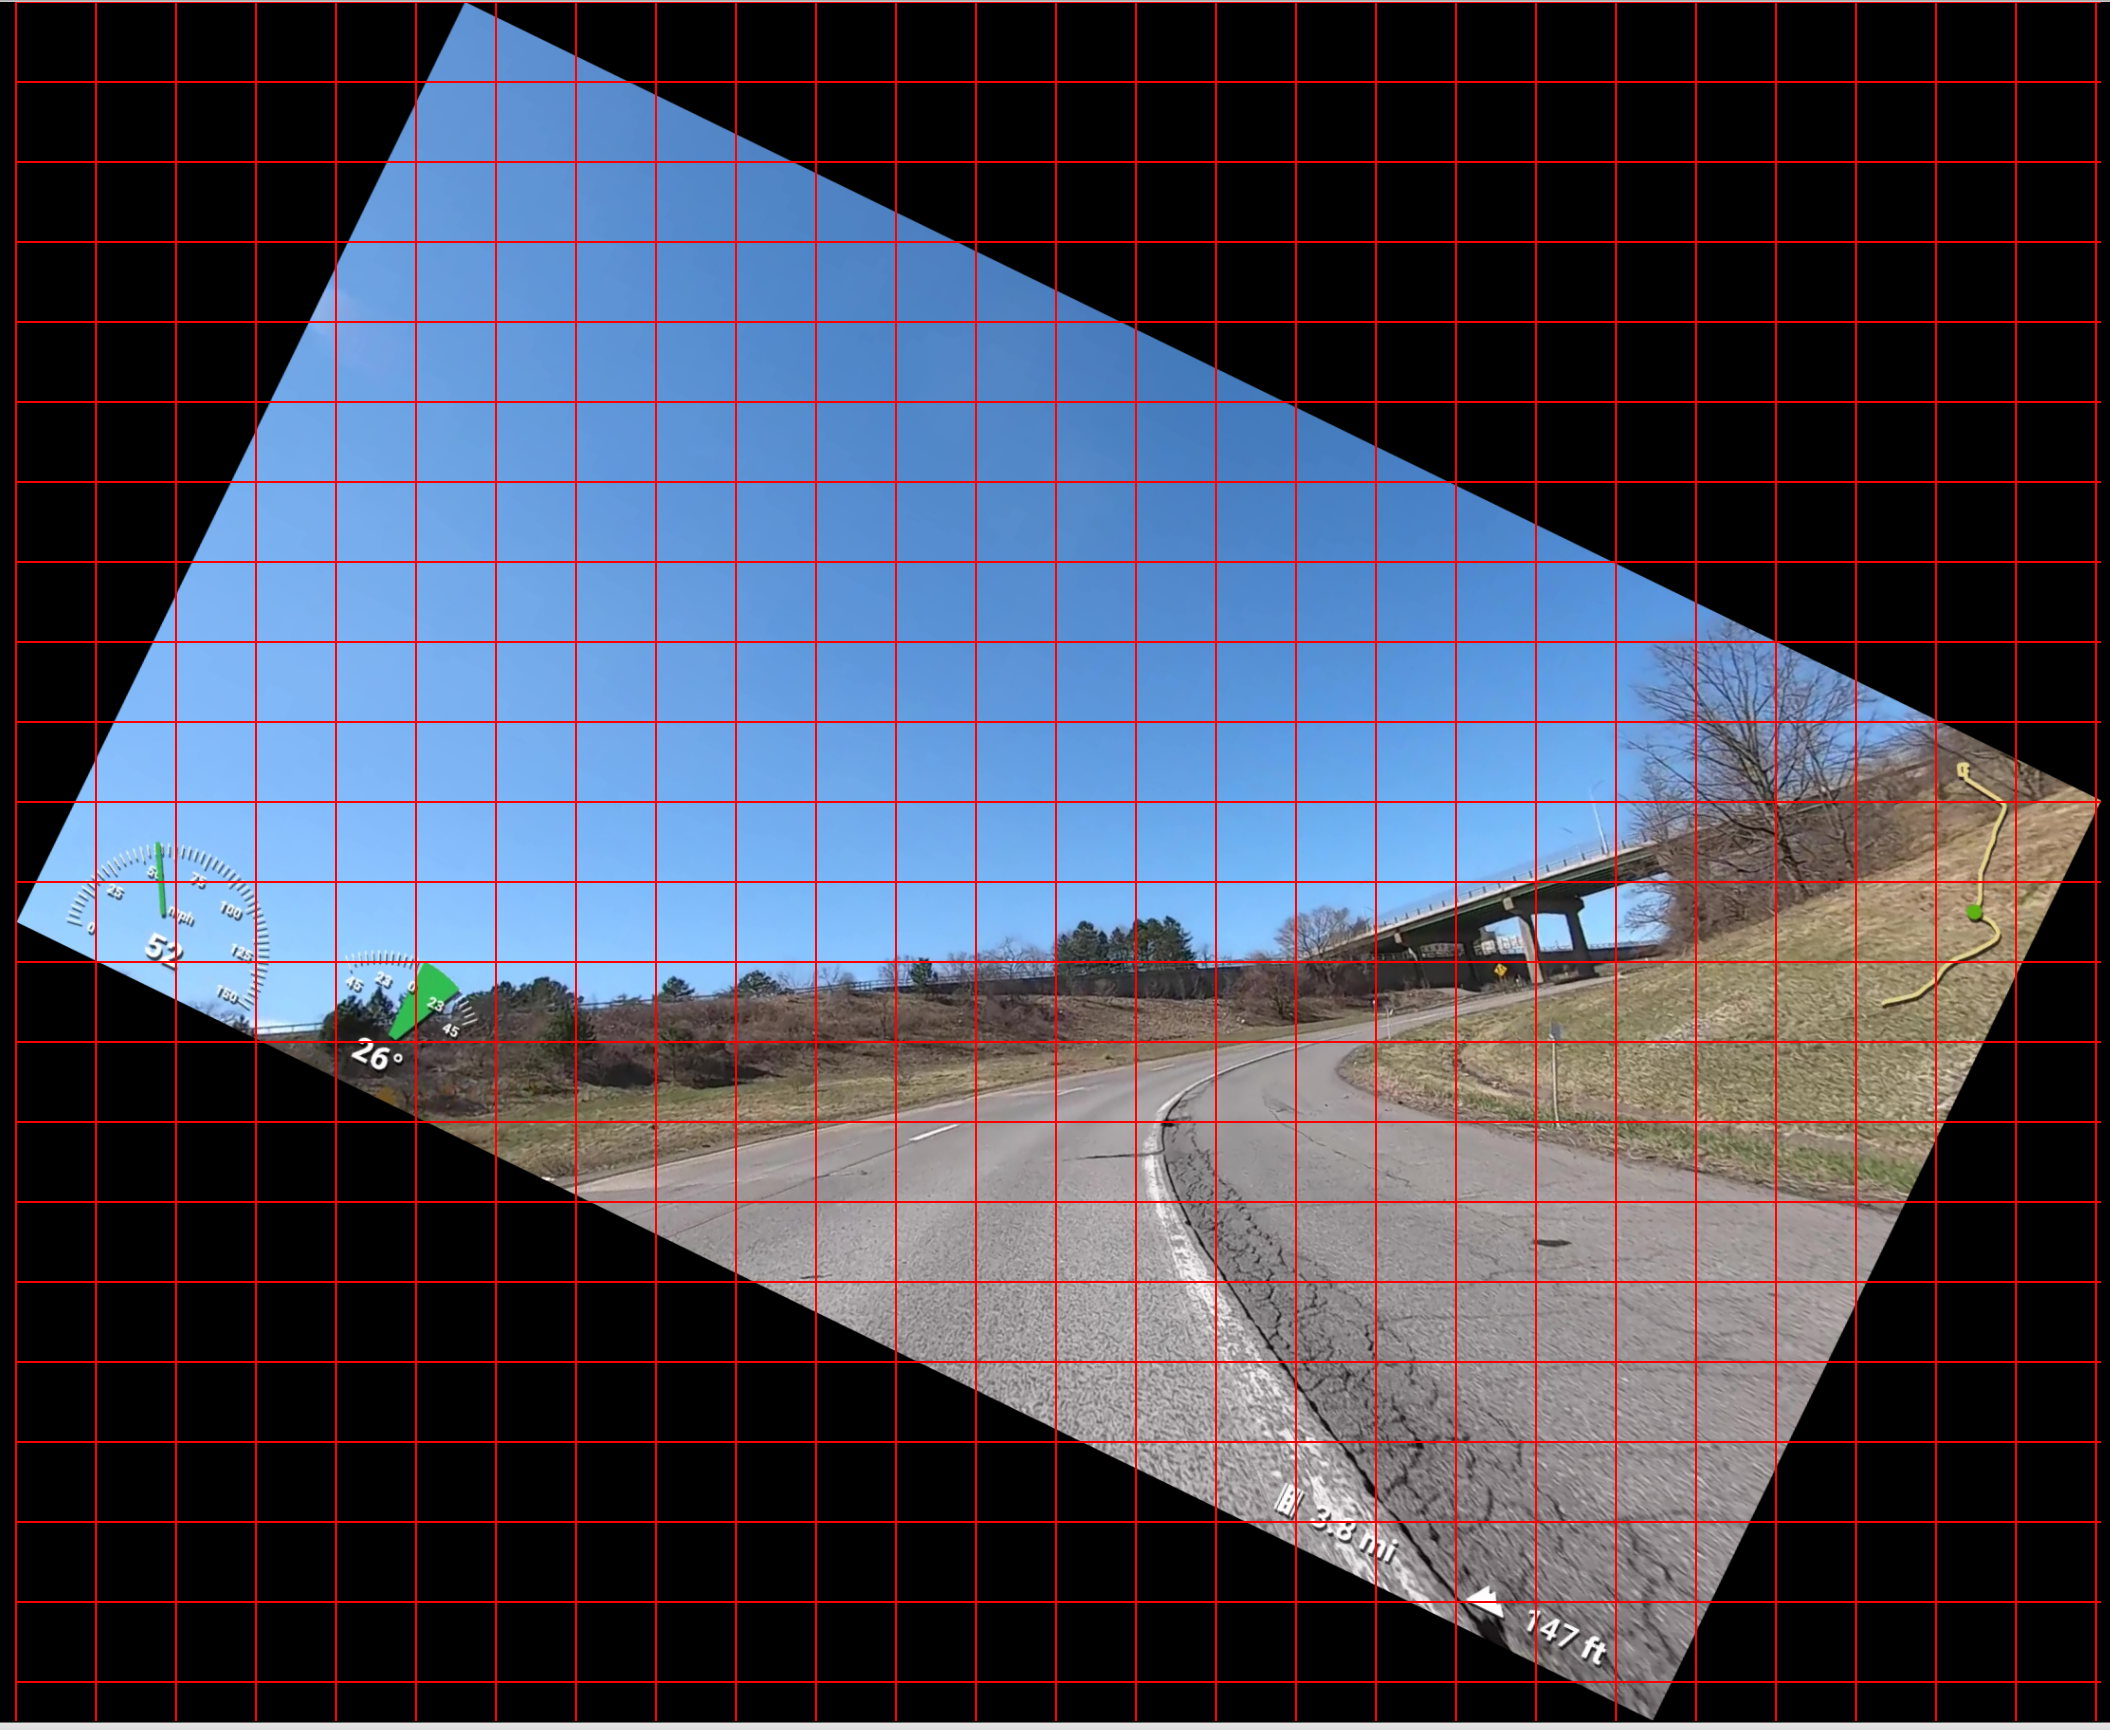
The Telemetry Overlay gauge shows an angle of 26°. If I tilt that photograph (using a basic photo editor I have) by that same amount, and leave its grid lines showing, this is what it looks like:
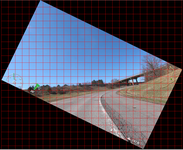
If you look at the road right in front of the Burgman, you can see that the software appears to be pretty accurate in its assessment of the lean angle.
I say "assessment" because the GoPro does not actually have a sensor for directly reading lean angle (the way my iPhone does, or the way MotoGP bikes do). I asked Juan Irache, who is the contact person for Telemetry Overlay, and appears to be its developer, how that works. Here's part of an email response from Juan:
In a nutshell, the gauge looks at the turn angle and speed and deduces the lean angle it must have in order to stay on the track. When the bike is not moving or tips over all those assumptions are wrong, so the value will be completely wrong.
As you pointed out, GoPros don't have a specific Lean Angle gauge, but new models do record relative orientation data. This is what the other Lean Angle gauge shows, but unfortunately the GoPro is not able to record reliable data for this stream when under a constant acceleration, so this would only be recommended when recording with more dedicated devices.
In any case, as you can see, it works well. I'm sorry that I didn't have a newer GoPro (as I believe an accurate speed is necessary) when I was doing a couple of track days on the Burgman, because there were a few instances of significant side-stand-grinding at a bit steeper lean angles.
Juan also noted this in an email:
So, to answer your last question. For the Lean Angle (2 wheel) gauge, the mounting position does not matter, as long as it is good for the GPS signal.
Update, April 2022:
In a recent email exchange with Juan, I learned that the latest version of Telemetry Overlay now supports the "Gravity Vector" telemetry stream, via its regular "Lean Angle" gauge (as opposed to its "Lean Angle (2 Wheel)" gauge, which used the calculations described above). This "Gravity Vector" telemetry is found in GoPro's Hero9 and newer models, and is a much more accurate, direct-reading, indication of lean angle — I've tested this out, using both gauges with footage from my Hero9 Black, and, as I discussed above, measuring the tilt on screen grabs with photo-editing software, by noting the degrees of rotation necessary to level the horizon.
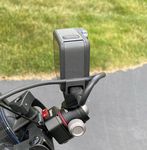
Note that using the "Lean Angle" gauge assumes that you have the camera mounted level horizontally when stationary (see the next picture, below), unlike "Lean Angle (2 Wheel)"; also unlike the calculated 2-Wheel gauge, it does not rely on GPS functionality.
As you saw earlier (with regard to aiming the camera upward), I use an inclinometer before tightening the ballhead mount. Reasonably enough, I also check the side-to-side level (and to ensure that the GoPro is parallel to the windshield surface, I use only a calibrated eyeball):
It makes sense to have a level horizon in a video, when the bike's level. It turns out that that's not critical in terms of getting the most out of Telemetry Overlay's "Lean Angle (2 Wheel)" gauge with older GoPro cameras, but it is critical when using the "Lean Angle" gauge with the latest GoPro cameras (if you happen to like seeing that information).
That's about it for Telemetry Overlay. I am really pleased with that software. And you can thank me, and others, with whining for the release of a trial version of Telemetry Overlay (as is also the case with RaceRender); it's now available, so you can check it out, along with watching much more complex videos others have made, before spending your $99 on it.
Oh, one last thing on these overlay programs. Both RaceRender and Telemetry Overlay allow you to save a given collection of gauges and their layout, for use with another video. If you happen to like the way I've laid out the overlays, drop me a line, and I'll be glad to share these saved patterns with you.
Speaking of which, you've probably noticed by now that I prefer an uncluttered collection of gauges and trip information, for a less obstructed view of the actual video of a trip. I've seen a lot of videos in which overlays take over most of the screen, especially featuring cars that have multiple cameras and OBD readers. That may be appropriate if you're practicing for your shift at the 24 Hours of Le Mans; for documenting a motorcycle day trip, not so much.
A piece of software that I haven't discussed yet is Telemetry Extractor Premium for GoPro. This is another product from Juan of Telemetry Extractor fame.
Okay, this isn't cheap, but it's a delightful piece of software (and you only go 'round once, etc.). What it enables you to do is generate a map of your day's travel.
Oh, I know you can do this with satellite tracking (and SOS) devices such as some offered by Spot and Garmin, or using phone apps such as Rever and others, or even just using Google location services. But Telemetry Extractor Premium for GoPro allows you to do this using only the files generated by your GoPro, i.e., without using any other devices, and I find that remarkably convenient.
What you do, once you've downloaded all of the day's GoPro files, is:
-
Drag and drop all of those files, en masse, onto the program.
-
Give the program a few minutes to read through the telemetry data in those files.
-
Tell the program that you'd like it to generate a GPX file. (There are mapping capabilities within the program itself, but I prefer this portable output method.)
-
Submit that GPX file to Google Maps running in a browser window.
-
And, finally, tell Google Maps to draw you a map.
To make this process easier to follow, I created a screen video of my performing these steps. This example uses the GoPro videos taken during a day's motorcycle ride in Tuscany, in May 2022 (two-up, on a rented BMW C 400 X):
Keep in mind that the GoPro:
-
Should be started a couple of minutes before setting off (or setting off again, after lunch, for instance), in order for the camera's GPS chip to lock onto satellites before recording starts.
-
Should be recording the entire trip (i.e., not just a portion of the day).
-
Must support telemetry, i.e., be a Hero5 or newer. (In this case, a Hero9 Black was used).
I don't know what the upper limits of Telemetry Extractor Premium for GoPro are, but I've successfully used this method to generate GPX files of rides taken for which I've submitted 35 MP4 GoPro files with an aggregate size of c. 134 GB. Those totals represent my maximum day-trip file numbers and sizes on several long days (using a 256 GB memory card, and recording set to 1920 x 1080 @ 60 FPS).
And speaking of limits, as I note in the screen video (in case you missed this), Google Maps has a GPX file-size import limit of 5 MB. This is why I specified a data-extraction frequency of 1/10 Hz in Telemetry Extractor Premium for GoPro, rather than, say, 1 Hz or greater; those more granular intervals would generate a GPX file larger than 5 MB (I have found from experimentation).
XII. VIDEO EDITING, IN THIS CASE USING MOVAVI VIDEO EDITOR:
I've been mostly discussing telemetry overlays, but let's not forget our other software goals. To refresh your memory, they included removal of boring bits, transition effects, and perhaps some text additions. Let's move on to those aspects.
Neither DashWare nor RaceRender nor Telemetry Overlay is well suited for these tasks, if they can perform them at all. Mostly, software that overlays telemetry data is set up to chop off the start or ends of videos (typically, after you merge multiple camera output videos into a single, larger, one).
After trying out a few video editors, I gave most of them very short shrift. What I was looking for was an editor that:
-
Was fairly easy to use.
-
Could perform minimal to medium, in terms of complication and sophistication, editing tasks.
-
Was reasonably priced.
An immediate problem with many video editors is that they have a steep learning curve. On top of that, once you do figure out how to perform a given function, if you don't do this sort of thing for a living then you'll promptly forget how to perform that task, the next time you use them.
A lot of editors are also very expensive. Final Cut Pro, for instance, a popular editor for Macs, starts at $299. And Photoshop, perhaps the biggest player in high-end photography and video editing, requires a monthly subscription, which goes from $10 to more than $50. No thanks.
Fortunately, my search turned up Movavi Video Editor. I've been using this Movavi product (and some of the company's one-trick-pony utility apps) for three years now, and I'm very satisfied with it.
Currently designated as Movavi Video Editor Plus 2021, this program has all the capabilities I need, and then some. Well, you can read about it on their web site. Further, the learning curve is minimal (granted, probably because professional film-editing software has even more functionality). Last, it costs $65 (for Windows or Mac)!
As I mentioned at the start of this OK, LET'S TALK ABOUT SOFTWARE section, now that we have the telemetry data added, what's left is fairly simple: a little text, a little cutting-room-floor action, and some transitions.
Here's a video with that full gamut of work, all accomplished very easily with Movavi Video Editor Plus 2021:
-
At the beginning, I chose one of the many title options, and entered some text.
-
That's followed by a transition effect it calls "blur-in"; you want to ease the viewer into the video.
-
At the 5:00 and 6:54 marks, I use a transition called "Page turn (left)," to indicate that I've eliminated chunks of the original video (respectively, an uninteresting road followed by a stop light, and then some parking lot travel followed by another stop light).
-
And at the end, there's a "Fade to black" transition, to ease the viewer out of the video.
By the way, all of these effects are easily customized. For example, you can set the duration of the title display, each transition, and so forth. In any event, here's that video:
That's it, nothing very fancy, but I think they're all nice effects. None presented any difficulty when using the software, and they're all simple enough that I don't forget how I did them in between editing sessions.
Do you recall earlier that I mentioned that Telemetry Overlay has this odd quirk of markedly increasing file size? Well, bringing Telemetry Overlay's output as input into Movavi, adding some effects, and then generating yet another output file, results in that final file's being about the same size as the original GoPro file (although, as I mentioned, it drops the frame rate down to 30 fps, if that matters to you). So that issue is taken care of.
The Movavi editor is, as one might expect, resource intensive. Fortunately, and like Telemetry Overlay, it plays nicely with other software running on my Mac: no need to close other programs, nary a lockup.
So that takes care of a final editor, as far as I'm concerned. Most importantly to me, Movavi is easy to learn and use — there is no requirement to study for hours or days — and it's reasonably priced for either a Windows or Mac computer.
XIII. GOPRO SETTINGS AND MEMORY CARDS:
There's one last area I want to cover: the configuration of the GoPro videos I've been using as examples, along with the physical memory cards used to store them.
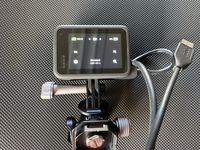
In a nutshell, my default settings for both my Hero7 and Hero9 have been Video mode, 1920 x 1080 pixels, in Linear mode, at 60 fps, with HyperSmooth and the GPS set to "On." Those are the settings for all the GoPro videos in this document (that is, all but the very first video, which was made with the Ego 727 camera):
Some notes on those settings:
-
The 60 fps has been dropped down to 30 fps, as a result of the various conversions from the raw GoPro output, to Telemetry Overlay, to Movavi Video Editor (which is responsible for this decrease), to uploading to a hosting service (which I think would normally also drop a 60 fps file down to 30 fps).
-
In the Hero9, there are additional settings for HyperSmooth (in addition to "Off" and "On"): "High" and "Boost." The regular "On" works just fine, I think; beyond that, you may eliminate even wanted displays of movement. (The Hero9 even has a "Horizon Leveling" setting; I've never tried this, but it might eliminate all of your leaning displays.)
-
There are all sorts of higher resolutions available these days, such as "4K" (and beyond). I feel that some of these are for corporate bragging rights, as you generally don't have devices capable of showing such resolutions, and if you do, you'll have to be within a few inches of them to notice any difference. At some point, your eyes cannot discern the difference, so all you do with such resolutions is more rapidly consume memory-card space.
-
There are settings with wider fields of view. For my basic trip-documentation purposes, I think the "Linear" mode is best, as it's a reasonably wide view (as I hope you've noticed), with no fisheye effect.
-
And here's something you may not have thought about: power up the GoPro, out in the open, for a couple of minutes, before you start recording. While you can set up a GoPro to turn itself on and start recording when you press the record button, doing so will mess up the collection of telemetry data. What you want to do is give the GoPro time to acquire satellites before you start recording video.
Recall that one of my goals — this was way back at the beginning of this page — was to "Be able to record a full day's ride, with minimal fuss." So not only do I not want to be swapping batteries during a day's ride, I don't want to have to swap memory cards, either.
Update, April 2023:
With the Hero11, the GoPro firmware went from c. 4GB to c. 12GB chapter files. A "chapter" is the file that GoPro will automatically close, and then automatically start the next file, when that size is reached (assuming you are recording for more than a few minutes). Some current operating systems and apps — especially on a Mac — have trouble dealing with files larger than 4GB, and may even truncate files being transferred without the direct use of a card-reader.
To circumvent this, I now use the app Camera Tools for GoPro Heros. To my knowledge, this is the only app that will let you transfer 12GB files from a Hero to a Mac, without truncating the files and without removing the memory card from the camera.
The only minor downside of Tools for GoPro Heros that I've discovered is that the creation date is not brought along in EXIF data on the Mac during this transfer. However, one of the options of the app is to rename the files as part of the transfer process, and this includes prepending the original creation date to the file name (which is what I do). Strongly recommended!
Update and Warning, November 2023:
With the Hero5, GoPro added a GPS chip, and its associated telemetry became available, with improvements along the way. A couple of months ago, GoPro released the Hero12, and decided to eliminate the GPS chip. I gather that this was done with improved battery life and less internal heat in mind.
You can read about this change, and potential work-arounds, in this blog post from the developer of Telemetry Overlay.
For those of us who use the telemetry output, and who power the cameras via an external power source, anyway, and who prefer a simple one-device setup for generating such annotated video, this is a show-stopper. So my advice to anyone who wants to generate output the way I've been doing it, the way this entire page is describing, is to buy a Hero11 Black now, while you still can. Remarking on GoPro's removal of the GPS chip, the Telemetry Overlay developer has this conclusion: "GoPro HERO11 Black: Given all of the above, the best GoPro ever made."
(Permit me an aside here, just for completeness. Note that GoPro's firmware precludes charging the battery while the camera is recording using external power. So at the end of documenting a day trip, using a USB cable, the internal battery will not also have been fully charged, in case you were wondering.)
Back to a discussion of memory. On the Hero7, a 128 GB card will hold — at my default settings — about 8½ hours of video.
For my week in the Alps, I took along seven of those cards; I didn't want to be bothered with transferring files to the cloud (which would be agonizingly slow) or to a laptop (which I don't own) each night. I simply popped in a new card for each day's riding. These were about $21 each, two years ago.
On the Hero9, you need a bigger card for the same or greater recording time. A 256 GB card will hold — at my default settings — about 10 hours of video.
Not having spent a week away from home on the bike lately, I've only purchased a couple of these cards for the Hero9. The ones I bought are about $44 now.
Update, October 2022:
I decided that a resolution of 1920 x 1080 was getting a little lame in these days of high-resolution devices, so I increased my default resolution to 2704 x 1520 (AKA "2.7K") pixels. To facilitate that change, I also ordered some SanDisk 512 GB SanDisk Extreme microSDXC™ UHS-I CARD (Up to 160 MBPs) memory cards. (I have another trip coming up. Hence, I first ordered one card, tested it out, and ordered a few more with a discount code from the first order).
A few things of note here:
-
512 GB happens to be the largest size that is compatible with the Hero9 (and the Hero10 and Hero11 models, too).
-
I ordered these cards, via the link above, directly from Western Digital, which is the USA distributor of SanDisk. I've now read one too many reviews (often with pictures) on Amazon that refer to counterfeit cards being sent to buyers from whatever third-party outfits Amazon builds its stock from. To my mind, dealing directly with the distributor obviates this problem. And in the case of this particular high-speed card, it is actually cheaper to buy it from WD than from Amazon (about $73 vs. $75, as I write this).
-
With the 512 GB card and that 2.7K resolution, you get about 16 hours of recording time, i.e., more than enough for a day's travels.
-
And while you can fit even higher resolutions on those high-capacity cards, for those of us who record an entire day, at some point you would wind up with just too many 4 GB GoPro files to conveniently deal with, in terms of computer memory for post-processing and in terms of permanent storage.
This is GoPro's official list of compatible micro SD memory cards. I suggest that you adhere to that list when buying cards, because I've read a lot of forum posts and reviews regarding GoPro owners' having problems with cards that were not as fast internally or otherwise not completely compatible.
One last note. I just mentioned permanent storage, above, and if anyone's interested (and still reading this tutorial!), I now have three 5 TB WD Elements Portable USB-connected external hard drives. I acquired these one at a time over the last couple of years, as I needed space, and have no complaints, would — and have — done it again, etc. While they're certainly not as speedy as, say, a solid-state drive, for what is essentially archival storage they're fast enough. And it's hard to beat getting 5 TB of storage for a little more than $100.
And that's it. Thanks for reading this, and I welcome your comments.
Bill Pollack
July 2021
Niskayuna, NY

’s Web Site")